Website Launch Checklist 2024: 20+ Essential Pre- and Post-Launch Tasks

Websites have become a necessary investment for individuals and businesses to help build authority and boost brand awareness. With so many website builders and content management systems (CMS) available, you can easily make a website on your own and without hiring a professional web developer.
Once you have a functional website, the final step is to launch it and let your potential visitors know about it. However, launching a website can be challenging. Everything needs to be considered – from ensuring a proper user experience to testing usability.
For that reason, we’ve curated a comprehensive website launch checklist for pre- and post-launch. For each item, we’ve included tips and tools to help you stay on track and avoid missing any steps in the process.
Download website launch checklist
Website Pre-Launch Checklist
Once you’re finished setting up a website, site owners must ensure that every element is well-executed. Below you’ll find our pre-launch website checklist covering 22 tasks to do before launching the final version of your website.
1. Activate an SSL Certificate
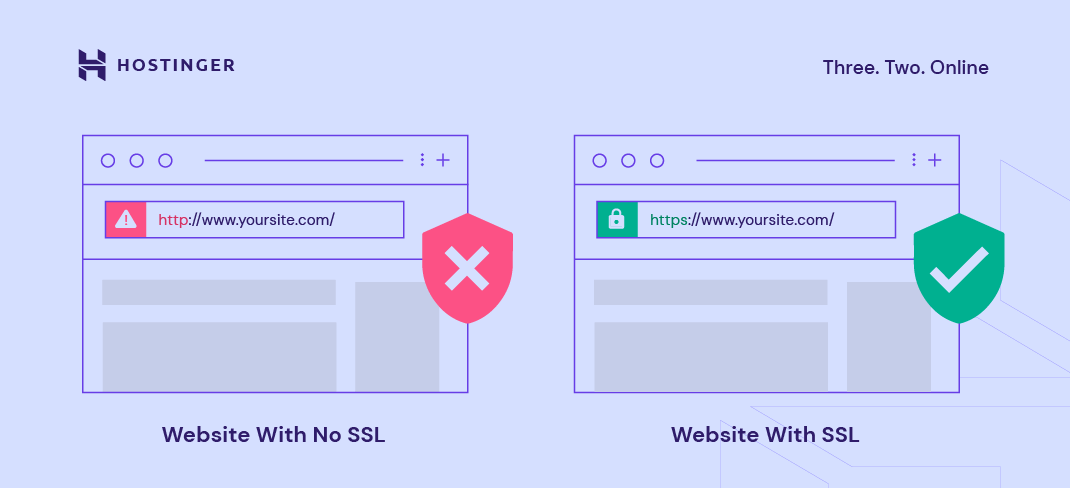
A secure sockets layer (SSL) is a security protocol that encrypts all data transmitted between a web server and a web browser. Every website needs to activate an SSL certificate for privacy protection, especially those that process sensitive data like usernames, credit card information, and private addresses.
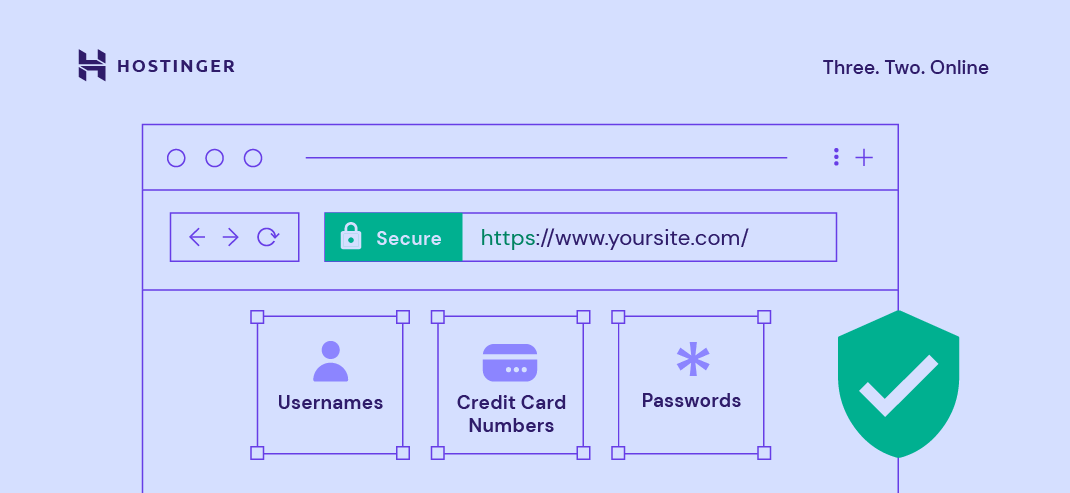
When a website has an active SSL certificate, the URL will begin with HTTPS instead of HTTP, indicating a secure connection. It will also boost a website’s search engine ranking and establish trust among visitors.
At Hostinger, we provide a free SSL on all of our hosting plans. That said, we recommend using an Extended Validation (EV) SSL certificate if you run a high-risk website that handles a lot of traffic, such as an eCommerce business.
2. Update Your CMS to the Latest Version
A content management system (CMS) enables non-developer users to easily set up and modify site pages. Some of its features include content creation and distribution, team collaboration, and image storage.
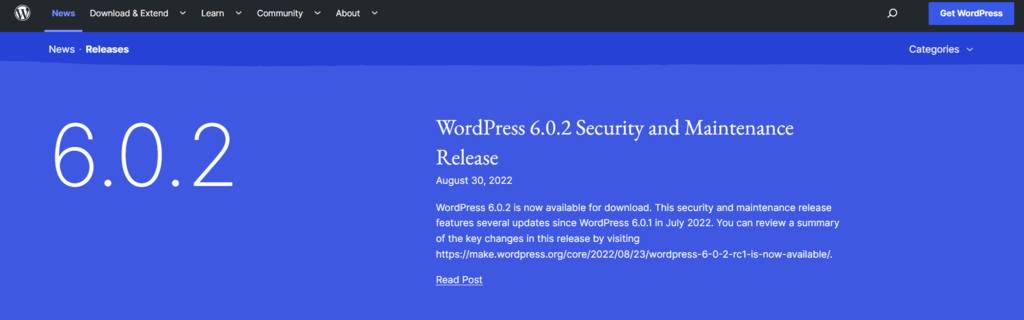
One of the most significant advantages of using a content management system is simplified installation and updates. For example, WordPress CMS constantly releases new updates that contain substantial updates to its security and site editing features.
Before the website goes live, ensure your CMS is up to date to avoid compatibility and security issues. Additionally, an updated CMS version provides speedier browsing and better functionality, resulting in a more responsive website.

3. Prepare a Backup Solution
Perform regular website backups to prevent losing site data in case of unexpected errors or security breaches. For eCommerce businesses, data loss can negatively affect customer relations and interrupt revenue streams.
For efficiency, we recommend choosing a hosting plan with automatic website backups. For example, Hostinger offers automatic weekly backups on all of its plans and daily backups on its business-oriented hosting plans. Users can choose to download a complete website backup or a one-click backup via hPanel, Hostinger’s custom control panel.
However, it is also possible to generate a backup manually by using a third-party service to download your web files.
4. Set Up All Essential Website Pages
Sites with incomplete pages typically have higher bounce rates since they usually lack the information customers need. These sites might appear unprofessional to visitors and perform poorly on search results.
That’s why ensuring all the pages are adequately placed is an essential step on the website launch checklist. Here are the four essential pages to include on your website:
- Homepage. It’s the page your customers first land on when visiting your site. Setting up an effective homepage provides a positive first impression, encouraging visitors to explore the site further. Ensure your homepage displays an eye-catching hero header to clearly indicate what you offer.
- About Us page. This page provides more detailed information about the business behind the site. It’s a great place to elaborate on your brand’s vision and achievements. Share captivating personal stories to make customers resonate with your brand’s value.
- Product or service page. This is an essential page for eCommerce and business sites. Ideally, site owners should constantly improve this page to provide a great customer experience. Try to optimize it by writing compelling product descriptions and taking well-shot pictures of your products to evoke the desired emotion.
- Contact page. The purpose of this page is to allow visitors to reach out to you quickly. It usually includes your business’ email address, phone number, and physical location. Consider adding a contact form to let visitors submit inquiries without leaving the site. This can be done by installing a WordPress contact form plugin.
In case you’re still unsure about the site’s final appearance and functionality, using a staging website can be a great option. Professional web developers often use it to ensure all the content and code changes work correctly before a site goes live.
WordPress offers a staging environment that allows users to securely develop and modify a site without affecting its original state. The most convenient way to make a staging site for newcomers is to use a custom-built toolset that can help set it up with just a few clicks.
Hostinger offers a built-in staging tool included with our higher-tier WordPress hosting plans, Business and Cloud Startup. Sites that run on the Premium plan can create staging sites manually or by using a plugin like WP Staging.
5. Delete Templates’ Temporary Content
When building a website using an easy website builder or a CMS, custom-made website templates usually contain temporary content like dummy text or images.
Most people easily skip this step, which can make a site look messy. Hence, you should always delete any element you’re not planning on using on the live site.

6. Setup Analytics Integration
A good analytics platform allows site owners to collect data on their site’s performance by measuring various metrics like traffic source and total conversions. Additionally, it also provides information about the audience’s behavior. With this data, you can create a better strategy to optimize your site.
While numerous website analytics platforms are available, Google Analytics offers multiple features, such as data visualization, reporting tools, and various third-party integrations.

WordPress site owners can easily integrate Google Analytics into the WordPress dashboard. This can be done manually by inserting a code snippet and the tracking code into the functions.php or header.php file.
Or you could install a WordPress analytics plugin like MonsterInsights.
7. Set Up Custom Error Pages
Error pages are part of the HTTP status code that signifies technical errors on the server or client-side. If the requested page does not exist, your domain will redirect them to a 404 error page. This may happen for several reasons, such as mistyped URLs, caching problems, or issues with domain name system (DNS) preferences.
A web browser will automatically present users with the default HTML error page, which tends to be visually uninteresting and not very user-friendly. Such error pages cause users to lose interest, making them unlikely to return to the website again.
Hence, it’s best to set up custom error pages. That way, you can design your 404 page and create a clear message to explain why the requested page can’t be found.
Take Hostinger Tutorial’s 404 error not found page as an example. It includes a simple error message and a call-to-action (CTA) button that directs users back to the homepage.

8. Test the Website’s User Experience (UX)
Aside from an attractive website design, a website should offer a seamless user experience (UX), which is the measure of whether a site’s interface is user-friendly and how quickly visitors can complete specific tasks.
Conduct usability testing to evaluate how easily end-users navigate and interact with your site. By doing so, you can identify aspects of your website that may mislead visitors and how to improve them.
Here are some of the most popular tools to test website usability:
- Crazy Egg. Provides a site heat map to identify users’ behavior on specific pages.
- Lookback. Enables usability tests with users via live interviews and screen sharing across multiple devices.
- Optimizely. An A/B testing platform with analytics features allows users to determine if their current strategy is working.
Besides providing a great user experience, making your site accessible to everyone, including people with disabilities, is essential. Implementing website accessibility can create a positive user interaction that leads to more traffic.
Ensure that your site follows the legal standard, such as Web Content Accessibility Guidelines (WCAG) and Accessible Rich Internet Applications (WAI-ARIA). Use tools like WebAim and WAVE to verify that your website complies with the applicable standards.
9. Check for Mobile Compatibility
Over 59% of global website traffic comes from mobile usage, indicating that most people prefer to access web content using their mobile devices. Making a mobile-friendly site can help you reach more potential customers and create a competitive edge.
Here are some best practices to ensure a site’s mobile friendliness:
- Use responsive site design. The web design practice automatically adjusts content to fit different screen sizes and orientations. One of the easiest methods is to use a responsive theme from website builders or CMS.
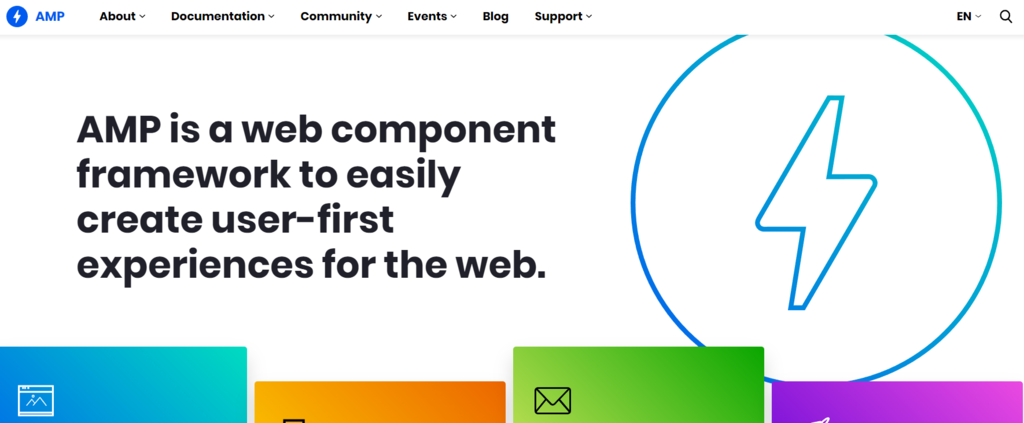
- Enable Accelerated Mobile Pages (AMP). An open-source web framework designed by Google to help speed up content delivery and improve the site’s readability on mobile devices.
- Eliminate pop-ups. Since mobile devices have a smaller screen size, a large number of pop-ups may interrupt the user experience. Use less-intrusive web elements to display promotional content.
- Dynamic serving. Depending on the user’s device, the server uses this setup to respond with different codes for the same URL.
- Make a separate URL. Creates a domain dedicated to mobile users, such as m.websitename.com.
- Use mobile testing tools. Test your site’s mobile readiness using a combination of tools and services. For example, Google provides a free mobile-friendly checker that can automatically analyze a site’s appearance on mobile devices.
Besides mobile responsiveness, browser compatibility is another aspect to consider. Since each web browser works differently, it is vital to maintain your web design consistency across all major applications, including Chrome, Safari, and Edge.
Conduct browser tests by getting the latest version of each browser and accessing your website to see how it works.
Alternatively, use online platforms such as BrowserStack or LambdaTest to ensure your website offers a smooth user experience for desktop and mobile users.
10. Set Up a Permalink Structure for Your Website
A permalink is a fixed URL pointing to a web page or blog post. It typically consists of two main components – a website domain name and a page slug.

Constructing a good permalink structure should be included in every website checklist since it can benefit both the site’s UX and SEO.
For SEO, structuring your permalinks correctly may increase their visibility on search engines. Regarding UX, permalinks provide a solid website structure that significantly improves user navigation.
11. Ensure All of Your Links Are Working
After putting in a lot of work to build the website, it can be somewhat disheartening to find that the links aren’t working correctly. A broken link can happen for multiple reasons, such as server issues, resource shortages, or back-end configuration errors.
Regardless of the reasons, fixing broken links can help reduce your website’s bounce rate and prove its credibility. On the contrary, a site with a lot of backlinks will be marked as outdated by search engines, preventing it from ranking well.
Generally, there are three types of links to check for:
- Internal links. Links that connect one web page to another within your site.
- External links. Links from your website that lead to another resource.
- Backlinks. Links from other websites that point to your site.
Use tools like W3C Link Checker and Ahrefs’ Broken Links Checker to monitor and identify broken links on your website.
12. Check for Small Errors
Aside from broken links, check for writing mistakes and other errors that might have been easily overlooked.
To avoid such issues, use an online grammar checker tool like Grammarly to spot incorrect sentence structure, typos, and overused words.
13. Create a robots.txt File
A robots.txt file helps dictate search engine crawlers to index a particular site’s pages and keep them from being overloaded by requests. This file prevents unnecessary indexing of pages, such as duplicate pages, resource files, or plugin directories.
Note that the robots.txt file must apply to the website’s root directory. For example, to control crawling for a web address like examplesite.com, the robots.txt file will be accessible via examplesite.com/robots.txt. Information will look like this:
User-agent: [specific bot name]
Disallow: [pages or sections you wish to block]
User-agent identifies which bots are subject to the rules, and everything after Disallow should include pages and sections to block.
Generating such a file can be done manually with any text editor. Write the directives and save the file as robots.txt. Once you’re done, test it.
Next, upload your TXT file to your server via a File Transfer Protocol (FTP) application or your web host’s data management tool, such as Hostinger’s File Manager.
However, to create a WordPress robots.txt file, plugins like All in One SEO (AIOSEO) and Yoast SEO can help ease the process. Once your robots.txt file is ready, submit it to Google Search Console to test it.
14. Implement SEO Practices
Search engine optimization (SEO) refers to an online marketing practice for optimizing websites to rank higher on search engine results pages (SERPs). Once you achieve a higher ranking, it’ll be easier to drive organic traffic to your site.
The following are some of the most popular SEO strategies you can implement:
- On-page SEO. This category focuses on the web page’s content, including title tags, header tags, and meta descriptions, potentially making it more engaging for web users and search engine crawlers. The most popular practice is performing keyword research and effectively including those keywords throughout the site’s content.
- Off-page SEO. Any activities performed outside your website that help to increase its ranking. One of the best practices regarding this is link building, which involves acquiring links from high-quality sites to improve your domain authority.
- Technical SEO. Technical SEO implementation involves improving the website’s back-end to better suit search engines’ algorithms. Some aspects include optimizing site speed, architecture, and mobile friendliness.
- Local SEO. This SEO practice enables small businesses to get more exposure to local search results. The best ways to boost local SEO include producing localized content and optimizing your Google My Business (GMB) account.
Keep in mind that every business has different needs and goals, so research your target audience properly before developing an SEO strategy. We recommend performing competitor analysis to discover potential opportunities for your SEO strategy and weaknesses regarding the competitors’ approach.
Those looking to implement SEO strategies on a WordPress site can take advantage of some of the best free and premium SEO plugins like All in One SEO (AIOSEO), Yoast SEO, and Semrush. Most SEO plugins feature a comprehensive SEO toolkit to help you improve your site search rankings.
15. Configure Your Site’s Favicon
A favicon is a small icon representing a site in a web browser, and it usually appears next to the meta title on the browser tab.
Adding a favicon can help enhance your brand identity, making it easier for visitors to recognize your site when they have several tabs opened within a single browser window. Plus, a favicon gives your website a more professional look.
To add a favicon to your website, either upload a PNG or ICO image with the name “favicon” to your public_html folder or upload a regular image and modify the theme’s header.php file.
16. Set Up a Business Email
Every business needs to create a professional business email address to establish legitimacy and gain customer trust. Additionally, a business email account offers more control over data security and protection from malicious threats.
A professional business email address usually requires a domain name and web hosting account. Fortunately, if you buy a hosting plan for a year at Hostinger, you can get a free web domain for the first year.
After acquiring hosting and a domain, all that’s left to do is set up the free business email address that comes alongside your hosting plan.
Premium, Business, and Cloud Startup hosting users can set up to 100 free business email addresses. Read our detailed tutorial to help you select the hosting plan that best fits your needs.
Alternatively, mail hosting can be an excellent choice for businesses that require a dedicated premium email service. Hostinger offers two email hosting services – Google Workspace and Hostinger Email.
Google Workspace allows users to get a custom address, 30 GB of cloud storage, and advanced security features for $6.00/month per user.
As for Hostinger Email hosting, pick between Business Starter for $1.59/month per mailbox and Business Premium for $3.99/month per mailbox, which come with 10 GB and 50 GB storage, respectively.

17. Make Sure You Have Clear CTAs
A call-to-action (CTA) is a text, image, or button that encourages visitors to take a specific action, such as purchasing a product or signing up for your service. That said, displaying a CTA on your website alone won’t provide much value. To make high-converting CTAs, you should consider the following elements:
- Make it stand out. Place it where visitors can notice it right away. Use color contrasting with the background and add extra whitespace to make it stand out from other site elements.
- Personalize it to different audiences. Design separate CTAs that cater to each audience segment. For example, create different CTAs for new visitors and regular customers.
- Create urgency. Use action-oriented copy to make visitors feel like they are missing out by not clicking the CTA.
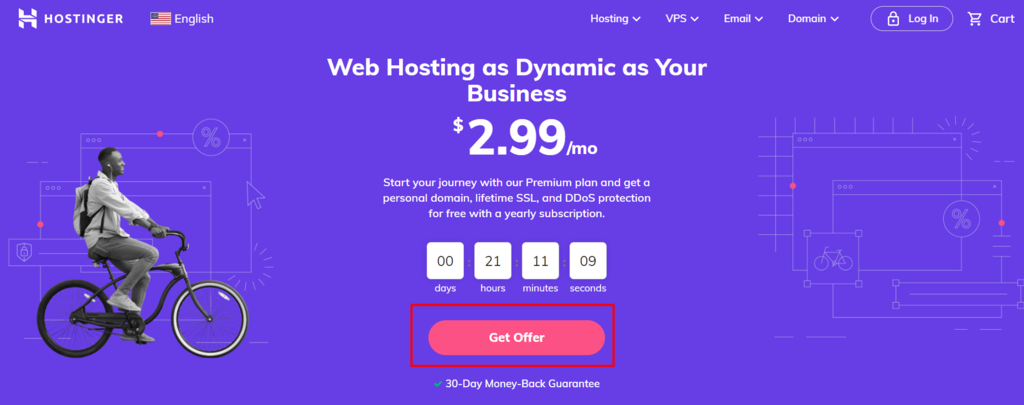
A great example of a good CTA button is the red “Get Offer” on one of Hostinger’s landing pages. The countdown timer creates a feeling of urgency, encouraging visitors to take action.
18. Create Social Media Profiles
With millions of social media users worldwide, creating an active social media profile is an effective way to gauge audience interest and entice them to visit your website.
Before setting up a profile, you’ll need to determine which platforms best suit your business needs and target audience. This will help you achieve optimal results, saving time and effort.
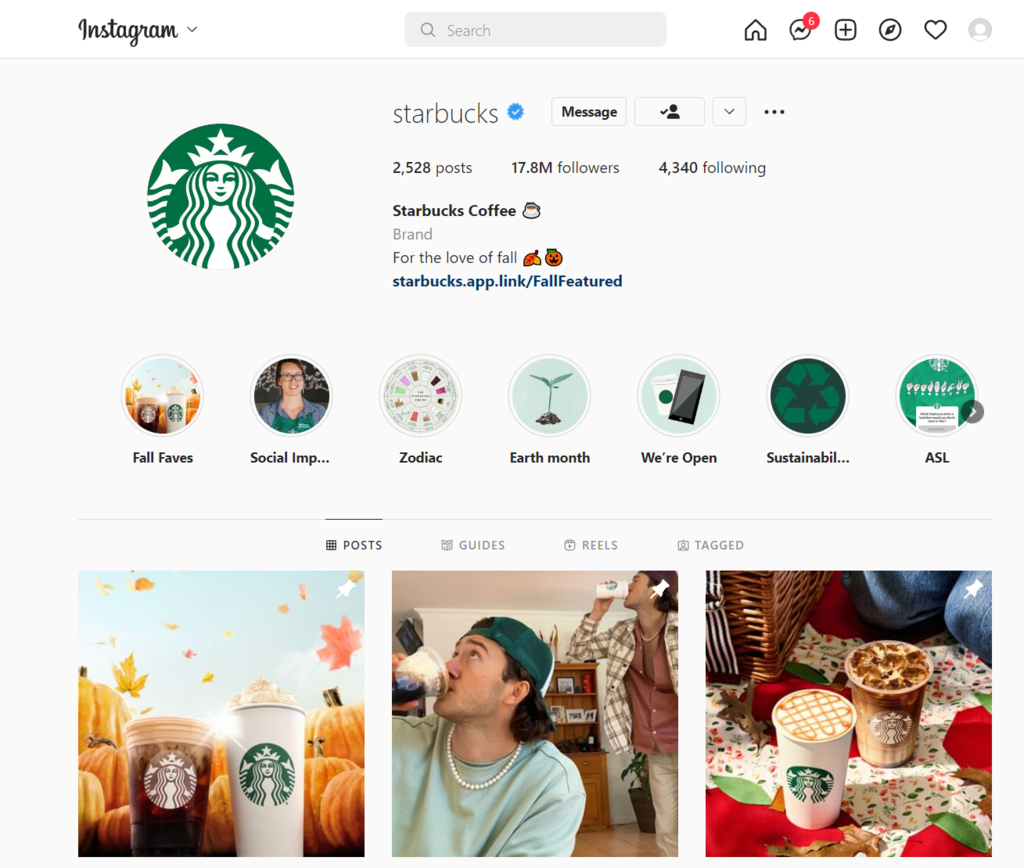
For instance, Instagram is an ideal platform for targeting younger audiences. Most businesses use the platform to highlight their brand values, promote new products, and run marketing campaigns.
YouTube is another great platform to use. Try converting some of your website’s content into the form of a video.
For instance, post a video demonstrating the steps if you have a tutorial article on how to start a blog. Mention the original article by linking it to the description box. Furthermore, ensure to embed a social media sharing button.
19. Build Anticipation Using Promotional Teasers
Creating a teaser or a coming soon page effectively builds anticipation before a website goes live. Put your creativity to good use by making a few custom graphical designs.
Most pre-launch pages also include an email signup form. This way, you can invite visitors to subscribe to receive brand-related news, including the website launch date. Offer small incentives to grow subscriptions, such as free eBooks or discount coupons.
20. Check If Your Conversion Path Is Working
This step is essential, especially when running an eCommerce site. An effective conversion path can help turn site visitors into potential customers or promoters.
Take some time to double-check that all the features of your conversion path are functioning correctly, such as the landing page, contact forms, and thank you page.
If your website is going to accept payments, perform a test run of each payment step. This includes shopping cart functions, payment gateways, and the confirmation page.
21. Add Your Website to the Search Engines
Adding your site to search engines is necessary to improve your site’s rank on SERPs and drive more traffic. While most search engines are capable of crawling and indexing websites automatically, doing it manually will help ensure that your website’s data is complete, updated, and accurate.
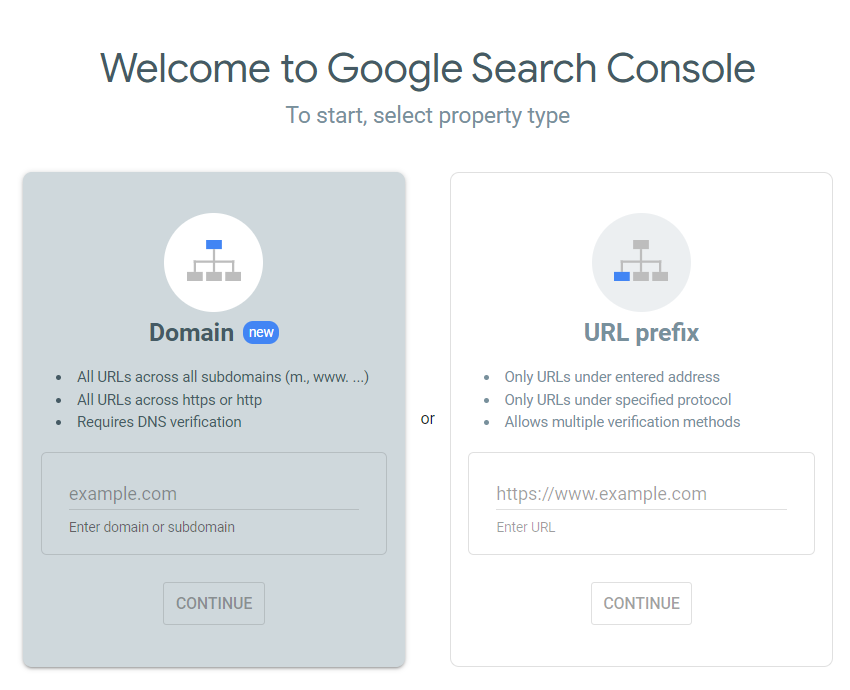
The submission process differs between search engines. For example, adding a website on Google involves uploading an XML sitemap to Google Search Console. The purpose of an XML sitemap is to make it easier for web crawlers to index the content on a website.
On the other hand, website submissions to Bing require a Bing Webmaster Tools account. Fortunately, it’s possible to import your sitemap to Bing instantly if your website has been verified on Google Search Console.
22. Announce Your Website Launch on Social Media
Next on the website launch checklist is to announce the launch of your new website across all social media channels. Start posting on several different platforms, including Instagram, Facebook, and Twitter, to notify viewers about the upcoming launch. Consider creating multiple posts for each platform to get noticed quickly.
Incorporate CTAs into all of your posts and create engaging videos to capture followers’ attention and entice them to look forward to the launch. Make another post to highlight the website’s new resources and features on the day of the launch.
If you are redesigning an existing site, explain in detail how the new site will improve the user experience.
Website Post-Launch Checklist
Once launching your new website, it doesn’t mean that the work is done. Here are a few things to double-check after the launch:
1. Crawl Your Website
Perhaps you’ve launched the final website and made all the optimization and promotion efforts but still can’t get any significant results. There is a possibility that your site has crawlability issues.
Occasionally, web crawlers may encounter an error when accessing your web pages that prevent them from indexing them. Several factors can contribute to web crawlability issues, ranging from not configuring redirects correctly and outdated sitemaps to unoptimized technical and on-page SEO components.
The best way to address this problem is by performing site audits regularly. Use online auditing tools like Screaming Frog or SEOptimer to analyze your site’s structure and identify any technical issues that might hinder its SERP performance. Then, plan a solid strategy to resolve them.
2. Optimize the Website
Website optimization is a practice of improving user experience and site performance on search results. Optimizing your website results in higher traffic and helps encourage conversion and customer retention.
One of the best web optimization practices is to improve page speed. Page speed indicates how fast visitors can interact with site content after accessing it. Besides being one of Google’s ranking factors, a faster loading site will offer a more positive user experience and generate more conversions.
Some of the most effective ways to optimize your site speed include:
- Leverage browser caching. Web browser caching involves a visitor’s browser downloading your website’s resources to load it faster the next time they visit the site.
- Minify resources. Bloated code can slow down site speed. Minify HTML, CSS, and JavaScript files by eliminating unnecessary or redundant characters, lines, and spaces to create more compact data.
- Optimize visuals. Use high-quality images that take less time to load. Consider implementing a lossy or lossless image compression method and pick the suitable format and dimension for your image.
- Set up a content delivery network (CDN). A CDN can help speed up web content delivery and reduce bandwidth usage. That’s why it’s widely used by heavy-traffic websites like eCommerce stores, entertainment, and online gaming platforms. It also uses the HTTPS protocol to protect sensitive data from hackers and cyberattacks.
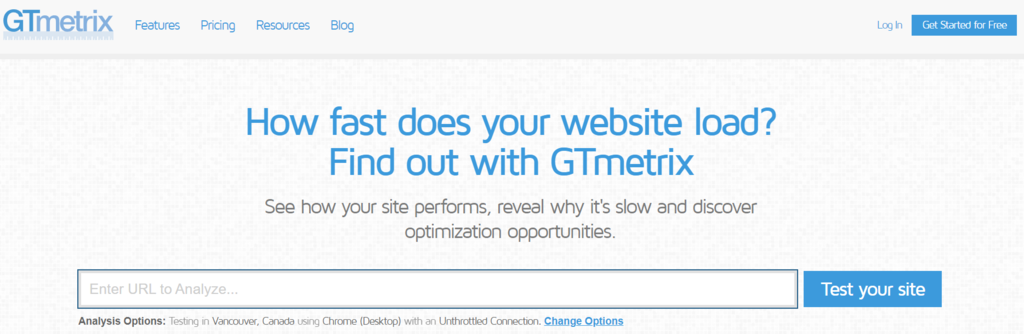
Besides optimizing site speed, running a website speed test is crucial to check how fast your site loads and identify the area that needs improvement. GTmetrix is an excellent site optimization tool that comprehensively analyzes a site’s page load speed based on various metrics.
3. Promote Your Website
The last thing on the post-website checklist is promoting your new website to boost traffic and increase brand awareness. Here are some of the best ways to promote your website:
- Email marketing. Due to its wide recognition and impressive return on investment, email marketing may be one of the most cost-effective ways to increase site traffic and conversion rate. Send personalized emails to attract new audiences and regular newsletters to retain existing ones.
- Guest blogging. This involves writing content for other websites in return for quality backlinks. This method will help you attract more visitors and expose your website to a larger audience. For effective results, partner with trustworthy and relevant websites within your niche.
- Online giveaways. A limited-time promotion where businesses offer free products or services. Giveaways help people identify your brand and remind them to make a purchase from you.
- Paid media. Pay-per-click, display, social media, and retargeting ads can boost your website’s traffic quickly and reach a wider audience. Paid advertising enables you to target a more relevant audience since you can customize the ads based on demographics, interests, and search queries.
Conclusion
No matter what type of website you’re launching, planning early is essential for its long-term success. Building a website without a solid foundation will waste time and effort since visitors will eventually leave your site if it lacks essential elements.
In this article, we put together a website launch checklist to help guide you through the pre-and post-launch process. We hope you can launch your website confidently and achieve optimal results by verifying and performing the items in this checklist.
If you find further suggestions to add to our website launch checklist, don’t hesitate to share them in the comments section below.

Amanda is a WordPress and digital marketing enthusiast with a passion for helping others grow their businesses and careers. She enjoys producing content that is both informative and helpful. When she's not working, Amanda loves hiking, reading books, and filling her bullet journal.

Wanda enjoys helping people become more successful online by sharing her expertise in digital marketing and website development. In her free time, she loves reading mystery books, thrifting for vintage clothes, and exploring aesthetic cafes.
