hPanel tutorial: features, overview, and tips
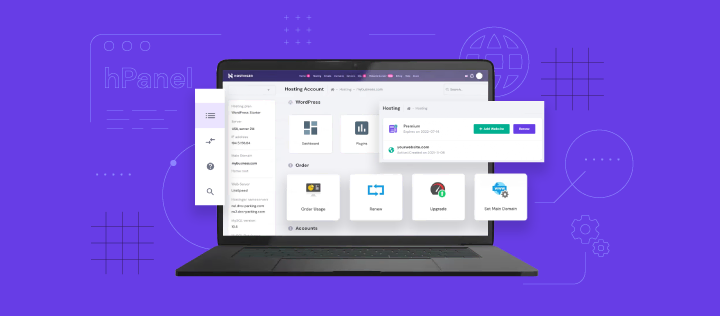
Designed for ease of use, Hostinger’s control panel hPanel streamlines most website management tasks, such as setting up and configuring your domains, websites, emails, VPS, and more.
In this tutorial, we’ll cover the essential features and tools within hPanel, helping you efficiently manage your hosting environment and optimize your online presence.
Download guide to using Hostinger
What is hPanel?
hPanel is Hostinger’s custom control panel, created to simplify and streamline website and web hosting management.
With hPanel, you can efficiently manage your domains, websites, emails, and other Hostinger services from one place, making it ideal for users of all technical levels.
hPanel consists of the following main sections:
- Home. Overview of your account and quick access to key features.
- Websites. Manage websites, hosting plans, and related resources.
- Emails. Set up and manage email accounts.
- Domains. Handle domain registrations, transfers, and DNS settings.
- VPS. Deal with virtual private servers.
- Billing. Take care of payment methods and active subscriptions.
There are also secondary sections accessible through the right-hand side menu bar.
The Referral Program lets you earn rewards by referring our hosting services, while AI Search helps you quickly find answers and solutions to potential roadblocks.
Purchase additional services through the Marketplace and learn about new features in the What’s New section.
Access support resources and contact options in the Help section, and update your profile, security settings, and notification preferences in the Account area.
hPanel home

The Home section serves as your dashboard, summarizing key information about your account.
It offers quick access to frequently used features and provides an at-a-glance view of your hosting plans, domain registrations, and other services.
This helps you efficiently manage your online activities and stay informed about the status of your hosting environment. Add widgets to the top of the page to keep track of the most important aspects of your websites and domains.
Websites

This section include all essential tools for creating, managing, and optimizing your websites.
View all your websites and their web hosting plans here. All sites and hosting plans are organized so that each website is nested under the corresponding web hosting plan.
Open the hosting settings by clicking on the three dots:

These links redirect you to the Hosting section of your website dashboard:

Use the top of the Websites page to search and filter through your websites or add new sites to your account:

Create a new site using WordPress or Hostinger Website Builder. Click the Add website button, and follow the steps to set up a new website.
You can also transfer your website from another hosting provider. To do this, click Add website, select Migrate Website, and follow the instructions. For more information, follow this migration guide.
WordPress
For WordPress websites, access the WordPress Admin Panel directly from this section or navigate to the Dashboard.

Use the Admin Panel to directly add and manage content in WordPress:

The hPanel Dashboard, on the other hand, has all the tools and settings you need to effectively manage other aspects of your website, such as site security, databases, and more:

hPanel provides a comprehensive interface for managing your WordPress sites. Our built-in tools ensure your WordPress site is secure, up-to-date, and optimized for performance. Key tools for WordPress management in hPanel include:
- Auto installer. Install WordPress directly through hPanel.
- Version control. View and update PHP and WordPress versions.
- Core settings. Enable HTTPS, activate maintenance mode, install LiteSpeed cache, enable object cache, flush cache, and manage WordPress updates.
- Speed and security tools. Manage SSL certificates and activate DDoS protection.
- Staging environment. Create staging sites for testing changes.
- Plugin and theme management. Manage plugins and themes without accessing the WordPress dashboard.

Hostinger Website Builder
For websites built with Hostinger Website Builder, you have the option to either Edit website or open the Dashboard.

Clicking the Edit website button opens the website editor:

Since Hostinger Website Builder is a drag-and-drop builder, you can edit all aspects of your site through the intuitive editor. Access everything from general site settings to your files, backups, and integrations through the three dots in the side menu:

The Dashboard menu, on the other hand, includes various tutorials and guides to help you get the most out of your site:

Compared to WordPress, Hostinger Website Builder is an ideal tool for beginners who want to manage everything about their website with an intuitive drag-and-drop interface.
To start, simply pick a website template and customize it, or use AI to create a unique web design and publish your site in no time.

Emails

Managing your email account through hPanel ensures seamless communication and professional presentation with your domain-specific email addresses.
In the Emails section, all your email plans and mailboxes are listed under the corresponding domain names. View the status of each plan, toggle auto-renewal and open the individual settings for each mailbox here.
If you need a new plan or more mailboxes, click on the Get plan or mailbox button.
Open the mailbox overview by navigating to Emails, selecting the domain associated with your email, and clicking Manage:

Use hPanel to manage various aspects of your email account:
- Create your email accounts. Add up to 100 mailboxes with the free email plan included in web hosting plans.
- Manage forwarders and aliases. Redirect emails to another address or consolidate emails from multiple addresses into one inbox.
- Webmail. Access webmail to view individual inboxes directly from the dashboard.
- DNS settings. Configure MX, SPF, and DKIM records.
- Email client setup. Get setup info for email clients like Outlook and Thunderbird.
- Email plan details. View storage limits and features.
- Autoresponders. Set automatic replies.
- Email filters. Create rules for incoming emails.
- Spam protection tools. Filter out spam.
Domains

Managing your domains through hPanel streamlines domain registrations, transfers, subdomains, and DNS setting management.
All your domains are listed in the Domains section. View the status and expiration date of each domain, toggle auto-renewal, and access individual settings for each domain.
If you need to register a new domain, click Get a new domain. Or, if you need to transfer a domain from another registrar to Hostinger, select Transfer an existing domain.
To open the Domain Overview for each domain name, select the domain and click on Manage:

Use hPanel to manage various aspects of your domain:
- Create subdomains. Organize your site with subdomains like blog.yourdomain.com.
- Set up parked domains. Park additional domains to display the same content as your primary domain.
- DNS zone editor. Configure DNS records such as A, CNAME, MX, and TXT, and reset DNS settings to default if needed.
- Domain lock. Prevent unauthorized domain transfers.
- WHOIS privacy tool. Protect your personal information by enabling WHOIS privacy.
VPS

hPanel provides robust tools for managing your Virtual Private Servers (VPS), giving you control over resources and performance.
In the VPS section, view and manage your VPS plans. Get an overview of server details, SSH access, and the overall status of your servers. Click + Get new VPS plan to purchase new plans.
Open the overview of an individual VPS by selecting your desired plan and clicking Manage.
Use hPanel to manage various aspects of your VPS account:
- Set up VPS. Follow the on-screen steps for setup, including SSH access, updating the server, creating users, enabling public-key authentication, and configuring a firewall.
- Configure tools. Install necessary tools like LAMP and SSH keys. If you need to double-check some Linux commands, simply prompt and get instant answers from VPS AI Assistant.
- Domain management. Point your domain to your VPS by changing the A record or setting up custom nameservers.
- Configure settings. Create backups, monitor server resource usage, reinstall operating systems, and manage licenses.

User settings
hPanel is also your dashboard for managing everything related to your Hostinger account. From invoices and resetting your password to managing referrals and accessing tutorials, hPanel is built to empower you to succeed online.
Billing
The Billing section of hPanel makes it easy to keep track of your financial transactions with Hostinger.
Get a snapshot of the renewal prices, expiration dates, and all active and expired subscriptions in your account. You can also add payment methods and view your account’s payment history here.
Referral program

The Referral Program enables you to earn rewards by inviting others to use Hostinger’s services.
You can generate and share referral links with friends and colleagues, making it easy to invite others. Once shared, you can monitor the status of your referrals and the rewards you earn.
AI search

hPanel’s AI-powered search is designed to help you quickly find answers and solutions.
By using the search bar, you can efficiently locate articles, tutorials, and support resources, helping you solve problems and learn about all aspects of web hosting and website management without navigating through multiple pages.
Marketplace

Use the Marketplace to explore and purchase add-ons and services to enhance your hosting experience. Discover additional tools and features that can be integrated into your hosting plan.
What’s new

The What’s New section keeps you informed about the latest updates, features, and improvements in hPanel. Here, you can learn about new tools and enhancements designed to optimize your hosting experience.
Help

The Help section in hPanel has various resources to troubleshoot and optimize your hosting experience. This includes a knowledge base with detailed guides and tutorials on various topics. Additionally, you can reach out to our Customer Success team 24/7 for help.
User settings

In the User Settings section, you can customize your account settings to enhance security and personalize your experience. This includes updating your personal information and password, enabling two-factor authentication for added security, and adjusting your email and notification preferences.
How does hPanel differ from cPanel?
While cPanel is a popular choice for web hosting management, it can be overwhelming for beginners due to its complex interface and extensive options, which often require a steeper learning curve. cPanel’s extensive features, while powerful, can lead to clutter and difficulty in navigation.
In contrast, Hostinger’s hPanel offers a more intuitive and user-friendly design, tailored specifically for ease of use within the Hostinger ecosystem. hPanel’s minimalist approach streamlines essential tasks like website management, email configuration, and domain management, making it a great choice for users seeking simplicity and efficiency.
For a more detailed comparison, read our guide on hPanel vs cPanel.
Conclusion
hPanel is an intuitive control panel designed to simplify website and hosting management. Its key features include domain management, email setup, VPS control, and WordPress tools.
By using hPanel, you can efficiently manage your online activities from one place, ensuring a secure and optimized hosting experience.
For those looking for a user-friendly alternative to cPanel, hPanel offers a streamlined and effective solution within the Hostinger ecosystem.

Matleena is a seasoned Content Writer with 5 years of content marketing experience. She has a particular interest in emerging digital marketing trends, website building, and AI. In her free time, Matleena enjoys cups of good coffee, tends to her balcony garden, and studies Japanese. Follow her on LinkedIn