I Bought a Domain, Now What? 6 Steps to Follow After Purchasing a Domain
A domain name is a must for building a successful business online. A memorable domain name helps you improve brand recognition and awareness, reaching a wider audience.
However, buying a domain name is just the beginning of your digital marketing strategy.
In this article, we will cover the following six steps after you purchase a domain name – from getting a web hosting service to building a successful website.

1. Get a Web Hosting Plan
After registering a new domain name, the next step is to choose a reliable web hosting provider. A web hosting company lets you host a website and makes it accessible online.
Typically, web hosting companies offer several types of hosting services with multiple plans.
We recommend choosing a web hosting plan carefully, so your website won’t suffer from frequent downtimes. Besides making sure the website hosting cost fits your budget, it is crucial to go over the features a plan offers. You don’t want to pay for the benefits you don’t need and lack the necessary tools to manage your site easier.
In this section, we will break down four of Hostinger’s plans so you can pick the one that suits your needs.
Web Hosting
Web Hosting is a cost-effective service that uses a single physical server to host multiple websites. It means users share the same server resources, like storage, processing power, and bandwidth.
You don’t have to be tech-savvy, as the web host will handle all the technical tasks, like server administration, maintenance, and configuration.
Unfortunately, the Web Hosting option has several drawbacks. For example, when another user on the same server experiences a sudden traffic spike, your site’s performance will also decrease. Also, as you don’t have much control over the server space, you won’t be able to customize it.
All in all, Web Hosting is great for creating a website for personal use, such as a blog or a portfolio. It is also ideal for those who plan to build their first site to learn more about web development. The cost of a web hosting plan starts at RM7.99/month.

Managed WordPress Hosting
Managed WordPress hosting is specifically designed for WordPress users to optimize their sites’ performance. The cost of WordPress hosting starts at RM7.99/month.
This hosting service provides WordPress-specific features to enhance your experience when building and optimizing a site.
For example, WordPress Multisite lets you create and run multiple websites using the same installation on your server. Furthermore, WordPress hosting plans come with an object cache to reduce your site’s response time significantly, multiple data centers, and SEO tools to boost your site’s visibility.
When it comes to security, the hosting service comes with pre-installed plugins, a malware scanner, regular backups, and a round-the-clock Customer Success team that can help with any issues.
VPS Hosting
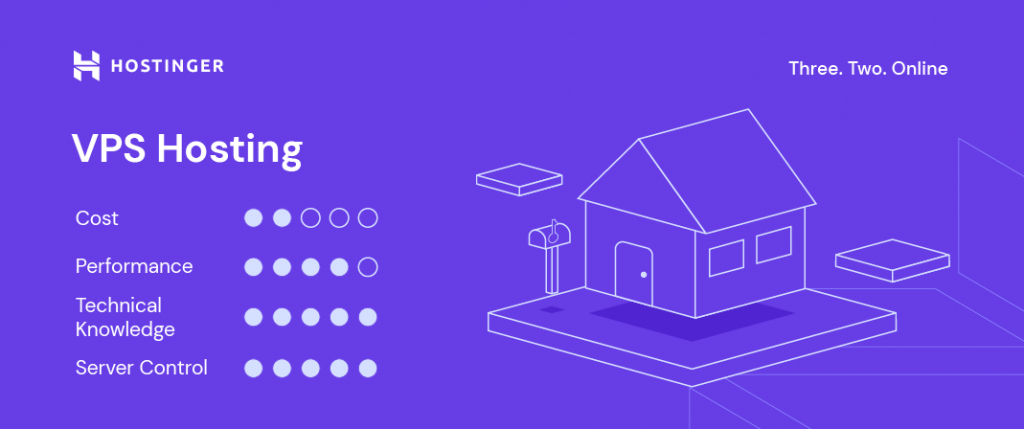
Virtual private server or VPS hosting offers a dedicated virtual partition on a physical server. It means that other users on the same server won’t affect your website’s performance.
This hosting type grants users root access, letting them install their preferred operating systems and apply advanced configuration options on the server. For this reason, VPS hosting is a great choice for advanced users with high-traffic websites and resource-heavy projects, like web apps and online game servers.
The downside is that VPS hosting costs more than shared or WordPress hosting, starting at RM24.99/month. Furthermore, it requires technical knowledge to set up a VPS environment and perform server management.
Consider switching to a VPS plan when you want to upgrade to a less restricted hosting plan and have learned the necessary technical knowledge.
Cloud Hosting
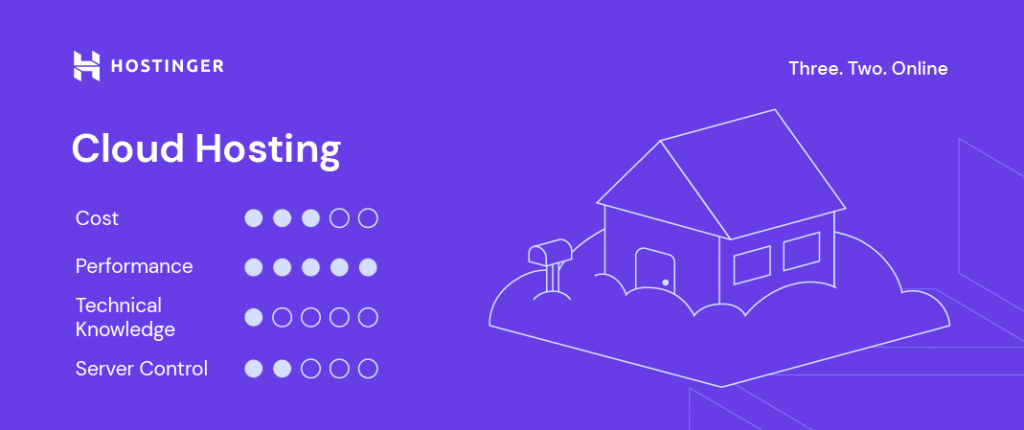
Cloud hosting uses a cluster of servers to host websites, balancing the traffic load. Simply put, if one server goes down, another server kicks in to keep your site running.
This hosting service is best suited for high-traffic websites, such as eCommerce stores, enterprise sites, or cloud-based projects requiring maximum uptime. As Hostinger offers a managed cloud hosting service, you can focus on developing your website while the web host takes care of the servers and your site’s back end.
However, cloud hosting is more expensive than regular web hosting, starting at RM49.00/month.
If you aren’t sure which hosting type is right for you, leverage the 30-day money-back guarantee in all hosting plans for testing.
Expert Tip
Consider upgrading to a different hosting plan if your website has overloaded its server resources and still performs poorly after the optimization. Luckily, Hostinger offers detailed Order Usage and notifies users in case their website has hit its resource limits. Simply go to Hosting → Manage → Order Usage in hPanel.
2. Connect the Domain Name to the Right Nameservers
If you use a Hostinger’s hosting plan but purchased a domain name from a different hosting provider, it is essential to point it to our nameservers.
Hostinger’s nameservers are located on hPanel’s Plan Details page. They look like the following:
ns1.dns-parking.com
ns2.dns-parking.com
There are two ways of doing this – changing the nameservers to your domain registrar or pointing the domain name via an A record. For more guidance, check out our complete tutorial on how to point a domain name to Hostinger.
Keep in mind that the process may take around 24 hours for the domain name changes to take effect. If it takes longer than expected, consider clearing the DNS cache or contact our Customer Success team for further assistance.
How to Point Your Domain Name to Hostinger – Video Tutorial
This Hostinger Academy video will show easy steps to connect your new domain name to Hostinger’s nameservers.

If you haven’t purchased a domain name yet, then you’re in luck, as all of our hosting plans come with a free domain for a year. What’s more, as an existing customer, you also get a chance to purchase a Domain Bundle – a collection of domains that have the same domain name but differing extensions.
3. Create a Branded Email Address With Your New Domain
Using a custom email address with your domain name, such as user@domainname.com, is a great way to build trust and credibility with potential customers. As all Hostinger plans include a free email account, you can easily create a business email account.
If you are looking for a premium email service, check out Hostinger’s business email hosting plans, ranging from $1.59–2.99/month.

Hostinger also offers a Google Workspace plan that costs $5.99/month. This package is a great option for those who want to use Gmail for business.
Pro Tip
Use a password generator like 1Password to automatically generate a random and secure password for your business email address.
How to Set Up Your Domain for Emails at Hostinger – Video Tutorial
In this Hostinger Academy video, you will learn how to create a custom email address using your domain name.

4. Set Up a Website or an Online Store
Websites are multi-purpose platforms that allow you to start your business, promote products or services, and build brand awareness.
Online stores typically exist as part of a website and are designed for eCommerce transactions with additional functionality, such as shopping cart and inventory management.
As for how to create an online store or a website, there are many beginner-friendly options available. For example, you can hire a web developer or utilize an online store builder. The latter is one of the most popular choices since it is more cost-effective and faster.
In this section, we will go over the steps to set up your own website or online store using WordPress and Hostinger’s website builder.
Create a Website With WordPress
WordPress is a popular content management system (CMS) that provides users with a beginner-friendly dashboard for site management and plenty of customization options, thanks to a variety of plugins and themes.

Here are the steps to create a website with WordPress:
1. Install WordPress
You need to install WordPress on your web hosting account to get started. Luckily, Hostinger provides a WordPress 1-click installer that makes the process much simpler.
Once installed, log in to the WordPress dashboard to start customizing your website.
2. Choose a Theme
WordPress typically comes with a pre-installed theme. For instance, WordPress 6.2 uses Twenty-Twenty Three as the default theme.
Pick a theme from the WordPress theme directory. Most themes are free, but some, such as OceanWP and Astra, have premium versions only.
Additionally, consider visiting marketplaces such as ThemeForest. This marketplace sells premium WordPress themes, ranging from $47-100/year.
Install the WordPress theme directly from the dashboard or manually upload it using an FTP client.
3. Install WordPress Plugins to Add New Features
WordPress plugins add more functionality to your WordPress site and admin dashboard. Thousands of free and premium plugins are available in the WordPress directory and third-party marketplaces.
Finding the right plugins for your site may take time. Thus, we have prepared a list of the best WordPress plugins:
- Yoast SEO – analyzes your content based on a focus keyphrase and provides suggestions to improve WordPress SEO.
- WooCommerce – enables eCommerce functionality, including online payment, order management, and inventory management.
- Visual Composer – provides a drag-and-drop page builder that lets you develop WordPress sites easily without any coding knowledge.
- W3 Total Cache – speeds up your WordPress site by enabling cache, content delivery network (CDN), and lazy loading.
- UpdraftPlus – backs up your WordPress website to integrated cloud services like Dropbox and Google Drive, simplifying site recovery.
Once you choose what you need, refer to our guide on how to install WordPress plugins.
4. Bonus: Start an Online Store With WooCommerce
We recommend using WooCommerce to build your online store, as it comes with various features like inventory management, order tracking, and analytics. You can also get more features by installing WooCommerce extensions.
There are two ways to set up WooCommerce on your WordPress site – installing the plugin manually or choosing the WordPress and WooCommerce installation using the auto-installer.
Installing WooCommerce via the auto-installer will permanently delete your current WordPress installation
Once installed, configure your WooCommerce store by adding products, setting up payment methods, and customizing your store.
Create a Website With a Website Builder
A website builder is a beginner-friendly tool that lets you create and design a website. It uses a drag-and-drop editor to alter the site’s appearance and offers plenty of pre-made website template options.
Starting at RM13.99/month, Hostinger Website Builder includes free hosting, built-in SEO tools, and eCommerce functionality.
We also provide AI features to help you simplify the site creation process, such as:
- AI Writer – generates SEO-friendly content by selecting keywords. It is a good starting point and a time-effective way to quickly make engaging copy.
- AI Heatmap – helps create a successful website, showing you which areas of the site will catch the most attention from your visitors.
- AI Logo Maker – designs your business logo from scratch. That way, you don’t need to use a third-party logo maker or hire a professional designer. However, after generating a free logo once, you need to buy additional credits to make more logos.
- AI Website Maker – simplifies the website creation process. To use this tool, you must provide your brand name, website type, and a detailed prompt.
In this section, we will walk you through the steps to create a website using our website builder.
1. Install Hostinger Website Builder
First, you need to install Hostinger Website Builder on your site:
- From your Hostinger account page, select Websites from the top navigation menu.
- Click Create or migrate a website. It will take you to a setup wizard page.
- Select the Hostinger Website Builder with AI option in the Select Platform section.
- Choose your domain name and click Select. Wait until the installation process is complete.
If you use WordPress or any other content management system, you can switch to Hostinger Website Builder in just a few steps.
2. Choose a Template
The next step is picking a website template that matches your needs.
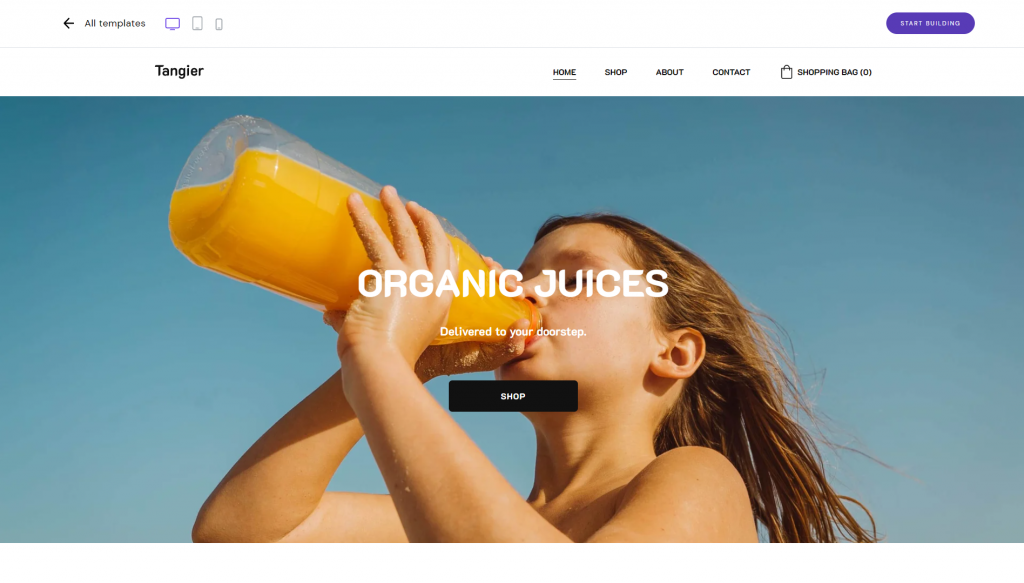
For example, an eCommerce template like Tangier has product pages and a shopping cart integration. Also, it is a great template for food eCommerce businesses, as it has a clean and colorful design.
3. Customize Your Site
The website builder’s editor lets you customize the site’s visual appearance. To move elements, drag and drop them into the predetermined grid blocks.
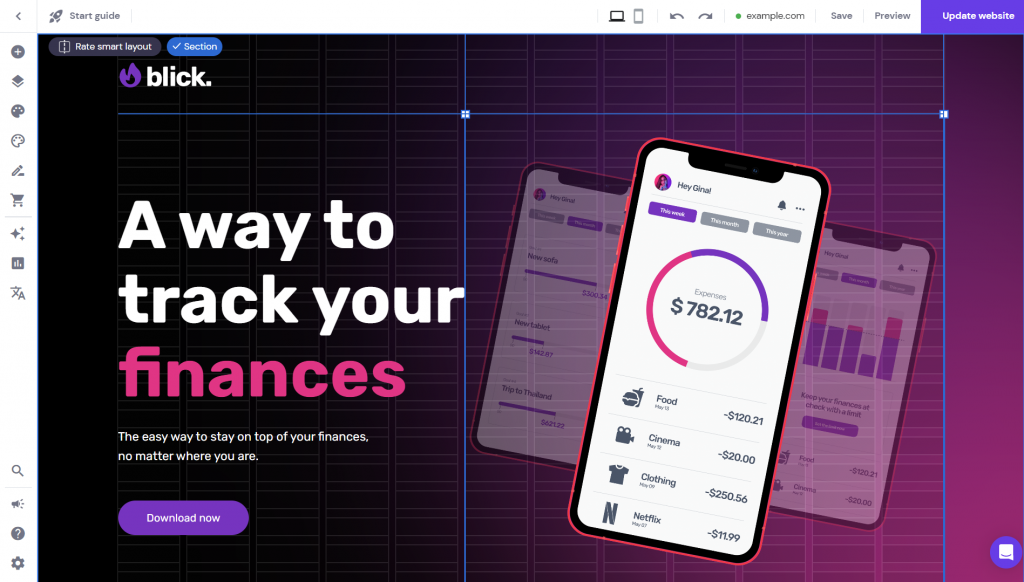
On the left sidebar, you will find more configuration settings. For example, the Pages and navigation section lets you manage pages and configure the site’s top navigation bar.
Meanwhile, the Website style section contains settings for the site’s color scheme, typography, and button styles.
5. Submit Your New Website to Search Engines
Submitting your site to search engines gives a better chance of ranking higher on the result pages. To do that, you need to create a sitemap to help search engines understand your website structure and connections between the pages.
If you use Hostinger Website Builder, it will automatically generate a sitemap. Those using WordPress can use a plugin like Yoast SEO. Alternatively, you can automatically create a sitemap URL with an XML sitemap generator.
Moreover, most search engines follow links to discover and index new pages. So, it is important to apply your site’s internal linking strategy for better results.
However, submitting your website is only part of the work. To rank your website on the first page, you will need to optimize it.
Your web page loading time can significantly affect its position, so use tools like GTMetrix or Google PageSpeed Insights to test your website speed and get improvement suggestions.
Mobile-friendly websites will likely rank higher as a lot of people browse the internet on mobile devices. If you use WordPress, get a fully responsive theme and add accelerated mobile pages (AMP) to your site.
Moreover, install an SSL certificate on your site since Google prioritizes pages that use HTTPS.
Creating a good meta title and meta description helps showcase your content to users, improving its click-through rate (CTR). Also, consider using plugins like Yoast SEO to get suggestions on how to make your content more SEO-friendly.
Expert Tip
It takes six plus months to start ranking a newly-created site, sometimes even up to a year. Building authority can help you rank better. To do so, it’s good to choose a niche for your site and expand from there. For example, instead of directly getting into digital marketing, you could focus on creating content for a subtopic like SEO or email marketing.
6. Promote or Sell Your Website
Promoting your business website or eCommerce store is essential to help you increase its visibility to the target audience.
The following are several methods we recommend using to promote your new site:
Social Media Marketing
Social media platforms provide many opportunities to interact with your target customers.
If you are on Facebook, join public groups relevant to your brand. You can share your expertise, gather insights about your industry, or even directly promote your website.
On Instagram or Twitter, make sure to include relevant hashtags when posting content, as they will display your post for users who are following or viewing these hashtags.
Moreover, adding social media widgets to your website will make it easier for customers to follow you and share content on their profiles.
However, be sure to use your time wisely – you might not need multiple social media accounts. Do some research to understand what social media platform your ideal customer uses.
Email Marketing
Email marketing is a strategy that helps increase conversion rates and keep visitors informed about your latest product or service updates.
There are several types of email campaigns you can use:
- Newsletters – send informative content or updates regarding your business regularly.
- Acquisition campaigns – these are aimed at customers or readers who read your newsletter but don’t convert.
- Retention emails – keep your subscribers and customers engaged. For example, send survey invitations and birthday wishes to make them feel appreciated and increase brand loyalty.
- Promotional emails – provide discounts, exclusive offers, and information about new products to drive sales and generate traffic.
Remember that your emails must have value to bring impact to the audience. So, create an appealing and engaging email by incorporating your business logo, adding a clear CTA, and making it easy to read.
It is important to track your email marketing campaigns to see whether it brings good results. If you use WordPress, install a newsletter plugin to manage and monitor your campaigns from your dashboard.
Paid Advertising
Paid advertising usually uses a pay-per-click (PPC) model, meaning you will get billed for every click on your ads.
If you are willing to invest in this type of ad to promote your site, we recommend using Google Ads. It offers different kinds of services, including search and display networks.
On a search network, your ads will appear on search result pages for relevant keywords. Meanwhile, display networks pop up on websites in banner-style advertisements.
To incorporate paid advertising into your marketing strategy successfully, follow the steps below:
- Find relevant keywords for your business and how much each click will cost. To accomplish this, use a free tool like Google Keyword Planner.
- Set up your Google Ads campaign by selecting its type. Then, add add the billing details and keywords.
- Create a compelling blog post that contains information and brief details about your business. It is also a good idea to use call-to-action buttons (CTA) to boost engagement.
Sell Your Website or Domain Name
Knowing how to sell your domain name is also important. For instance, you want to start a new business, but the current domain name is no longer relevant. Or you simply wish to make money by joining the domain flipping industry.
In addition, your domain name will eventually expire when left unused for too long, not bringing you any profit.
Once you decide to sell your domain, you must implement the right strategy. First, you need to park your domain to minimize the risk of cybersquatting.
Then, check whether the domain name is valuable. Several factors that contribute to its value are traffic, keywords, a top-level domain (TLD), and length.
For beginners, we recommend learning about the domain name market. NameBio, ShortNames, and NamePros are popular websites you can use for resources.
Choose the pricing strategy and decide how to sell the domain name. For example, you can create a landing page and sell it individually. Also, consider promoting your domain name at domain marketplaces, such as Afternic and Efty.
Suggested Reading
If you want to learn more about building a landing page, read our guide on How to Create a Landing Page That Converts.
Conclusion
Purchasing a domain name helps business owners achieve their goals, such as establishing an online presence and creating a strong brand identity. However, deciding what to do after can be quite demanding for beginners.
In this article, we have discussed the six steps to follow after buying a domain name:
- Get a web hosting plan.
- Connect the domain name to the right nameservers.
- Create a custom email address with your domain name.
- Set up a website or an online store.
- Submit your new website to search engines.
- Promote or sell your website.
If you still have any questions, be sure to read our FAQ section. For feedback or a discussion, go to the comment section below. Good luck on your online journey!
I Bought a Domain, Now What? FAQ
We will answer several frequently asked questions about the steps to follow after you purchase a domain name.
How Long After Purchasing a Domain Can You Use It?
You can use your domain after the registrar approves your domain registration request. This usually takes up to 48 hours.
What to Do After Buying a Domain And Hosting?
After buying a domain and web hosting, you can create a professional email address, use your domain on social media handles, build your website or online store, and promote it to your target audience.
When You Buy a Domain Name, Do You Own It?
You don’t own your domain name, but you have 100% control over it for your registration period. This means you decide which website your domain is pointed to, which registrar maintains it, and what information is associated with your domain account.






Comments
April 28 2023
What To Do After Buying a Domain And Hosting? After buying a domain and web hosting, you should set up a business email, use your domain on social media handles, set up goals for your website, and start physically building your website. I don't see anything in my account. I would like to get this set up but how
May 12 2023
Hello there! All of the purchased services will appear on the Home page (the first one you see after logging in to hPanel). If they are not there, I would highly suggest contacting our Live Support, the payment might have been lost and our team will help to locate it.
November 24 2023
Hi! I have an existing domain name, how do I build a business website using that domain name? Thanks!
November 24 2023
Hi there! Please feel free to contact our Customer Success Team so we can assist you further. We're here to help!