How to Edit Footer in WordPress: 3 Effective Methods + Plugins for Editing
When launching a WordPress website, editing the footer can be a bit frustrating.
Even though customizing a footer is not a complicated process, it can get time-consuming to get the design you want. This is because each WordPress theme may have different footer layouts.
However, don’t take that as a reason for ignoring it. A footer can help your site in a couple of ways. Visitors navigate to the footer sections to look for information, and it’s also useful for improving search engine optimization (SEO).
In this article, we will talk more about how to edit footer in WordPress. Plus, we’ll add in a few WordPress footer plugins to help with the editing process.
How to Edit Footer in WordPress – Video Tutorial
Learn how to edit the footer in WordPress using widgets, WordPress Customizer, the block editor, or a plugin.

What Is a WordPress Footer
The footer is the section of the website that is located at the very bottom of the page. It lists additional information about the site and links to pages that may be helpful for visitors. Other than that, the internal links help improve the site’s SEO.
A footer area commonly consists of, but is not limited to, the following components:
- WordPress sitemap
- Social media icons
- Newsletter subscription
- Links to company information pages – About, Contact Details, and Team
- Links to resources – Blog, Tutorials, and Courses
- Privacy Policy and Terms and Conditions
- Events and programs
- Customer service
- Copyright claims
It’s not necessary to include all these elements. Select the ones relevant to your website to avoid having a footer area that takes up half of the web page.
When it comes to the footer design, it’s all up to the users’ preference. However, keep in mind that the theme you choose for your WordPress site can affect the footer’s styling, formatting, and features.
Here’s an example of what a site footer looks like:
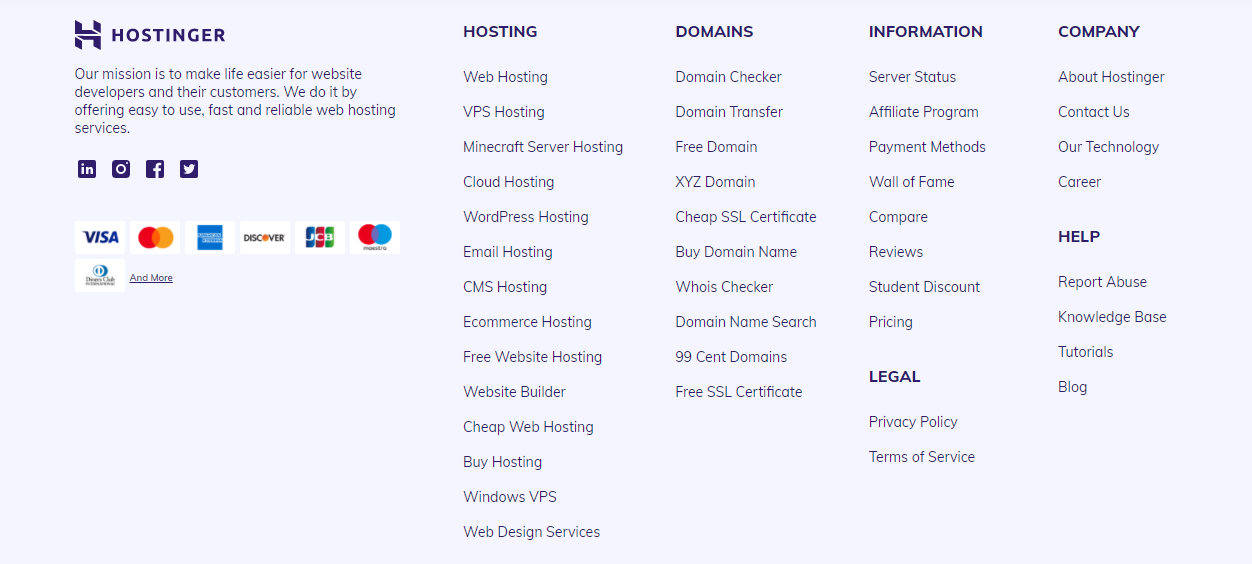
It’s possible to have a footer like the one shown above without having any web developing experience. In the next section, we’ll present four different methods on how to edit footer in WordPress.
How to Edit the Footer in WordPress
The footer content can be found in the footer.php file of the WordPress theme, and it’s coded in either HTML or CSS.
However, you don’t need to edit the file directly to customize a WordPress website footer. You can also use widgets, WordPress Customizer, or a plugin.
Edit Your WordPress Footer With Widgets
One of the easiest methods to edit the footer is by utilizing the WordPress built-in widget system. However, this only applies to themes that have a footer widget area. If yours doesn’t, simply use a different method.
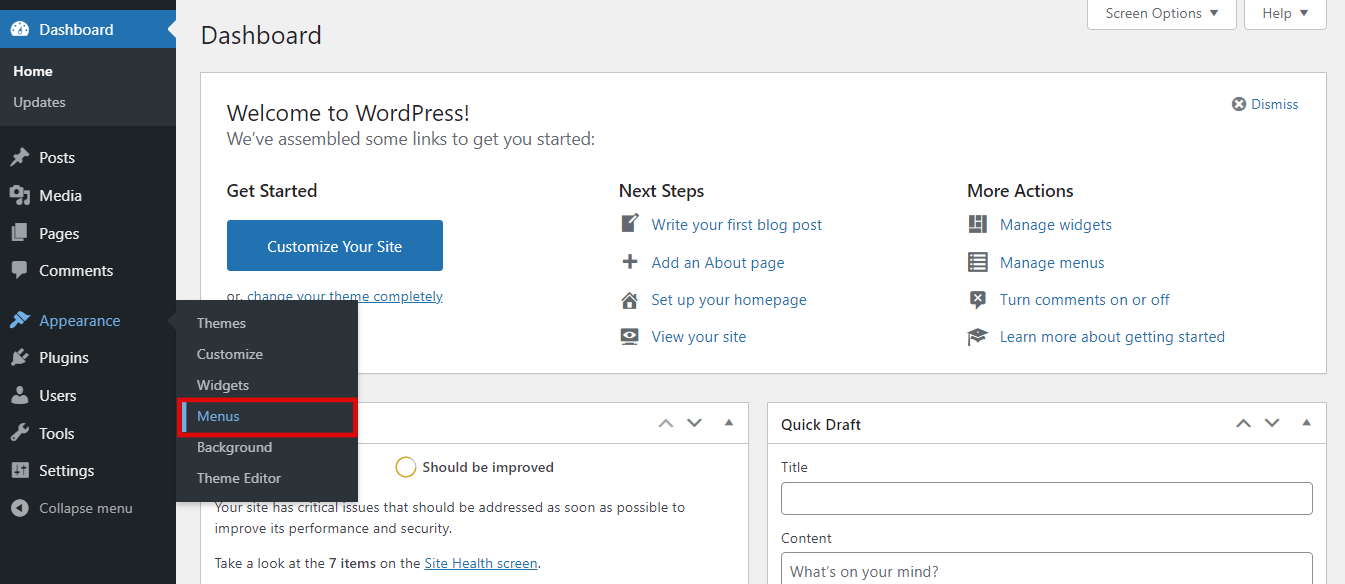
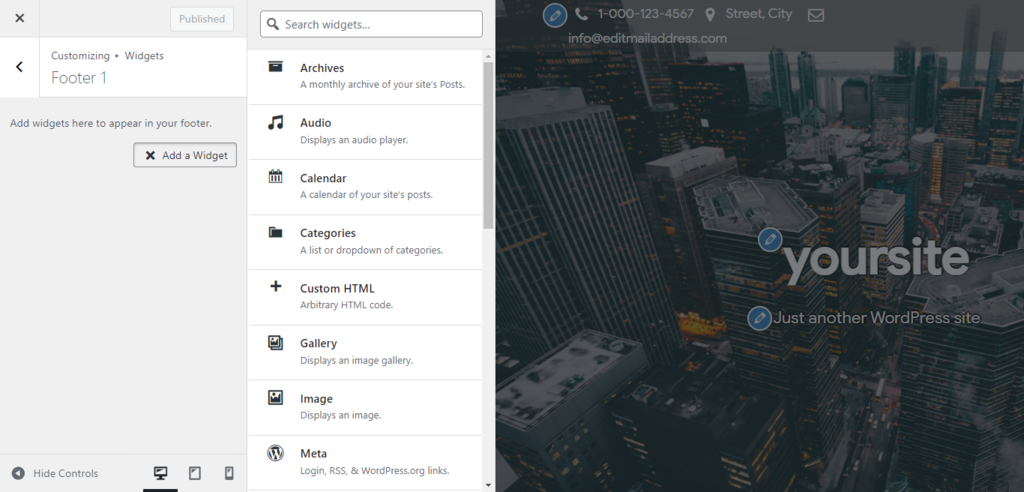
To access the widget area, simply hover on Appearance and select Widgets from your WordPress dashboard.
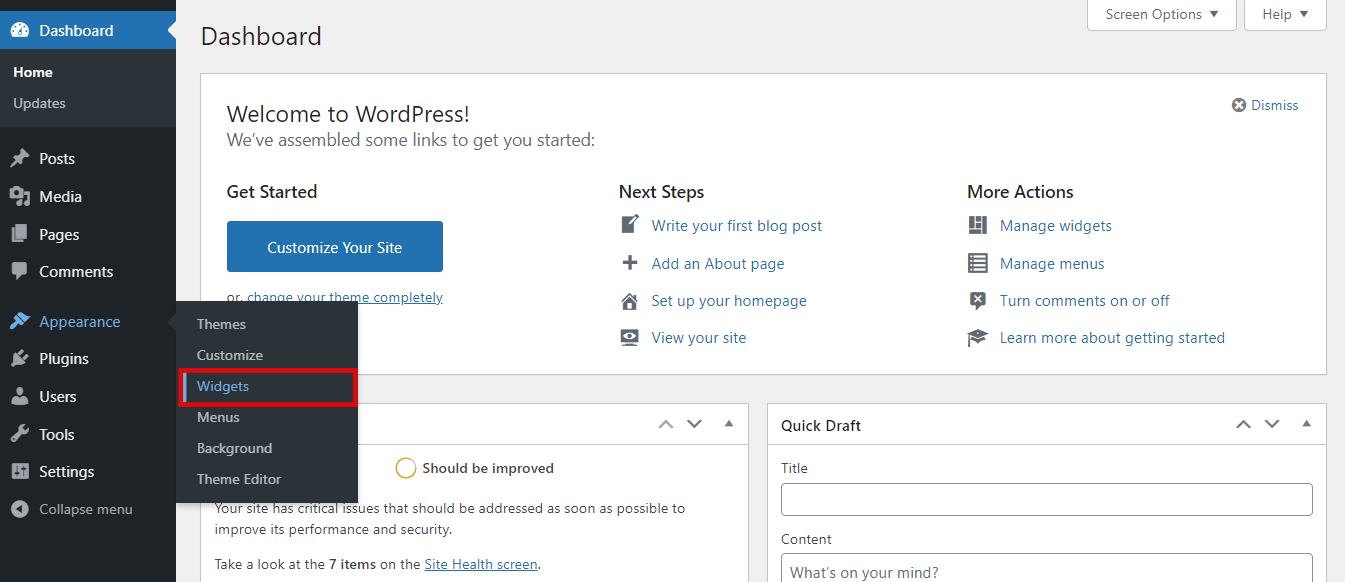
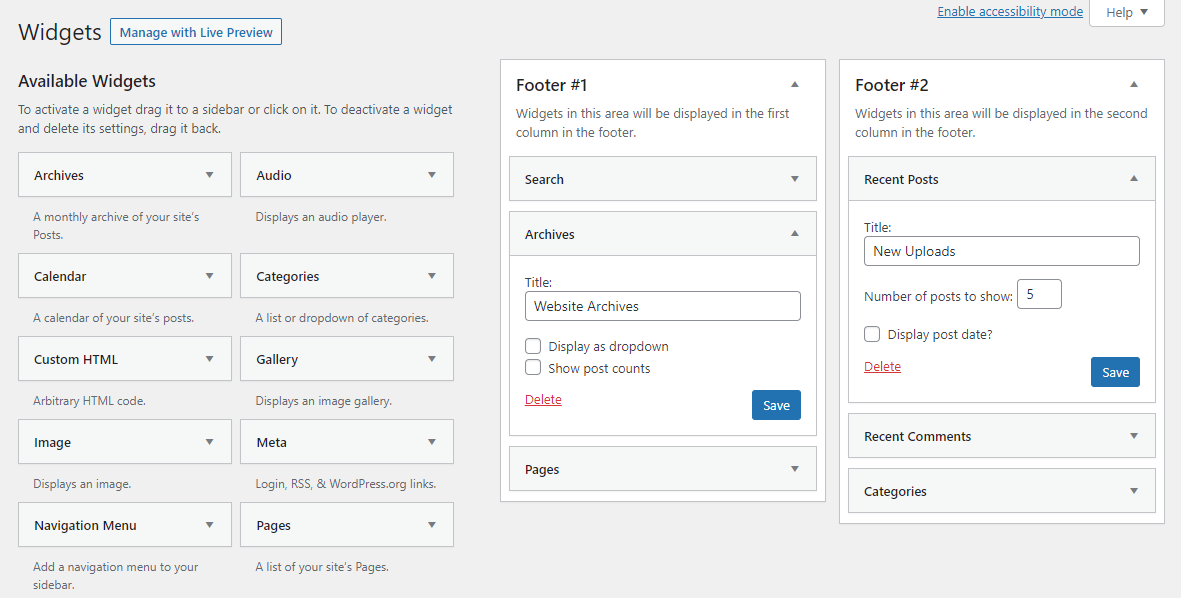
The Widgets page is divided into the Available Widgets section and the Footer area.
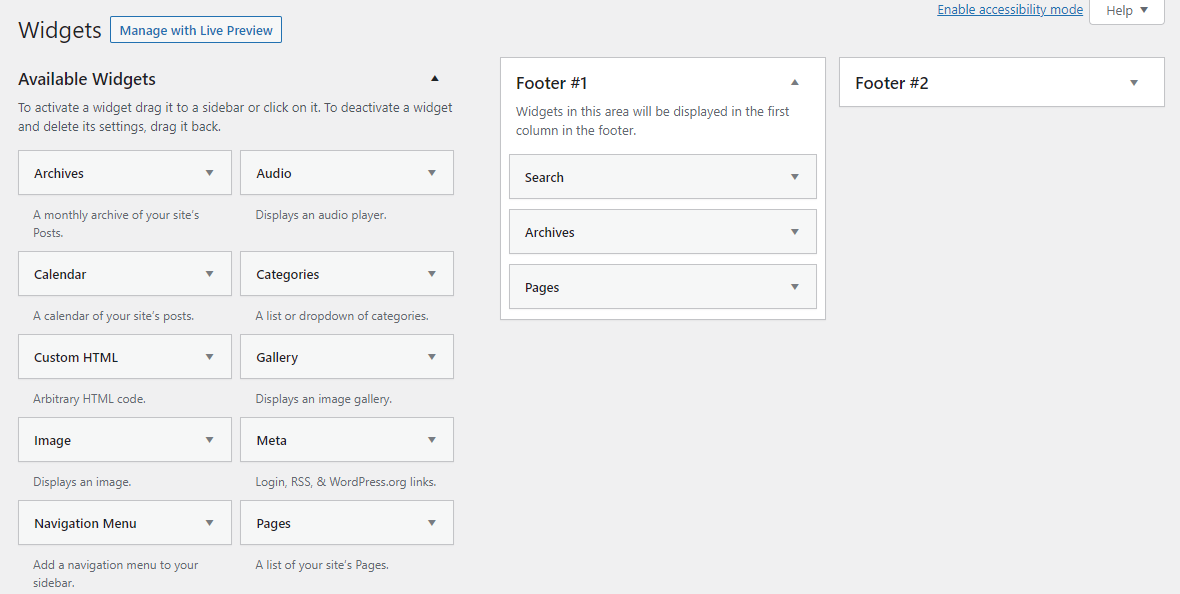
Keep in mind that the theme you use may have a different number of footer areas than the one shown above.
To edit the footer, simply drag and drop a widget to the footer area of your choice. Then, click on the widget to configure it, and press Save once you’re done.
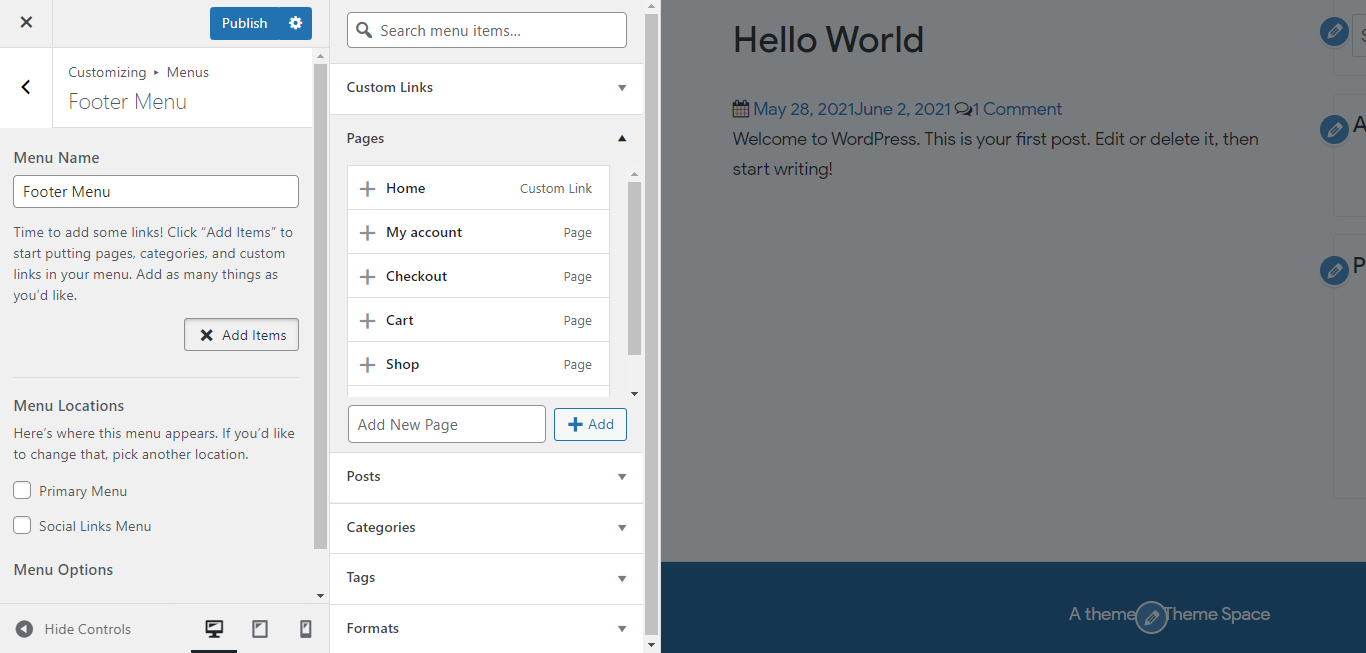
To add links to the footer widget area, follow these steps:
- Navigate to Appearance → Menus.
- Type in a new Menu Name and click on the Save Menu button.
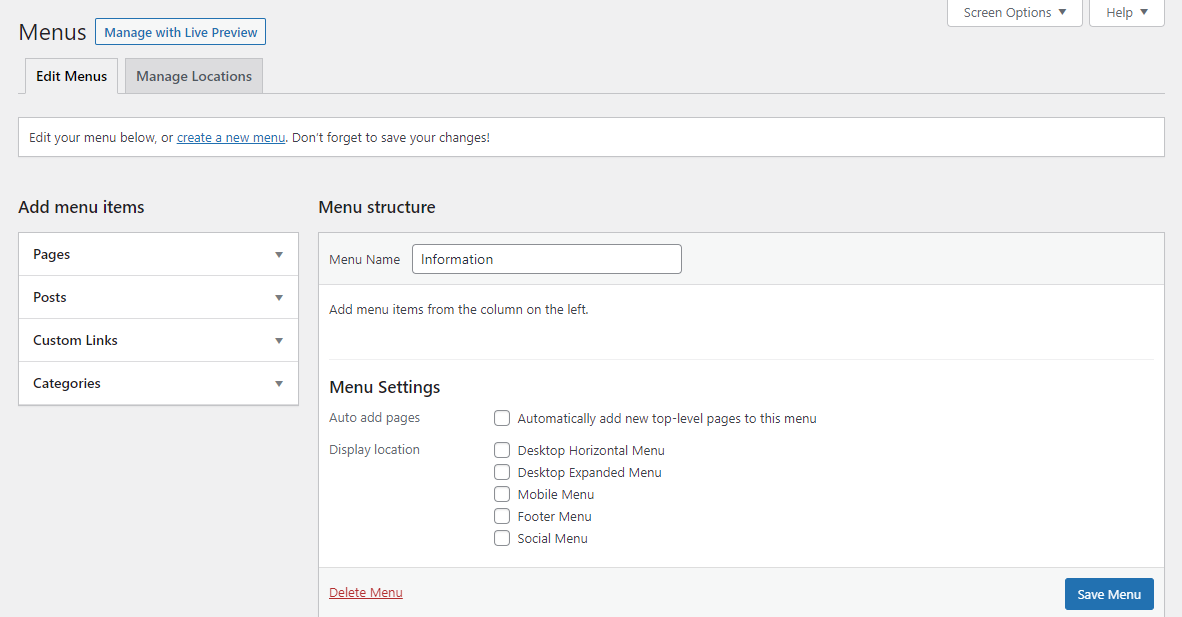
- Tick the boxes next to the pages, posts, or categories you want to add to the menu and click Add to Menu.
- Press the Save Menu button.
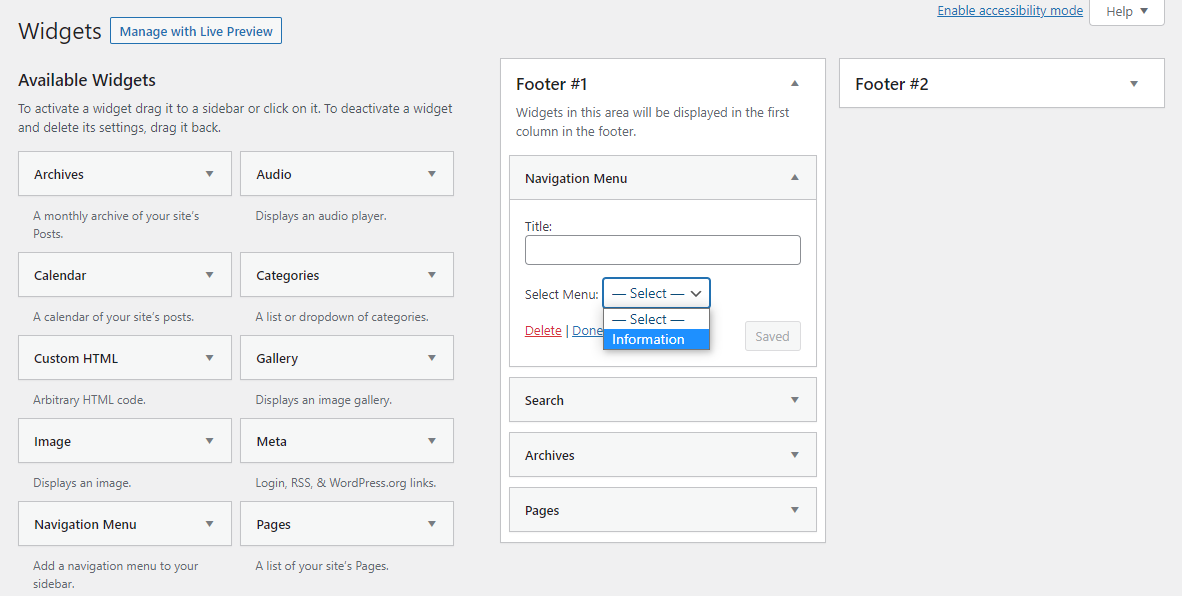
- Go back to the WordPress Widgets page, then drag and drop the Navigation Menu widget to the footer area.
- Select the newly created menu from the dropdown menu, then press Save.
Edit the Footer via Your WordPress Theme
WordPress users can also edit the visual aspects of the footer using the built-in Customizer. It shows a live preview of your website, so you’ll be able to see the changes you’ve made in real-time.
To access the Customizer, go to Appearance → Customize in your WordPress dashboard.
Here’s what to look for to edit the footer in the WordPress Customizer:
- Theme Options – you might find a Theme Footer section where you can customize the colors, border, and text of the footer to fit the site’s overall design.
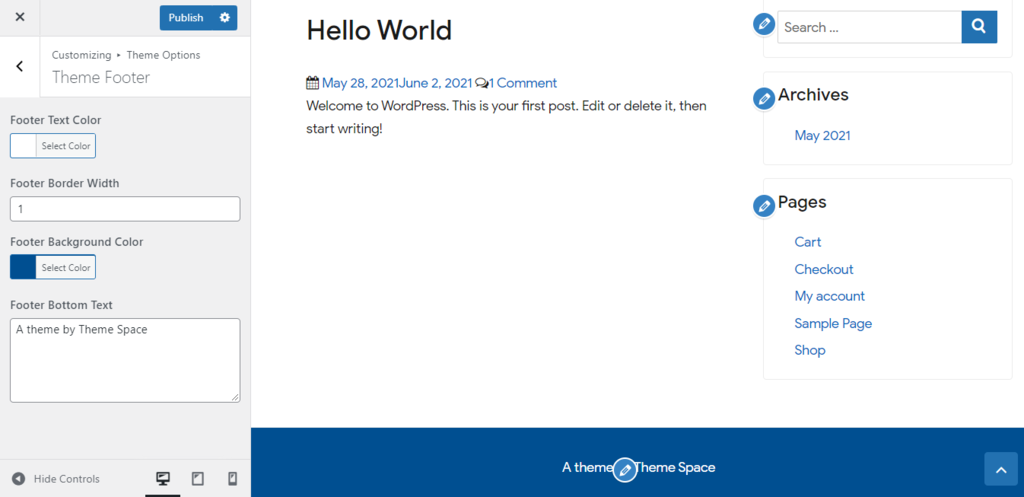
- Widgets – where various content widgets can be added to a footer area.
- Menus – for those who want to add links to the footer. It uses the built-in WordPress menu system.
Once you’re happy with the results, remember to press Publish or Save Draft.
Keep in mind that not all themes have footer options. You may have to rely on just customizing widgets and menus.
For the ones that do have, the settings might also be placed in a section other than Theme Options, such as Footer Builder.
Edit the Footer Using the Block Editor
WordPress 5.9 introduced a new block editor for site customization. It makes editing easier as the footer now has its own block and template. Various blocks like site title, calendar, and navigation have also replaced widgets.
However, keep in mind that the block editor is only available if you use a block-based theme. An example of a block-based WordPress theme is the new Twenty Twenty-Two default theme.
To access the editor, hover on Appearance and select Editor.
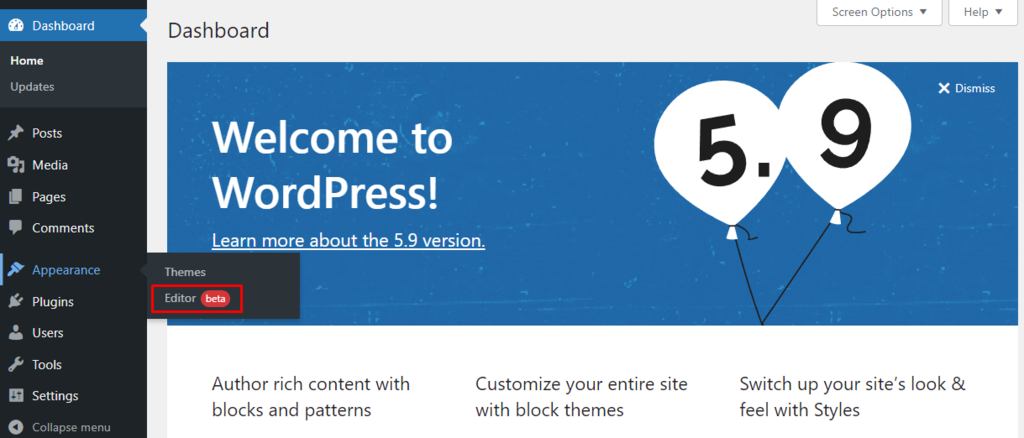
It will take you to the block editor, opening the Home page template.

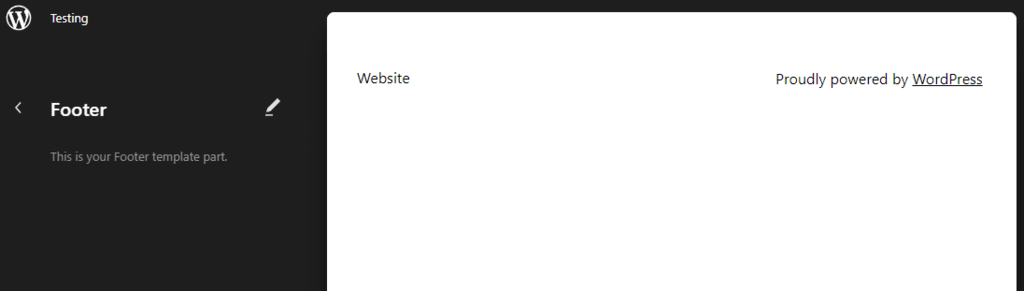
Scroll down to the bottom of the page to find the footer area, and start editing the footer.

Alternatively, click the Edit option on the block toolbar to display only the footer area.
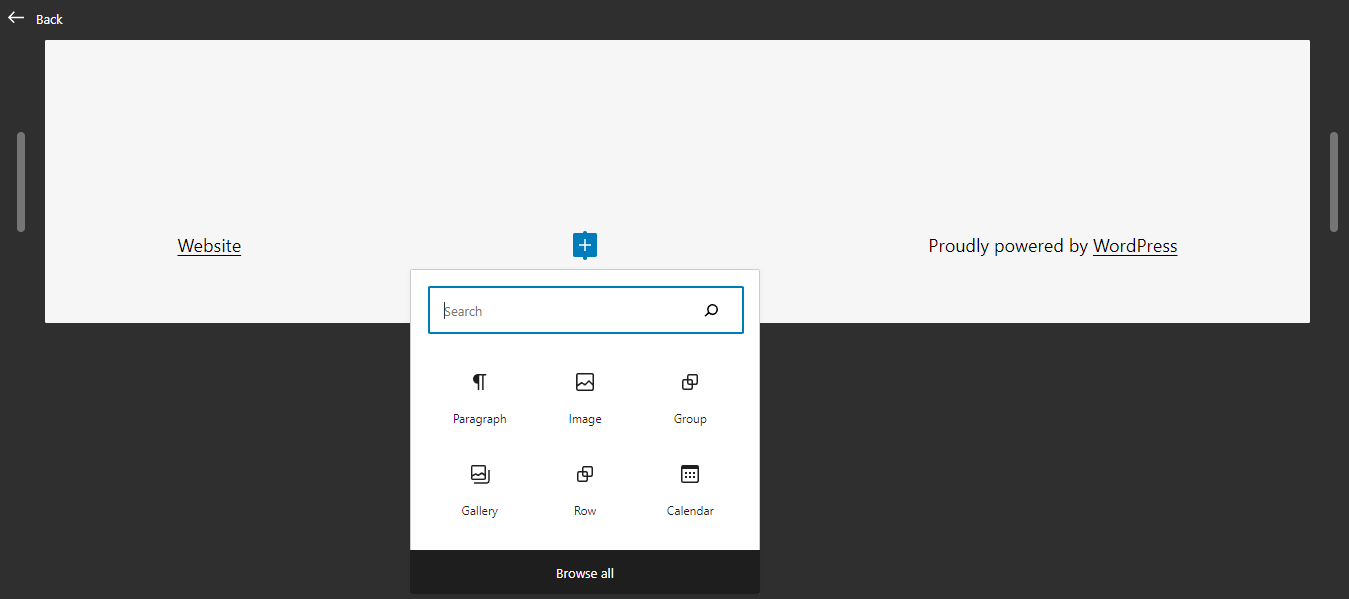
Start editing it by adding blocks to the footer. To do so, hover over the area and plus (+) icons will appear on locations that are available for blocks. Click the icon and pick a block to add. You can search the desired block or click Browse all to see all available blocks.
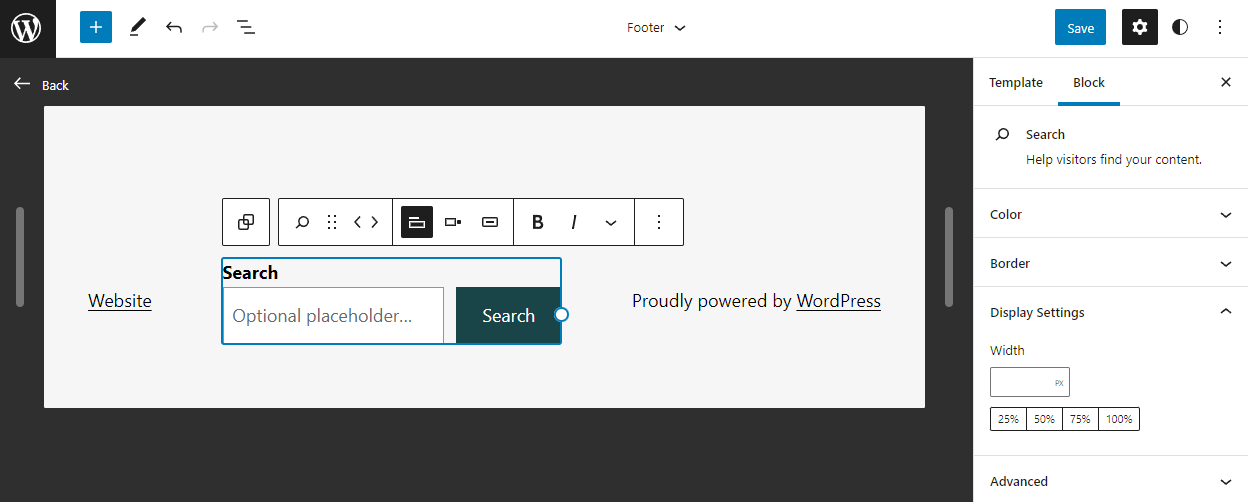
For example, let’s add a Search block to the footer. You can change the title’s text and include an optional placeholder directly on the editor.
To customize the button’s design, select the block on the editor and click the Settings icon on the top-right area of the screen. Depending on the block type, you can customize its color, border, and use the additional CSS field.
To rearrange the blocks on the footer, open the list view by clicking on the list icon on the top-left section of the screen.
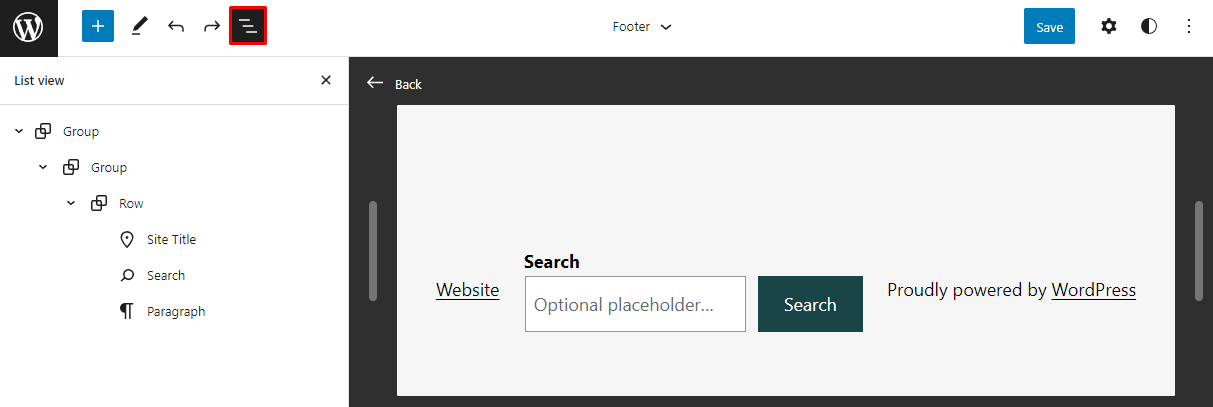
The list of blocks and their structure will appear on the left panel. Simply drag and drop a block item on the list to rearrange it.
Remove the “Powered By WordPress” Footer
Most WordPress websites themes have the message “Powered by WordPress” at the footer. Sometimes it also includes the developer’s credits, such as “Theme by Developer A.”
Even though there’s nothing wrong with having the message on the footer, it might look unprofessional or even misrepresent your brand’s interests.
You can edit or remove the message by editing the footer.php file. To avoid issues, make sure you’ve made a backup of your website files before changing the file. Once you’re ready to go, continue with the following steps to remove “Powered by WordPress” from your footer:
- In the WordPress admin dashboard, navigate to Appearance → Theme Editor.
- Under the Theme Files section, click on Theme Footer (footer.php).
- Find the footer credit text “Powered by” and its code. In the WordPress Twenty Twenty theme, the code looks like this:
<p class="powered-by-wordpress"><a href="<?php echo esc_url( __( 'https://wordpress.org/', 'twentytwenty' ) ); ?>"><?php _e( 'Powered by WordPress', 'twentytwenty' ); ?></a></p><!-- .powered-by-wordpress -->
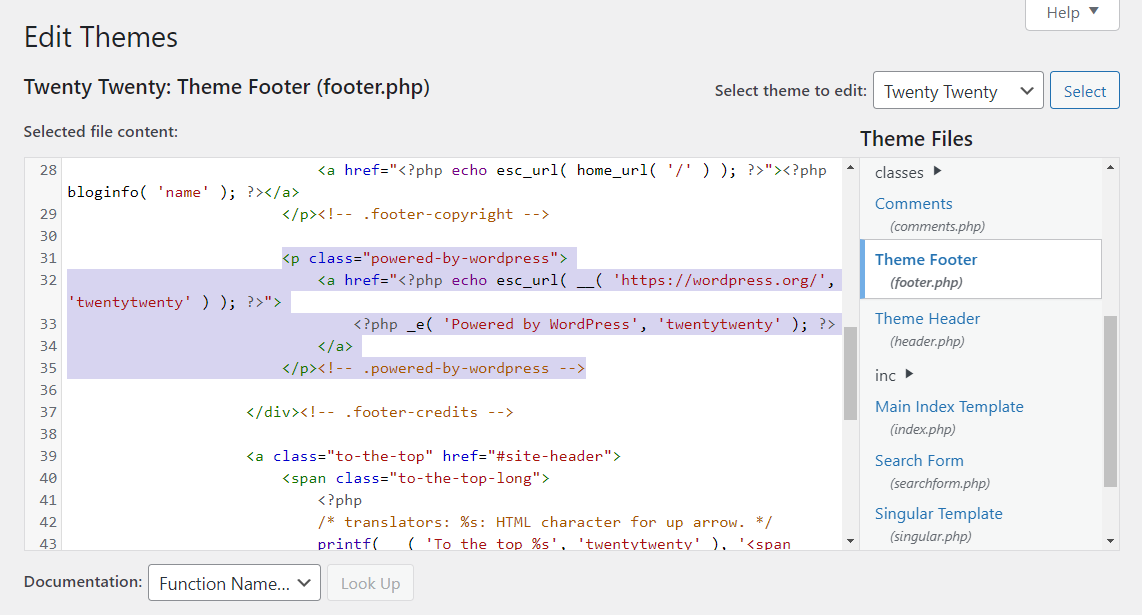
- Feel free to remove the footer text or add your website brand instead, and press the Update File button.
Adding Code to the WordPress Footer
At times, you may need to insert additional code to the footer, whether it’s CSS or PHP. Usually, it’s to connect your site with an external app or for design purposes. There are several ways to do so.
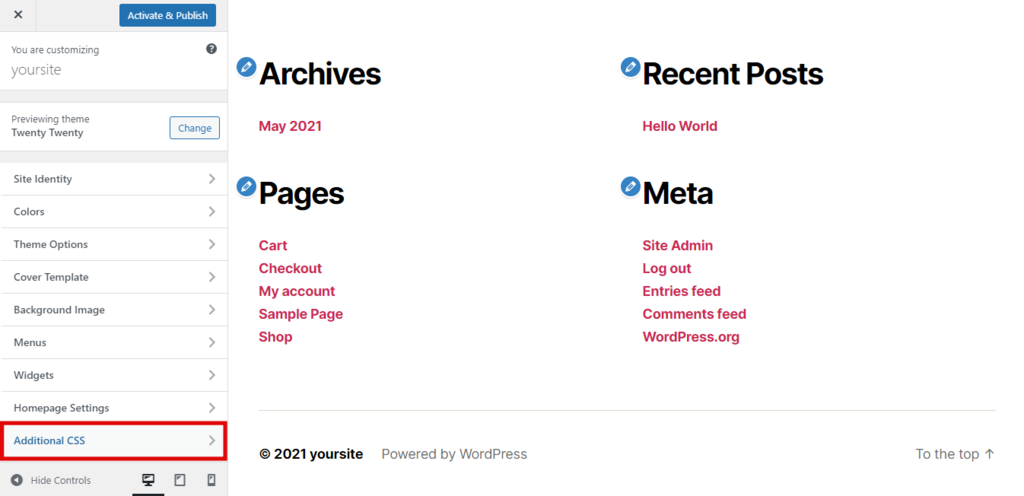
Use the Additional CSS field in the WordPress Customizer if you only want to make small changes to the footer. For example, changing the background color or the margin and padding of the content area:
- Access the WordPress Customizer, and select Additional CSS.
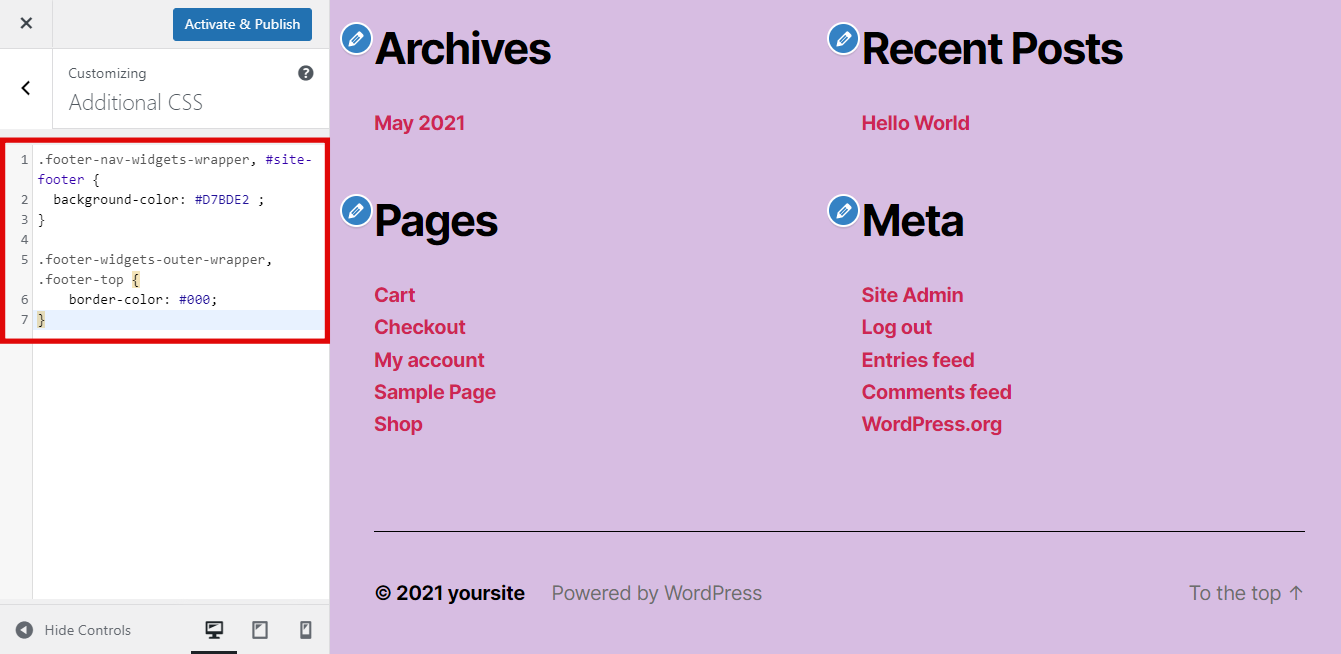
- Add the following code to change the footer’s background and border color:
.footer-widgets-outer-wrapper, .footer-top {border-color: #000;}.footer-nav-widgets-wrapper, #site-footer {background-color: #D7BDE2 ;}
- To edit the footer’s margin and padding, add the snippet below:
.widget .widget-title {margin-bottom: 1rem;}.footer-widgets a {padding-left: 5rem;}
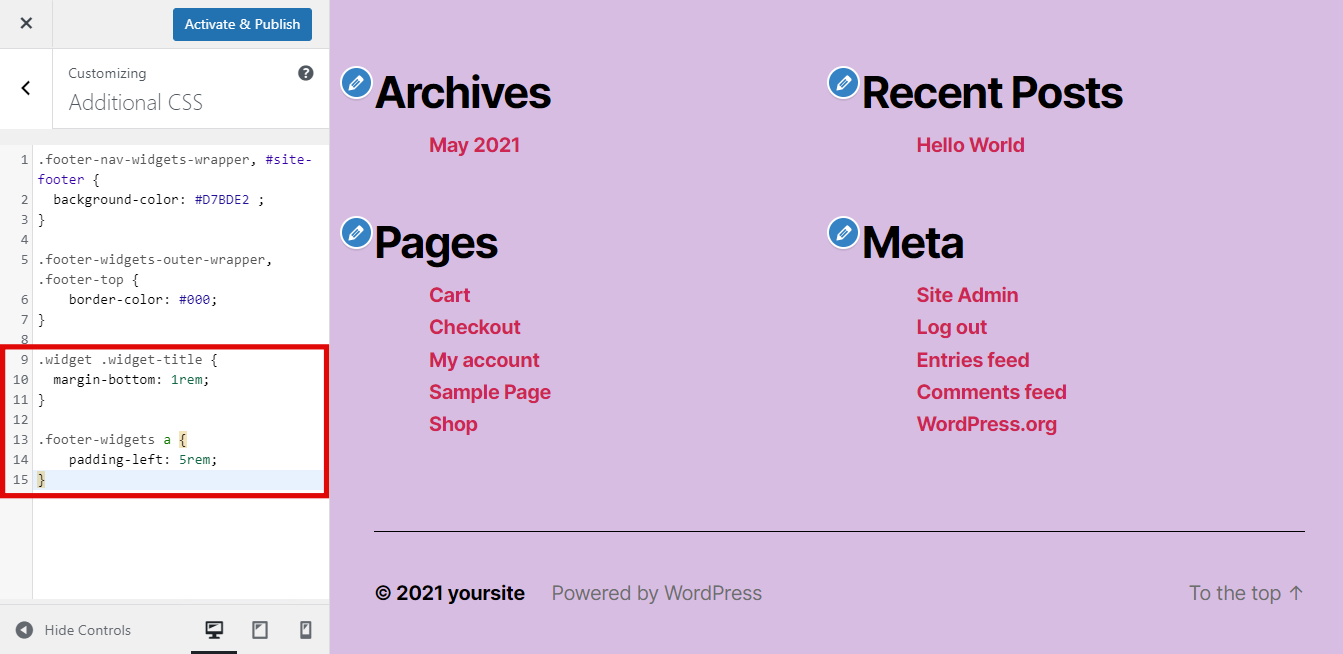
- Click the Activate and Publish button.
The easiest way to add custom scripts to the footer is by using the Insert Headers and Footers plugin:
- Install the plugin, and activate it.
- Go to Code Snippets → Header and Footer from the dashboard.
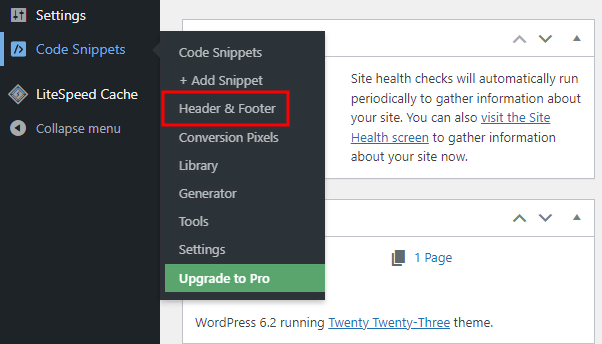
- Scroll down to the Footer section, then copy and paste your custom footer code.

- Click Save Changes.
It’s possible to add codes and scripts manually to the footer if you edit the WordPress theme’s PHP files. However, you’ll need to have some knowledge of HTML, CSS, JavaScript, plus web design and development.
Suggested Reading
3 Best WordPress Footer Plugins
If you want to edit the WordPress footer with a plugin, we recommend three tools: Insert Headers and Footers, Header Footer Code Manager, and Footer Mega Grid Columns. Let’s take a look at each of them.
1. Insert Headers and Footers
Plugin Stats:
- Downloads: 1 million+
- Rating: 4.5/5
- Notable features: user-friendly, Google Analytics compatible
- Best suited for: beginners looking for a simpler solution to add code snippets to the footer
- Price: free
Insert Headers and Footers is a plugin that helps you add code and scripts without having to edit the theme’s files. Its interface is very straightforward, making it an easy-to-use plugin for beginners.
You don’t need to know any programming languages to edit the footer with this plugin. Simply paste code from Google Analytics, Facebook Pixel, and other services to add them to your site.
Insert Headers and Footers supports custom CSS, HTML, and JavaScript.
2. Header Footer Code Manager

Plugin Stats:
- Downloads: 200,000+
- Rating: 5/5
- Notable features: enable codes in specific posts and pages, activity log
- Best suited for: users who want management options for the footer codes
- Price: free
Header Footer Code Manager is another tool that helps you add snippets to the footer with ease. Not only does it allow you to add unlimited scripts and styles but also to manage the code placement.
Other than specific pages and posts, the snippets can also be set to load on desktops and mobile devices or one of the two. Furthermore, you will still have the list of snippets ready to use even when you change themes.
The plugin comes with activity logs as well, so you know who added and last edited a snippet. Header Footer Code Manager supports CSS, HTML, and JavaScript codes from any service, including Google AdSense, Twitter, and Clicky Web Analytics.
3. Footer Mega Grid Columns

Plugin Stats:
- Downloads: 6,000+
- Rating: 4.5/5
- Notable features: grid view, compatible with most WordPress themes
- Best suited for: people who don’t want to use the theme’s default area
- Price: freemium
The Footer Mega Grid Columns plugin displays footer widgets in a horizontal grid, helping to organize your footer’s content in columns.
The plugin is pretty easy to use. Simply drag a widget and drop it on the column to display content on the footer in grid view.
If you want additional features like color options, multiple grids, and a custom CSS editor, the Essential Plugins bundle is available from $119/year.
Keep in mind that you need to paste the code provided by the plugin’s developer in the footer.php file of your theme for it to work.

Conclusion
In addition to the header and body, the footer is one of the main parts of a website. It’s located at the very bottom of the site, mainly consisting of additional information and links to different pages on the website.
Thus, the footer helps WordPress users improve their websites’ SEO and navigation.
In this article, you’ve learned different ways on how to edit footer in WordPress:
- Via the WordPress widgets system.
- Using WordPress Customizer to edit your theme.
- Using the block editor in WordPress 5.9.
- Removing the “Powered by WordPress” text.
- Adding code and scripts.
- Using a WordPress plugin.
If you have any questions or suggestions about how to edit the footer in WordPress, feel free to leave us a comment below.
Learn What Else You Can Do With WordPresss
What Is WordPress Sidebar
How to Edit a WordPress Header
How to Delete All Comments in WordPress
How to Setup Push Notifications in WordPress
How to Embed a Video in WordPress
Guide to WordPress Security
How to Set Up WordPress Auto-Update
Guide to WordPress Private Pages and Posts

Domantas leads the content and SEO teams forward with fresh ideas and out of the box approaches. Armed with extensive SEO and marketing knowledge, he aims to spread the word of Hostinger to every corner of the world. During his free time, Domantas likes to hone his web development skills and travel to exotic places.
