How to Add Images to WordPress Using the Block and Classic Editor + Steps to Edit Images
Using images can make your WordPress blog posts more appealing, as they break up lengthy text. Moreover, adding images will help you illustrate your points.
With the right image optimization strategy, you can also improve your WordPress site performance and position in search engine results pages (SERPs). The process involves various practices like optimizing the image size, file format, and ratio.
In this article, we’ll show you how to add images to a WordPress blog post or page via the block and classic editors, as well as the Media Library. You will also learn how to edit the image size and details in the WordPress CMS.
Download all in one WordPress cheat sheet
How to Add Images to WordPress Using the Block Editor
The block editor, also known as Gutenberg, is the default WordPress editor that uses blocks to add elements like images, paragraphs, and headings. It also enables you to add a post to a dedicated blog page using the Query Loop block.
Adding images with the Gutenberg editor is relatively easy. All you have to do is upload an image file from your local computer, select one from the Media Library, or insert it via a URL. In this section, we’ll go over all these methods.
First, log in to your WordPress dashboard and create a new post. In the post editor screen, insert the Image block using the Toggle Block Inserter button. Alternatively, use the keyboard shortcut /images to quickly add the Image block to the editor.

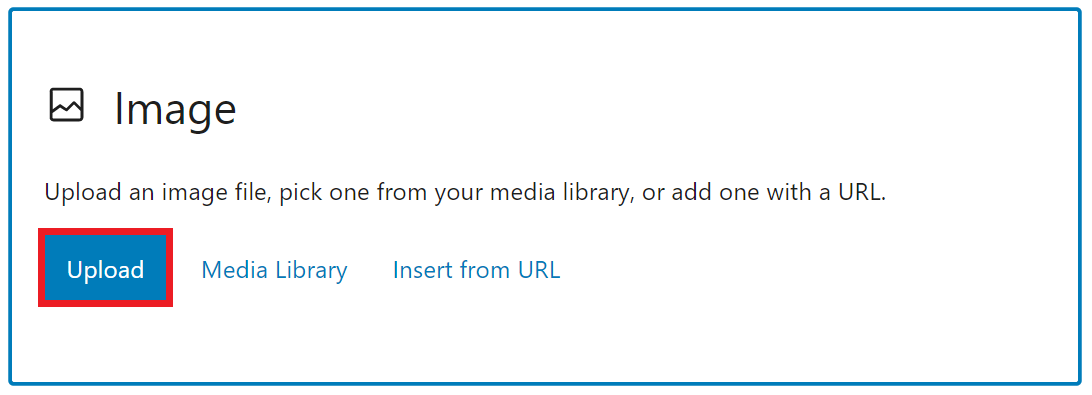
Adding an Image from Local Computer
To add an image file from your computer, follow the steps below:
- Click the Upload button on the Image block to open your computer’s files.
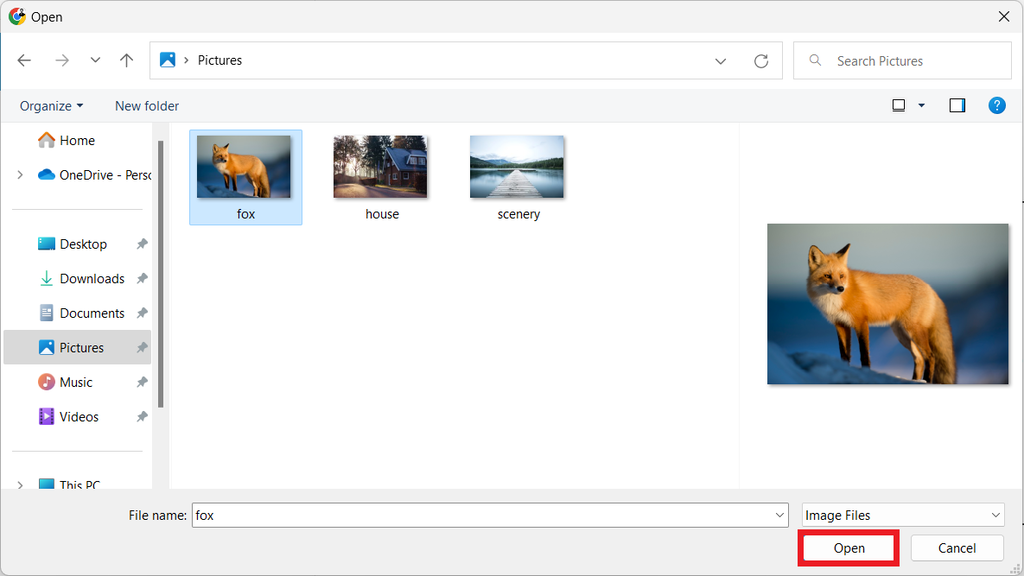
- Navigate to the folder where you store the images. Select an image and click Open.
Here is an example of an image in a blog post:
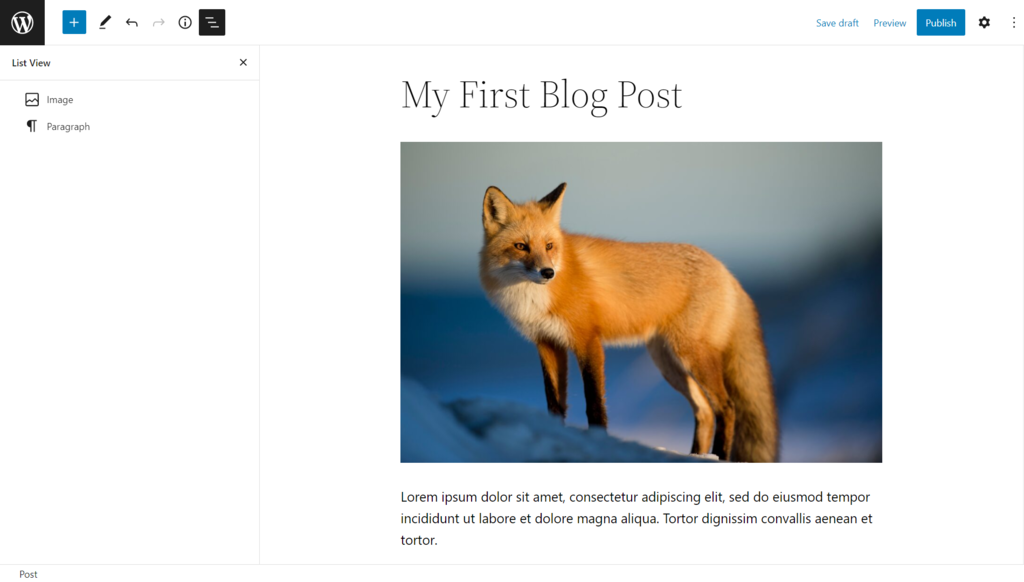
- Save the changes.
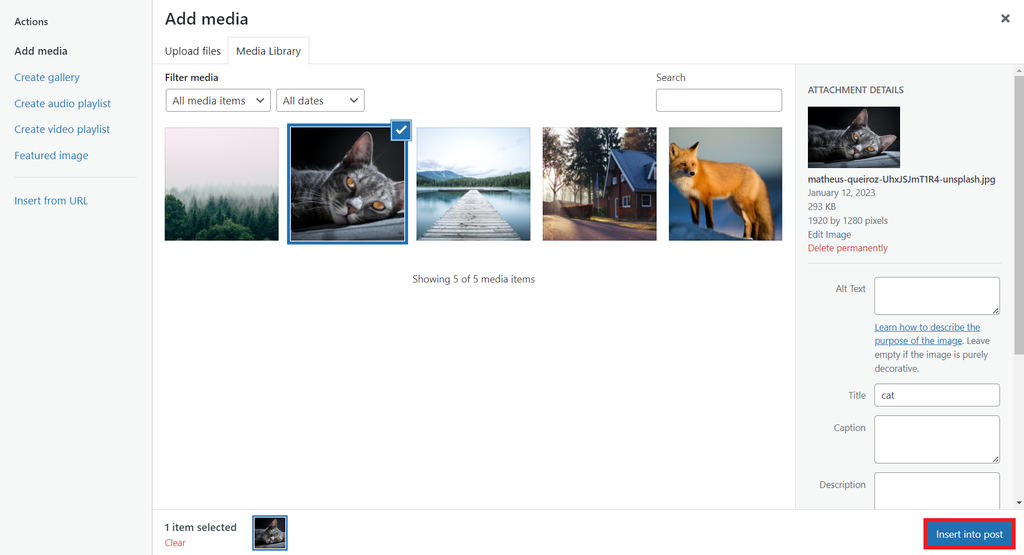
Inserting an Existing Image from Media Library
Alternatively, try inserting images from the Media Library. Here are the steps:
- Click the Media Library button on the Image block.
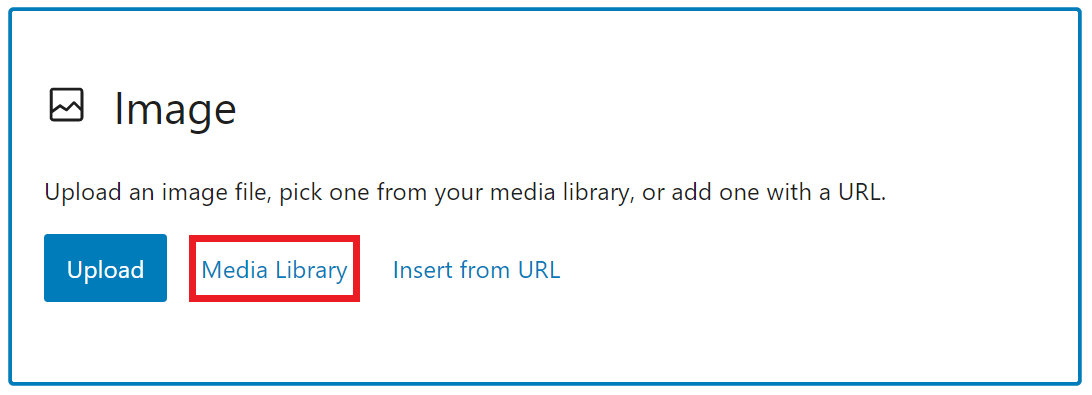
- Select an existing image from the Media Library and click Select.
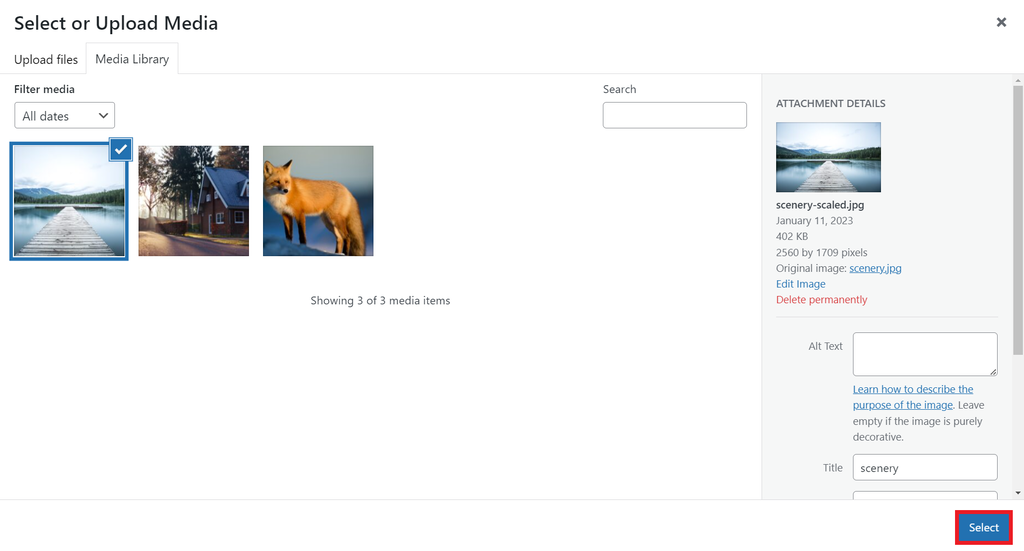
- Save the changes.
Adding an Image via a URL
The Image block enables you to insert an image using a custom URL. To do so, follow the instructions below:
- Click the Insert from URL button on the Image block to open the URL text field.
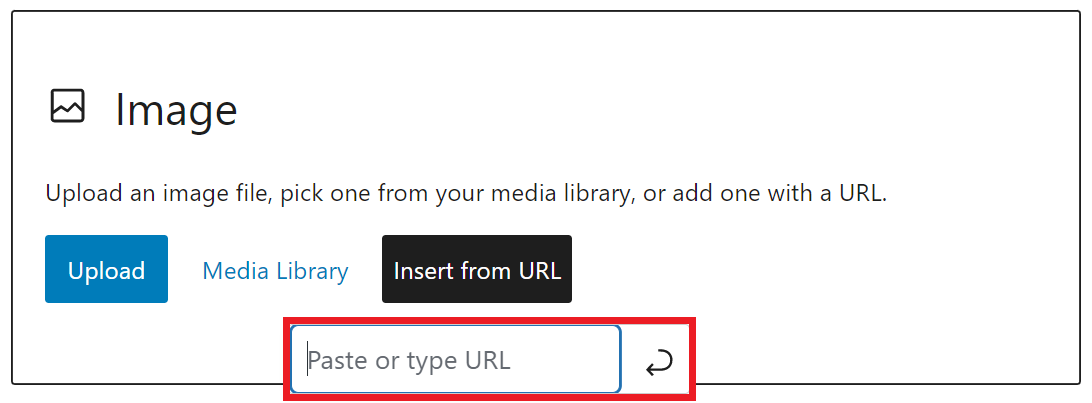
- Copy the URL that contains your preferred image. For this tutorial, we took a picture from Unsplash. Right-click on the image and select Copy image address.

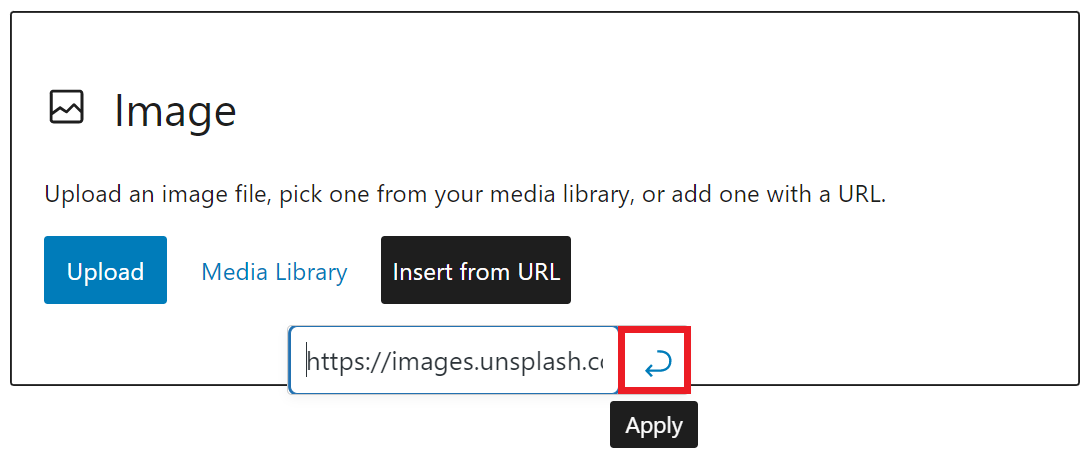
- Go back to the block editor and paste the URL to the field. Click the Apply button or hit Enter on your keyboard.
- Save the changes.
Moreover, WordPress enables you to set a featured image or a post thumbnail. Here are the steps to do so:
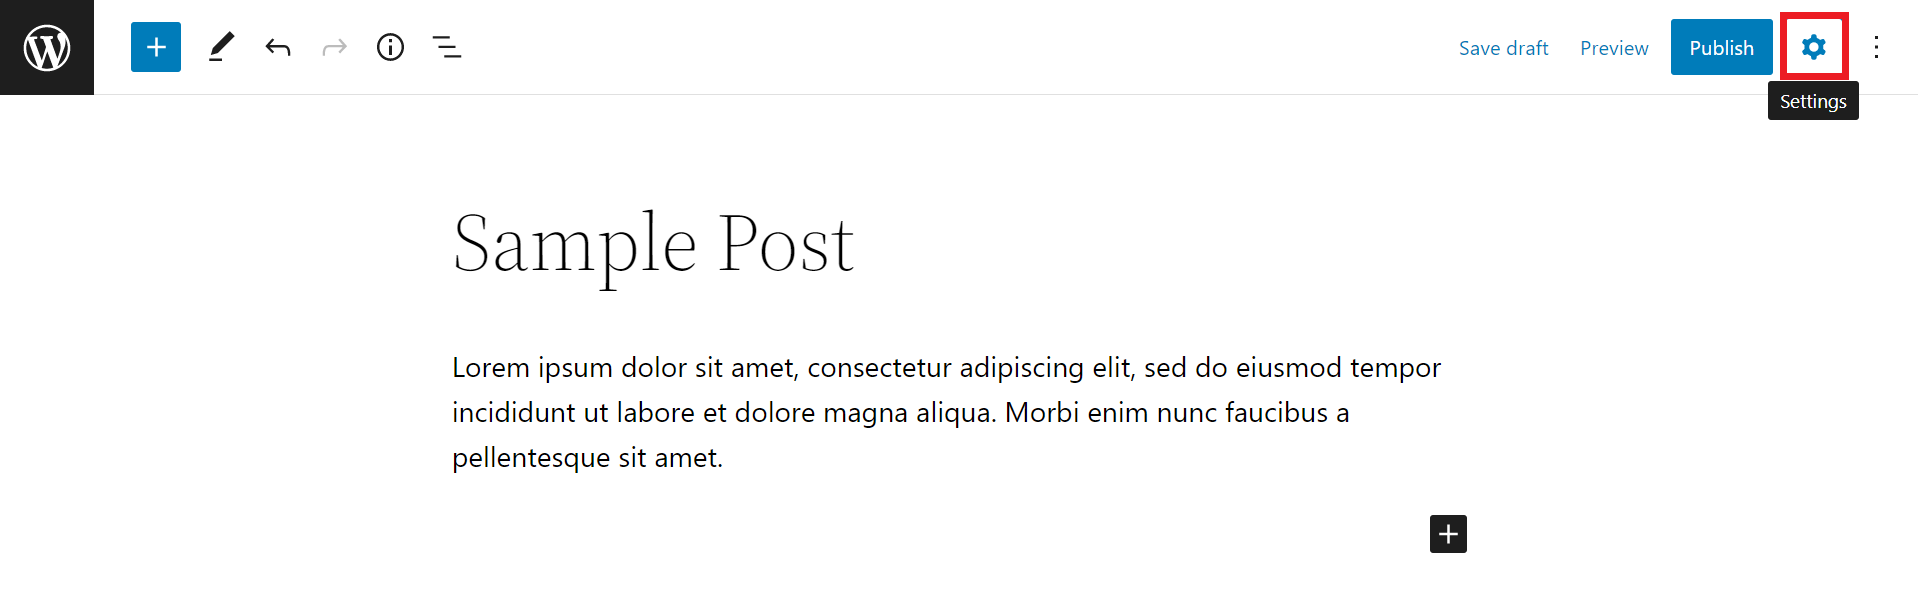
- From the block editor, open the block settings panel by clicking on the gear icon between the Publish button and the three dots menu.
- On the settings panel, navigate to the Post tab → the Featured image section. Next, click the Set featured image area.
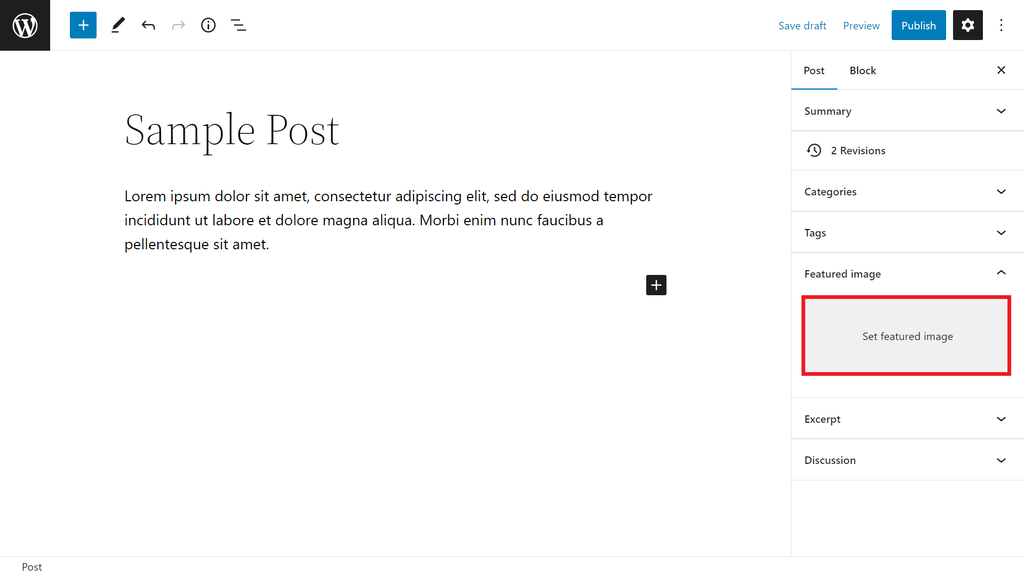
- In the Media Library window, either upload a new image or select an existing one. Once added, click the Set featured image button.

- Save the changes.
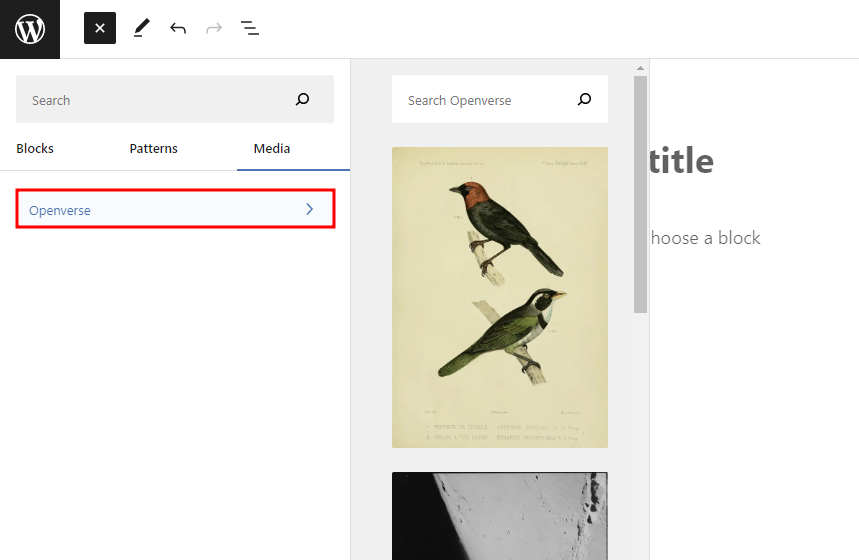
Adding an Image from Openverse
WordPress 6.2 comes with Openverse integration, allowing you to add openly-licensed images directly from your editor.
To access this feature, select the block inserter from the top-left corner of the editor screen and open the Media tab. Click Openverse and select or search for any image to add it to the editor. WordPress will automatically store the image in the media library.
How to Add Images to WordPress Using the Classic Editor
To add images using the classic WordPress editor, you will need to install the Classic Editor plugin. This is because newer WordPress versions don’t have the classic editor by default.
Once the plugin is activated, set the classic editor as default. From the WordPress dashboard, navigate to Settings → Writing → Default editor for all users. Then, check the Classic editor option and click Save Changes to confirm.
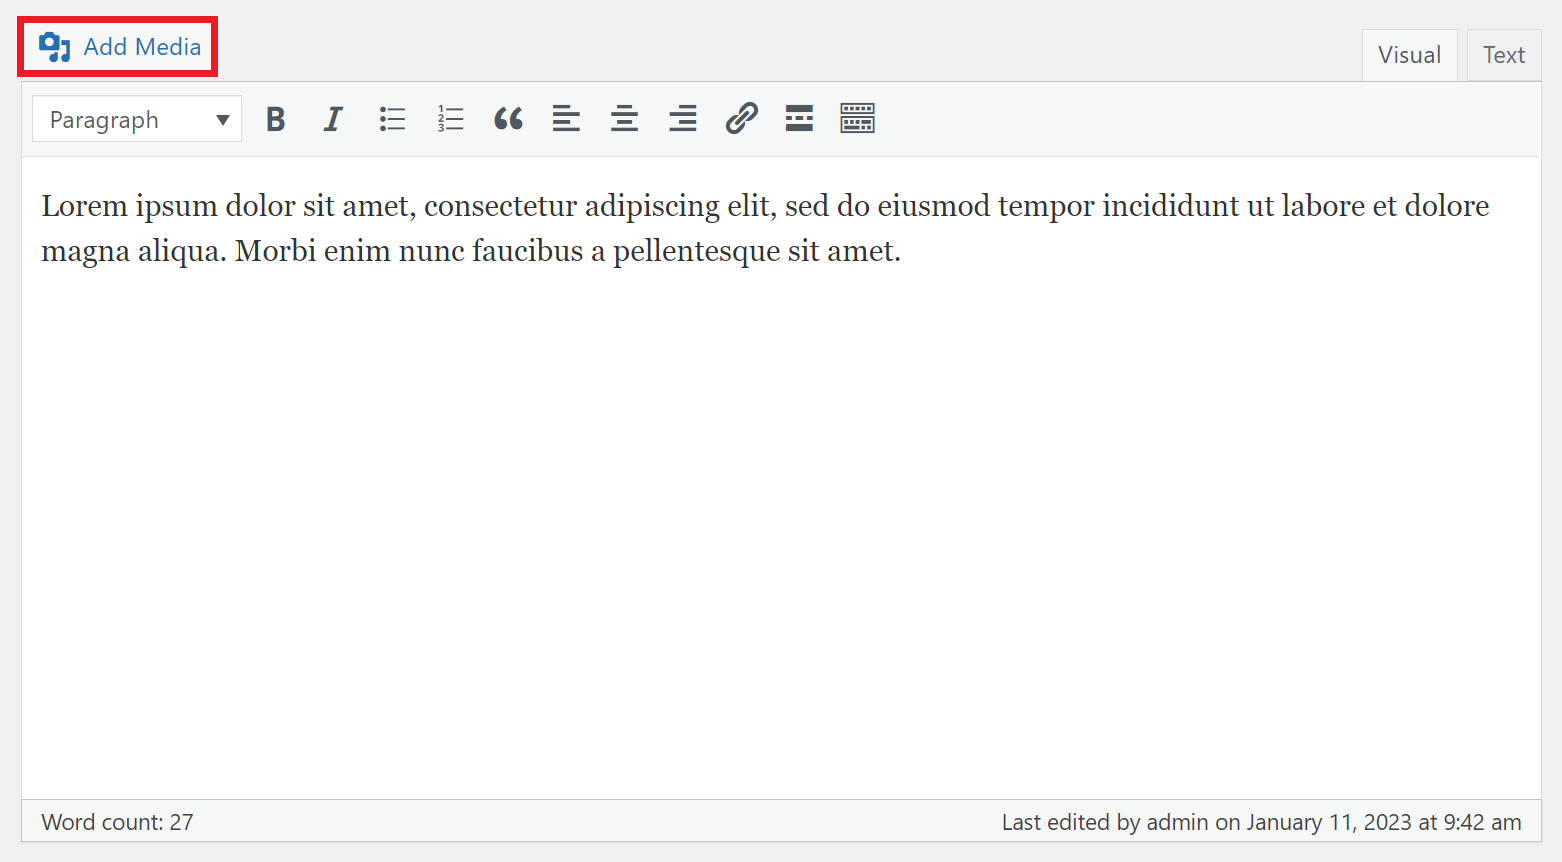
Unlike the block editor, adding images to a WordPress post using the classic editor can be done via the Media Library. Here are the steps:
- Create a new WordPress post and open it using the classic editor.
- Click the Add Media button to open the Media Library.
- On the Add Media window, select the Upload files tab and click the Select Files button to upload an image.
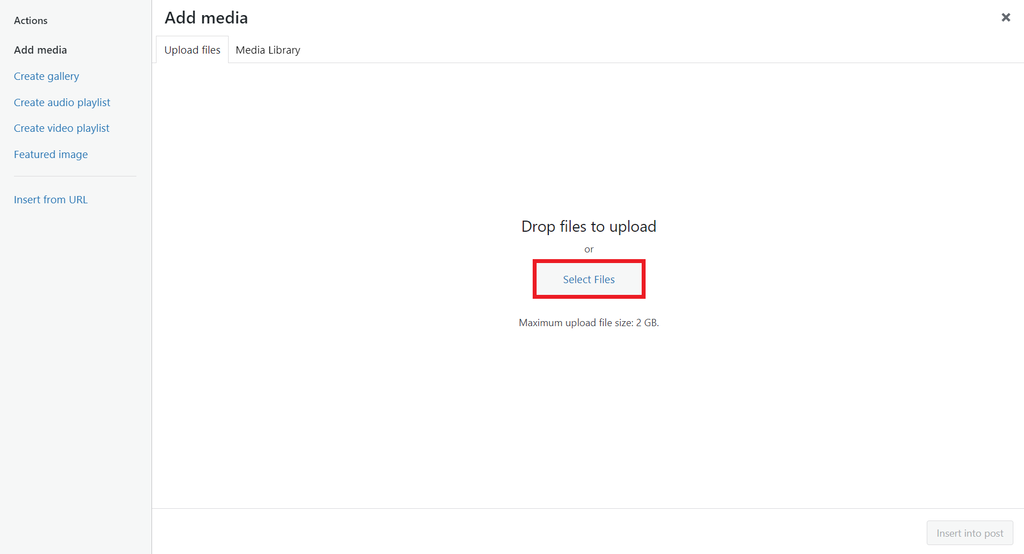
- Once the upload process is complete, click the Insert into post button to add the image to the editor.
- Save the changes.
How to Add Multiple Images Using WordPress Media Library
The WordPress Media Library is a library that stores media files, such as videos, images, audio, and documents, in one directory. It also lets you upload multiple images at once.
Follow the instructions below to upload images to the Media Library:
- From the WordPress dashboard, navigate to Media → Library.
- In the Media Library screen, click the Add New button.
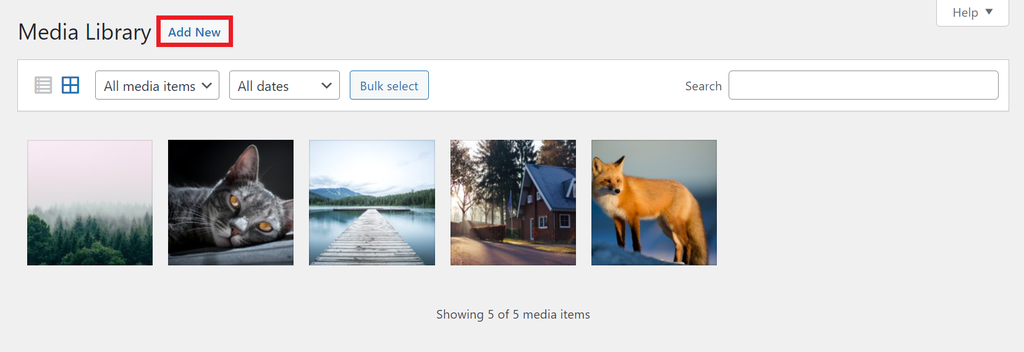
- Click the Select Files button to upload images from your computer. Alternatively, drag and drop them into the provided field.

- Wait until the upload process is complete. Once finished, you can add the images to a page or post.
How to Edit Images in WordPress
WordPress enables you to edit images, such as changing the size and adding details. In this section, we will show you how to use these features.
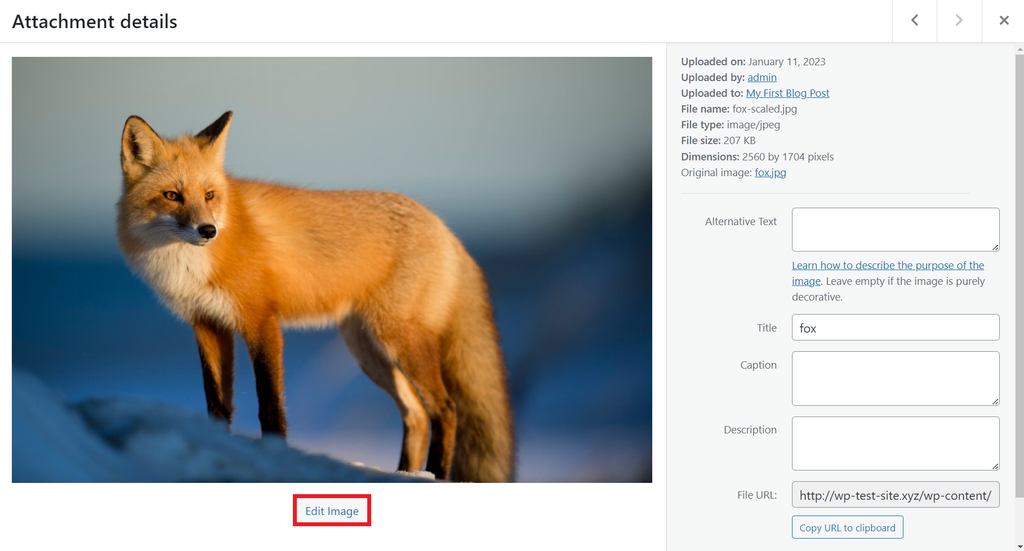
How to Edit Your Image Size in WordPress
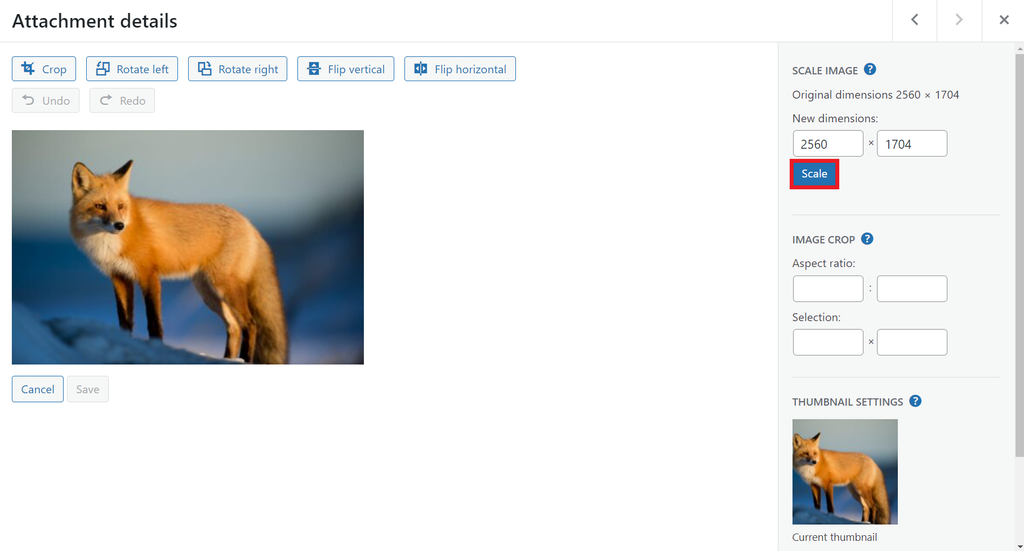
You can crop and scale an individual image via the Media Library. Follow the steps below:
- Open the WordPress admin dashboard and go to Media → Library.
- Select a picture you want to resize.
- In the image settings or attachment details window, click the Edit Image button.
- Go to the Scale Image section on the right side of the image settings screen, then define new dimensions. Note that you can only scale images down.
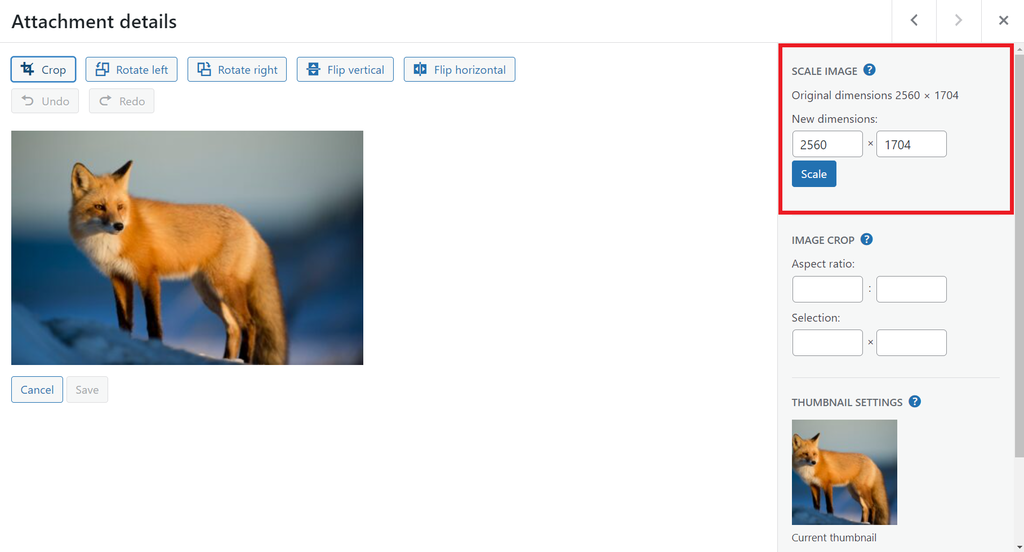
- Click the Scale button to confirm the changes.
It is also possible to change the WordPress images sizes to fit your preference and help optimize your images for increased web page speed and enhanced user experience.
Here are the steps to create custom sizes for these WordPress images:
- From the WordPress admin dashboard, navigate to Settings → Media.
- On the Media Settings screen, edit the values for the image max width and height.

- Save the changes.
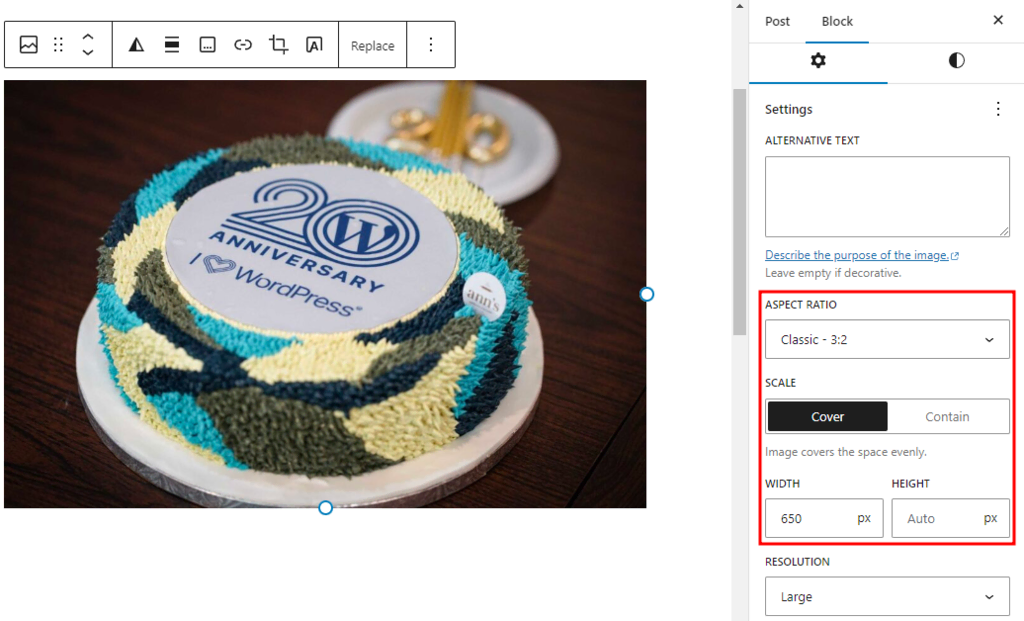
Alternatively, you can edit the image dimensions directly in the block editor. This is useful if you want to adjust the image based on the content around it.
To do so, open the post or page that contains the image you want to edit, and follow these steps:
- Select the Image block you want to edit.
- Open the block settings panel by clicking on the Settings button on the top right corner of the editor and open the Block tab.
- You can customize the image in several ways. First, you can select an aspect ratio from the Aspect Ratio dropdown menu to automatically adjust the image size using the predefined ratio.
Alternatively, you can use the Width and Height fields to define a custom dimension.
How to Edit Image Details in WordPress
Additionally, WordPress lets you edit the details of the images. For example, you can add alternative text or alt text, a description, and a caption.
In this section, we will show you how to insert details into your images. Follow the instructions below:
- From the WordPress dashboard, open the Media Library and pick an image.
- In the image settings window, add details to your image, such as Alternative Text, Title, Caption, and Description.

- Once finished, click the Close button to confirm the changes.
Conclusion
Adding images to a WordPress website is a great way to make your content look more engaging and enhance your SEO performance.
In this article, we provided a complete guide about adding images to your site via the WordPress block editor, the classic editor, and the Media Library. The methods are similar, so you can choose one that fits your preference.
Hopefully, this article has helped you understand how to add images in WordPress. If you have questions or difficulties, feel free to comment below, and we will give you answers. Good luck!

Information Technology and web development are Yoga's passions. He loves nothing more than sharing his experience with readers, and helping them to understand the world of IT. In his spare time, Yoga likes to make music and learn to code. He is always looking for new challenges, and enjoys pushing himself to learn new things.
