ERR_CONNECTION_REFUSED on Chrome: What It Is and How to Fix It
ERR_CONNECTION_REFUSED is an error message that you may see when using Google Chrome to access a website. Although frustrating, it usually indicates a client-side issue that is simple to resolve.
This guide will explain what the ERR_CONNECTION_REFUSED error is and how to troubleshoot it using 11 different methods.
| Error code | ERR_CONNECTION_REFUSED |
| Error type | Connection |
| Error variations | This site can’t be reached This page is unavailable Unable to connect Hmmm…can’t reach this page |
| Error causes | Faulty internet connection Google synchronization error Bad Google Chrome extensions Antivirus, firewall, or VPN interference Outdated browser or DNS cache |

What Is the ERR_CONNECTION_REFUSED Error?
The ERR_CONNECTION_REFUSED error message appears on Google Chrome when the browser’s attempt to connect to a web page is refused.
On Mozilla Firefox, this error produces the “Unable to connect” message. Meanwhile, Microsoft Edge displays “Hmmm…can’t reach this page” when the issue occurs.
In most cases, ERR_CONNECTION_REFUSED is a client-side error, which means that an issue on your machine has caused it. However, in rare cases, the ERR_CONNECTION_REFUSED error in Chrome can be caused by the target web server.
If you’re seeing ERR_CONNECTION_REFUSED on localhost though, the solution to your problem will be related to localhost as well.
Learn How to Fix ERR_CONNECTION_REFUSED With Hostinger Academy
Learn how to fix the ERR_CONNECTION_REFUSED error on your web browser.

11 Methods to Fix ERR_CONNECTION_REFUSED
This section will explore 11 methods to fix the ERR_CONNECTION_REFUSED error in Chrome.

The methods are mostly beginner-friendly, although some of them are advanced. We will walk you through each step, making the troubleshooting process as painless as possible. Let’s start.
1. Check Whether the Website Is Down
The ERR_CONNECTION_REFUSED error can sometimes be caused by issues with the website itself, such as server downtime. Before trying out the other methods, check if the site is accessible.
To check if a website is down, use free online tools such as Website Planet, Host Tracker, or Site24x7. All you have to do is input the website’s URL, and the tool will tell you the website status.
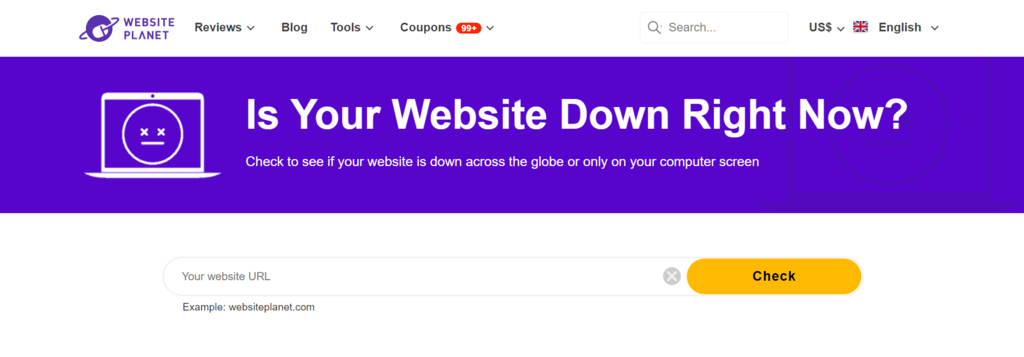
If the website is down for everyone, all you can do is wait for the website administrators to fix the issue. If not, the problem undoubtedly lies in your machine, and you can try the following methods.
Suggested Reading
Learn how to prevent website downtime and deliver a flawless user experience in this article.
2. Restart Your Network Router
You can often fix a faulty internet connection by simply restarting your router. Whenever you have connection issues, this method is always worth trying.
To restart your network adapter, locate your router and unplug the power. Wait 10-30 seconds before plugging the power back on. Once you’ve reconnected to the internet, try reaccessing the website.
3. Troubleshoot Internet Connection
Windows and macOS have built-in tools for troubleshooting connection issues. The troubleshooter can pinpoint the problem and offer possible fixes.
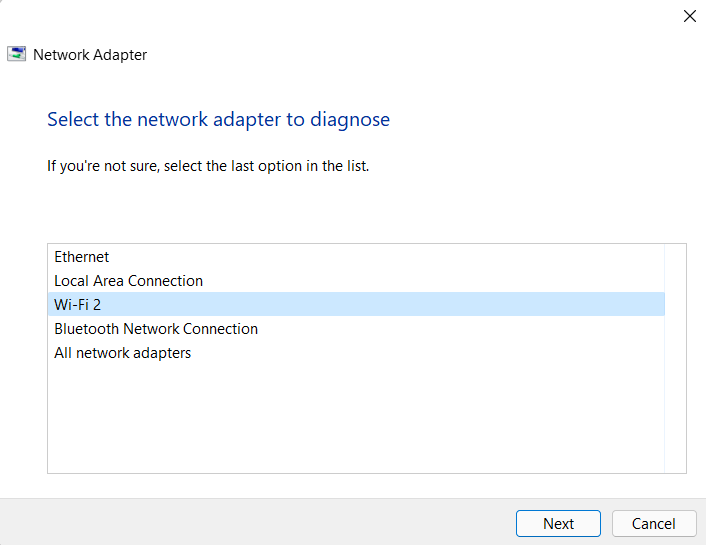
Follow these steps to start the connection troubleshooter on a Windows machine:
- Open Settings using the Start menu or pressing the Windows key + I.
- Navigate to the Network & internet menu.
- Press the Troubleshoot button.

- Select the network adapter you want to diagnose and click Next.
- Wait until the system finishes analyzing the issues.
- If issues are found, apply the suggested fixes.
- Close the troubleshooter and reboot the system.
For Mac users, here’s how to start the internet troubleshooter:
- Disconnect or unplug all external devices except your monitor and keyboard.
- Turn off the system.
- Turn the system back on while pressing and holding D.
- Choose your preferred language.
- Wait until Apple Diagnostics has finished running.
- If the system identifies issues with your connection, it will suggest possible solutions.
- Apply the suggested solutions and reboot the system.
Try revisiting the problematic web page after running the troubleshooter on your system. If the issue persists, try the other methods.

4. Turn Off Synchronization to Google
Problems with Google’s synchronization may cause the ERR_CONNECTION_REFUSED error in Chrome.
Here’s how to turn off synchronization on Google Chrome:
- Open the three dots menu located to the right of the address bar.
- Select Settings.
- Go to Sync and Google Services -> Turn off.

Check whether the error is solved. Don’t forget to turn on the synchronization again after browsing the website.
5. Check Google Chrome Extensions
Google Chrome extensions are great for extending Chrome’s functionality and improving the overall browsing experience.
However, many extensions are made by third-party developers and are not closely monitored by Google. Therefore, an outdated or problematic Google Chrome extension may be causing the error.
We suggest checking all the extensions installed on your Google Chrome browser. Make sure that they are all recently updated and uninstall any outdated ones.
This is also an excellent opportunity to disable Chrome extensions that are weighing down your browser. It’s vital to regularly audit installed extensions to prevent speed issues and security threats.
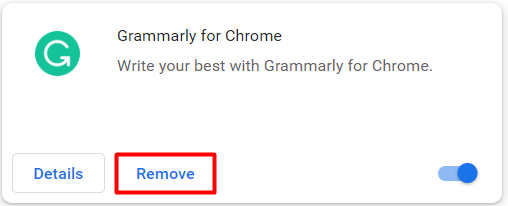
To remove a Google Chrome browser extension, follow these steps:
- Navigate to Chrome’s three dots menu -> More tools -> Extensions.
- In the Extensions menu, find the extension you want to uninstall and click Remove.
Finally, check whether you can access the website after uninstalling the extension.
6. Reinstall Chrome
Your current Google Chrome installation may have issues causing the ERR_CONNECTION_REFUSED error. The easiest way to revert Chrome to its original settings is to uninstall and reinstall it again.
But before you do this, consider a quicker way to revert the Chrome browser to its original settings by resetting it.
Follow these steps to reset Chrome:
- Open Chrome.
- Navigate to the three dots menu -> Settings -> Advanced.
- Click Restore settings to their original defaults.
- Select Reset settings.
If the error still appears, proceed to reinstall the Chrome browser. Here’s how to do it on Windows:
- Open Chrome.
- Download the latest version of Google Chrome to your computer.
- Open Settings -> Apps -> Apps & features.
- Find Google Chrome in the App list, expand the three dots menu, and click uninstall.

- After Chrome is successfully uninstalled, run the previously downloaded Chrome installer.
7. Disable Antivirus and Firewall
The purpose of antivirus and firewall programs is to protect your computer from security threats like viruses and malware. These programs regularly scan your files and network traffic for malicious activity and block them from infecting your computer.
However, antivirus and firewall programs are not perfect. Sometimes, they can block safe websites, preventing users from accessing them. Instead of opening the website normally, the ERR_CONNECTION_REFUSED error may appear on your browser instead.
Temporarily disabling the antivirus and firewall might fix this error. That said, make sure that the website you’re trying to access is safe before you try this method.
Here’s how to disable the antivirus software and firewall on Windows if you’re using the default Windows Defender Firewall:
- Access Windows Security by going to Settings -> Privacy & security.
- Click Virus & threat protection.
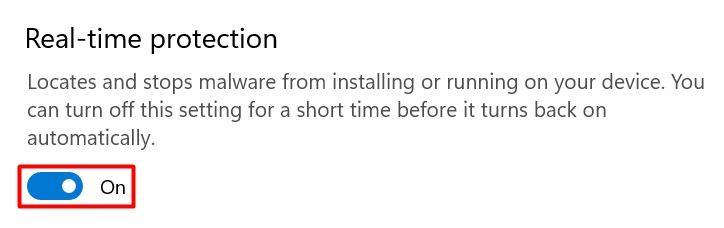
- Under Virus & threat protection settings, select Manage settings.
- Switch off Real-time protection.
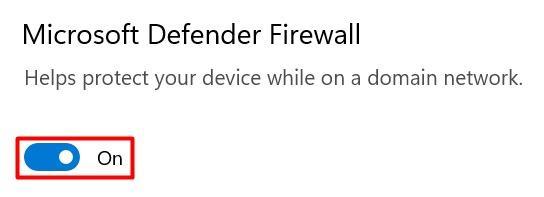
- Go to Firewall & network protection.
- Open each network profile – domain network, private network, and public network and disable Microsoft Defender Firewall.
If you’re using a macOS machine, follow these steps to turn off the built-in firewall temporarily:
- Click the Apple logo at the top left corner.
- Select System Preferences -> Security and Privacy.
- Select the Firewall tab to expand its settings.
- Click the lock icon and enter your username and password.
- Once it’s unlocked, select Turn off Firewall.
- Click the lock icon again to prevent further changes to the firewall settings.
If you use third-party antivirus and firewall software, the steps to disable it will be specific to the software. We recommend studying the software’s documentation to learn how to do it correctly.
Keep in mind that you should only disable your antivirus and firewall software temporarily. You risk getting viruses or malware if you keep them off. After trying this method, quickly restore the antivirus and firewall software to its original state.
8. Deactivate Your VPN
For many people, having a VPN is essential for ensuring their online privacy. A VPN lets users mask their actual IP address, making them appear to be browsing the internet from another location.
However, some VPNs might interfere with the connection and trigger the ERR_CONNECTION_REFUSED error in Chrome. Deactivating the VPN temporarily may fix the issue.
Most VPN services make activating and deactivating VPN easy. For example, here’s how to deactivate NordVPN:
- Open the NordVPN client.
- Make sure you’re connected to a server and select Disconnect.
- Select how long you want to pause the VPN connection for.
Don’t forget to reconnect to the VPN once you’re done trying this method.
9. Clear Browser Cache
The browser cache is where Chrome stores cookies, login data, and other information to speed up the website loading process and personalize the user experience.
It’s possible that your browser currently stores an outdated cache of the problematic website, triggering the ERR_CONNECTION_REFUSED error. Clearing the browser cache will force your browser to fully reload the website’s data, updating the cache to its latest version.
Another way to quickly open a web page without using the existing cache is to open the website in incognito mode or use a different browser. If the error message still appears, go ahead and clear your browser cache in Chrome:
- Navigate to the three dots menu -> More tools -> Clear browsing data.
- In the Time range drop-down menu, select All time.
- Make sure that all the browsing data, including browsing history, cookies and other site data, and cached images and files are selected. Then, click Clear data.

Try reaccessing the problematic website. If the ERR_CONNECTION_REFUSED error message persists, proceed to the following method.
10. Flush DNS Cache
The browser cache is not the only place where website data is kept locally on the client’s computer. Every computer also stores a Domain Name System (DNS) resolver cache stored in the operating system rather than the browser.
Flushing the DNS cache will force your computer to redownload the latest DNS information of the website, which might fix the ERR_CONNECTION_REFUSED error.
For Windows users, follow these steps to flush the DNS cache:
- Open the start menu and search for Command Prompt.
- Right-click it and select Run as administrator.
- Type in this command and press Enter:
netsh winsock reset catalog
- Next, type in the following DNS flush command and press Enter again:
ipconfig /flushdns
If you use macOS, here’s how to clear the DNS cache:
- Click the Spotlight Search button, search for Terminal, and open it.
- Type in the following command in Terminal and press Enter:
sudo dscacheutil -flushcache; sudo killall -HUP mDNSResponder
- Enter your password when prompted to begin the DNS cache flush.
Once the DNS resolver cache is cleared, try to reaccess the problematic website and see if the ERR_CONNECTION_REFUSED error message persists.
11. Configure Proxy Server Settings
Aside from VPNs, people also use proxy servers to protect their privacy online. A proxy server lets you browse under a different IP address and filter communication and cache data.
However, a proxy server can also cause connection issues like ERR_CONNECTION_REFUSED.
There can be a variety of causes, such as incorrect proxy configuration, caching errors, or the web server blocking the proxy and the IP address attached to it. It’s also possible that the proxy you’re using has gone offline.
So, if you’re using a proxy, it’s worth checking whether its settings are correctly configured.
Here’s how to check proxy settings on a Windows system:
- Open Control Panel.
- Navigate to Network and Internet -> Internet Options -> Connections -> LAN Settings.
- Make sure to uncheck both Automatically detect settings and Use a proxy server for your LAN (These settings will not apply to dial-up or VPN connections).
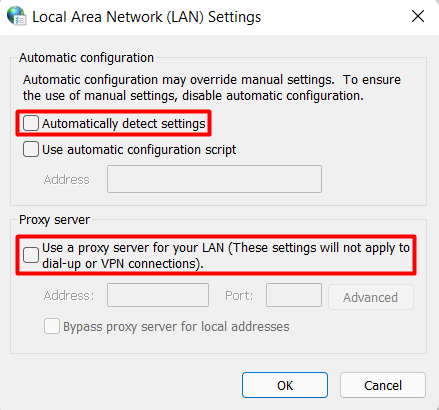
- Click OK.
If you use macOS, here’s how to access proxy settings and adjust them:
- Click the Apple logo -> System preferences.
- Open proxy settings in Network -> Advanced -> Proxies.
- Uncheck all selectable proxy protocols.

- Click OK.
Once your proxy is disabled, try reloading the web page. If the ERR_CONNECTION_REFUSED persists, there’s one final method you can try.
12. Change DNS Server
An overloaded or inactive DNS server can be the culprit of ERR_CONNECTION_REFUSED.
By default, every internet user uses their internet service provider’s (ISP) DNS server address. You’re free to change the DNS address if you need to.
To find out if your current DNS server is causing the problem, try changing your default DNS address to one of the following:
- Google Public DNS: 8.8.8.8 or 8.8.4.4
- Cloudflare DNS: 1.1.1.1 or 1.0.0.1
- OpenDNS Home: 208.67.222.222 or 208.67.220.220
- AdGuard DNS: 94.140.14.14 or 94.140.15.15
- Quad9: 9.9.9.9 or 149.112.112.112
Here’s how to change your DNS settings on Windows:
- Open the Start menu -> Settings -> Network & internet.
- Select the internet connection you want to assign the new DNS to. In this tutorial, we’ll select Wi-Fi.
- Open Hardware properties.
- Next to DNS server assignment, click Edit.
- If it’s set to Automatic, change it to Manual.
- Choose the internet protocol version (IPv) that your ISP requires. Most ISPs use IPv4 by default, but some require IPv6 addresses.
- In this example, we’ll switch to Google Public DNS. Enable IPv4 and enter Google Public DNS’s Preferred DNS server and Alternate DNS server.
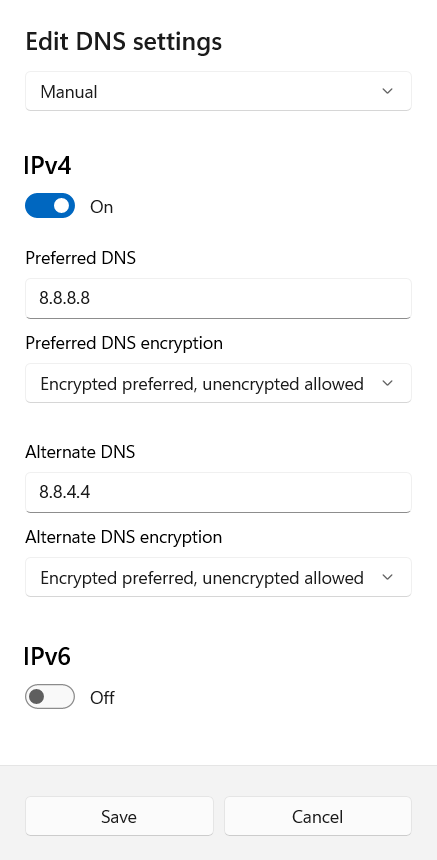
- Some DNSs are encrypted, which is better for security. To make sure encryption is enabled, choose Encrypted preferred, unencrypted allowed for each DNS address.
- Click Save.
Here’s how to change the DNS servers on macOS:
- Click the Apple logo -> System Preferences.
- Open Network.
- In the left sidebar, select the network you want to assign the new DNS to.
- After the network is selected, click Advanced.
- In the new window, open the DNS tab.
- Remove the existing DNS servers.
- Click + to add the new DNS server addresses.
- Enter your preferred public DNS address. In this example, we’ll use Google Public DNS.
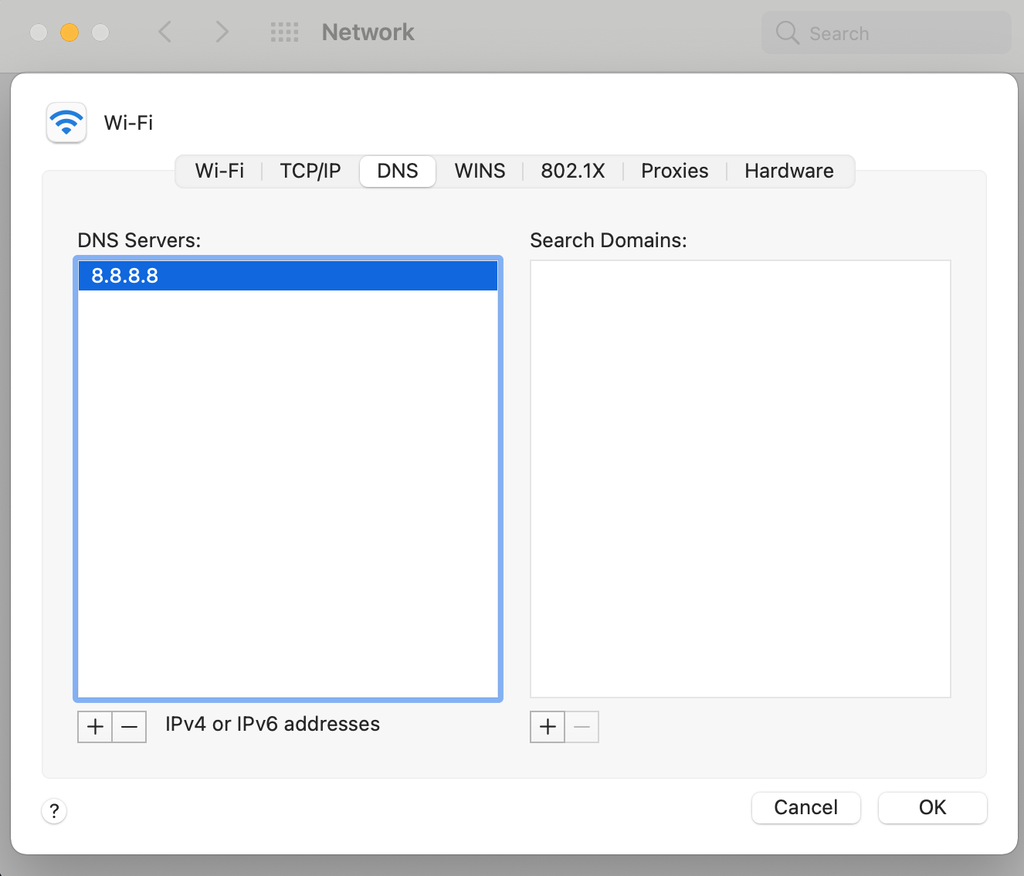
- Click OK.
Unfortunately, custom public DNSs can run into problems as well. If you happen to use a custom DNS server already, try reverting to your ISP’s original DNS as this can sometimes fix the ERR_CONNECTION_REFUSED error.
Find Out the Ways to Solve Other Similar Errors
How to Fix the ERR_CACHE_MISS
How to Fix the ERR_NAME_NOT_RESOLVED
How to Fix the ERR_TOO_MANY_REDIRECTS
How to Fix the ERR_CONNECTION_RESET Error
How to Fix the ERR_CONNECTION_TIMED_OUT Error
How to Fix the ERR_CONNECTION_CLOSED Error
How to Fix the PR_END_OF_FILE_ERROR
Ways to Fix INET_E_RESOURCE_NOT_FOUND Error
How to Fix “Your Connection Is Not Private” Error
Conclusion
ERR_CONNECTION_REFUSED is a client-side error that can be caused by a variety of factors, including an unreliable internet connection, Chrome extension issues, antivirus and firewall interference, and incorrect internet settings.
In this guide, we went over 11 methods to solve the ERR_CONNECTION_REFUSED error. These methods include:
- Checking if the website is down
- Restarting your network adapter
- Troubleshooting your internet connection
- Turning off synchronization to Google
- Checking Google Chrome extensions
- Reinstalling Chrome
- Disabling antivirus and firewall
- Deactivating VPN
- Clearing cache
- Flushing DNS cache
- Configuring proxy server settings
- Changing the DNS server address
We hope that one of these methods has helped you fix the ERR_CONNECTION_REFUSED error. If the error persists, we recommend contacting your hosting provider for help.
ERR_CONNECTION_REFUSED FAQ
Here are some frequently asked questions about ERR_CONNECTION_REFUSED.
Why Do Some Sites Refuse to Connect?
Some sites may refuse to connect due to issues such as server downtime, network connectivity issues, DNS problems, or firewall settings. Additionally, some sites may be blocked by a user’s ISP or by government censorship, while others may be down temporarily for maintenance or updates.
What Is the Difference Between an ERR_CONNECTION_REFUSED Error and an ERR_CONNECTION_TIMED_OUT Error?
An ERR_CONNECTION_REFUSED error occurs when the destination server actively rejects a connection attempt, while an ERR_CONNECTION_TIMED_OUT error occurs when the destination server does not respond within a set time frame. The former indicates a server-side issue, while network connectivity issues can cause the latter.
Can I Prevent ERR_CONNECTION_REFUSED Error from Happening?
As an end-user, you cannot prevent an ERR_CONNECTION_REFUSED error from happening since it indicates a server-side issue. However, you can try refreshing the page, clearing your browser cache and cookies, checking your network connectivity, or contacting the website administrator to resolve the issue.

Hasna is passionate about tech, culture, and the written word. She hopes to create content that helps people succeed on the web. When not writing, rearranging, or polishing sentences, she enjoys live music and overanalyzing movies.