How to Fix ERR_CACHE_MISS Error in Google Chrome: 7 Proven Methods
If you’ve been using the Google Chrome extension for a while, there’s a chance you’ve encountered an error message that says ERR_CACHE_MISS.
This Chrome error indicates that there is an issue related to the cache. Usually, this error occurs when you try to submit information to a website.

However, it’s not a critical issue, and you can solve it yourself. We will explain what ERR_CACHE_MISS error means, and then we’ll show seven proven methods to fix it so you can immediately get back to browsing.
| Error code | ERR_CACHE_MISS |
| Error type | Browser error |
| Error variations | net::ERR_CACHE_MISS Confirm Form Resubmission ERR_CACHE_MISS NET ERR_CACHE_MISS |
| Error causes | Browser extensions Cache or cookies DNS configurations Chrome version |
What Is the ERR_CACHE_MISS Error
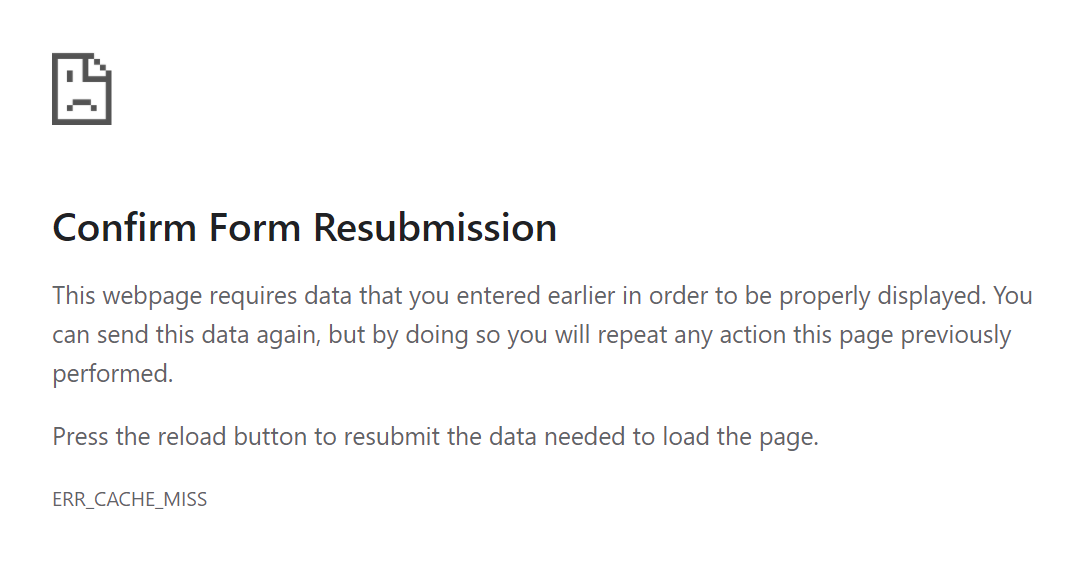
ERR_CACHE_MISS is a common error that indicates a caching-related issue. When it happens, the browser will show a message that reads Confirm Form Resubmission.
This error almost only appears on the Google Chrome browser. On different browsers, the message may vary. For example, on Firefox, a similar error message says Document Expired.
The Confirm Form Resubmission message may appear when a Chrome user clicks the reload button, refreshes a page, or clicks the back button after submitting a form to a website.
It’s actually not an error, but one of Chrome’s features that functions as a warning. It aims to stop the web browser from unintentionally duplicating information entered on a web form.
Without the ERR_CACHE_MISS function, you could, for example, make a card transaction twice on an eCommerce site.
Some of the forms that may trigger an ERR_CACHE_MISS error if you try to return to the page after filling them include:
- Sign up forms
- Login forms
- Database search forms
- Financial details forms for doing transactions
Fix ERR_CACHE_MISS Error – Video Tutorial
Take a look at our video tutorial on how to fix the ERR_CACHE_MISS Chrome error:

How to Fix ERR_CACHE_MISS in Chrome (7 Proven Methods)
There are seven possible methods to solve ERR_CACHE_MISS in Google Chrome. If the error keeps appearing after you try one of them, continue with the following solutions available in this list.
1. Reload the Page and Restart Chrome
Sometimes the error may be caused by network connection issues, such as your network being disconnected for a few seconds while the page is loading. To solve this, we recommend you hard reload and restart Google Chrome.
For Windows, hard reload the web page by pressing Ctrl+F5 or Ctrl + the browser’s reload icon. For Mac, hit Command+Shift+R.
If reloading the page doesn’t work, restart the Chrome browser by entering chrome://restart into the URL bar. It will restore all the windows and tabs you have opened, so you won’t lose any information.
Alternatively, simply relaunch Google Chrome by closing then reopening it. After that, go back to the website you were trying to visit. If the ERR_CACHE_MISS error still appears, try the method below.
2. Disable Browser Extensions
Corrupted or outdated extensions can also be the cause of the ERR_CACHE_MISS Chrome error. They may interfere with browser’s ability to connect and load web pages.
To check whether your Google Chrome extensions are the source of the problem, try to disable extensions of your browser. Here’s how to do so:
- Open Chrome, then navigate to Customize and control Google Chrome – that’s the three vertical dots icon at the top-right of the browser window.
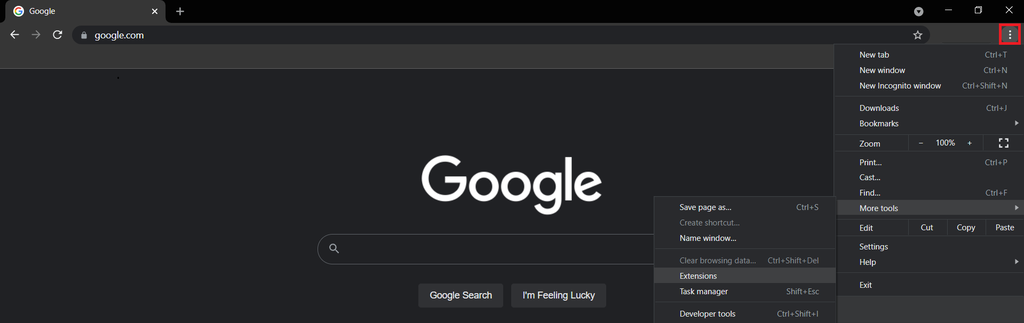
- Go to More tools -> Extensions.
- On the Extensions page, toggle the button to disable an extension. Do it to all installed extensions.
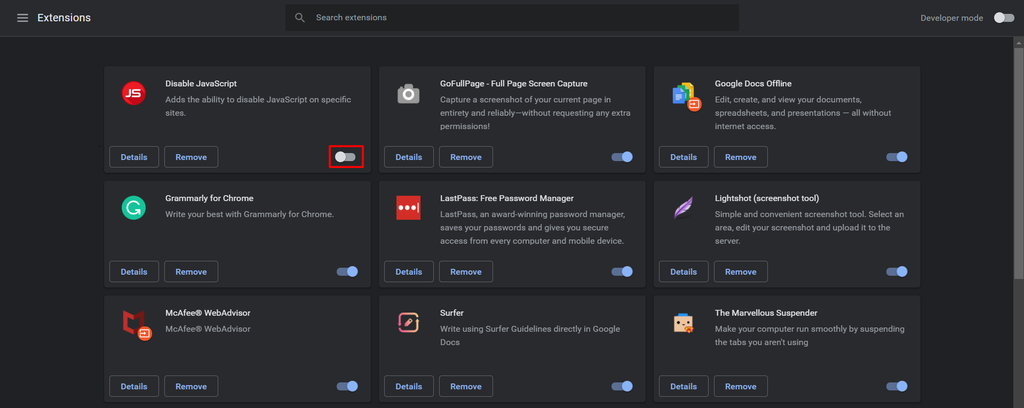
- Refresh your browser.
After that, re-enable the Google Chrome extensions one-by-one then refresh the browser. If re-enabling an extension brings the ERR_CACHE_MISS back, that means it might be the cause of the error. Therefore, you may need to update or reinstall that extension.
Meanwhile, if the ERR_CACHE_MISS error started to appear shortly after you installed a third-party browser extension, remove the extension by following these steps:
- Open Chrome, then navigate to Customize and control Google Chrome.
- Go to More tools -> Extensions.
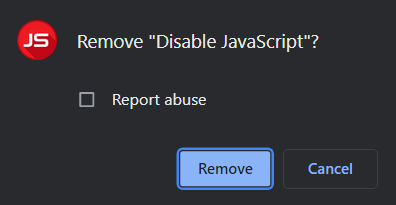
- Select Remove next to the extension that you want to get rid of.

- A pop-up prompt will appear to confirm the removal. Choose Remove to confirm it.
We also recommend removing unused and unnecessary extensions as they may slow down your browser.
3. Check for Chrome Updates
Using an outdated browser can cause errors such as ERR_CACHE_MISS and also risks your site’s security. Thus, if you update Google Chrome newest version, it will eliminate any incompatibility issues that might contribute to it.
Usually, Chrome automatically displays an Update button on the right side of your browser window. Also, it normally updates itself when you close and reopen the browser.
However, if you want to make sure whether you need to update Google Chrome, follow these steps:
- Open a new window, then click the Customize and control Google Chrome icon.
- Navigate to Settings -> About Chrome.

- You’ll see that the browser automatically checks for updates. If you’re not using the latest version yet, it will automatically download the latest version.

Now, try to open the same web page that you were trying to access. If the ERR_CACHE_MISS error was caused by an outdated version of Chrome, you shouldn’t see the same error on your browser now. If it’s still there, proceed to the following method.
4. Clear Cache and Browsing Data
Your browser saves information from websites you visit in its cache and cookies. Both help create a better online experience, enabling you to open websites faster on the next visit.
However, too much browser data or corrupted files among your cached files may lead to errors like ERR_CACHE_MISS. Clearing cache and browsing data can fix this issue.
Here’s how to clear browser cache on Chrome:
- Open a new tab, then enter chrome://history into your Chrome URL bar.
- Click Clear browsing data.

- A pop-up will appear. Choose your desired Time range. If you want to delete everything, select All time.

- Check all three boxes – Browsing history, Cookies and other site data, and Cached images and files.
- Click Clear data.
- Reload Chrome.
Alternatively, clear browsing data navigating to Customize and control Google Chrome. Then, click More tools -> Clear browsing data.
Note that clearing cache and browser data will delete your login info and may cause some sites to load slower.
5. Reset DNS Settings
If you suspect your network connection is the culprit of the ERR_CACHE_MISS error message, try to clear your DNS cache.
These are the cache files of previous Domain Name System (DNS) lookups stored in the operating systems. The cache consists of compressed information units about all websites you have visited.
It streamlines the DNS lookup process, making web pages load faster on your next visit to the same IP address. However, corrupt or outdated DNS cache files can cause internet connection issues and incorrectly display web content.
It can also lead to security issues like DNS spoofing and search behavior tracking. Therefore, it’s best to flush the DNS cache periodically from your browser and device.
Chrome stores a separate DNS cache from your computer’s operating system. To flush DNS cache in Chrome, follow these steps:
- Open Google Chrome.
- Enter chrome://net-internals/#dns into the URL bar.
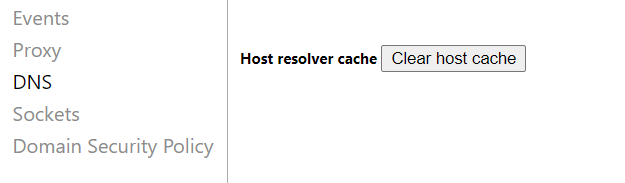
- You’ll see the net internal settings page. Click the Clear host cache button.
You can also flush the DNS cache on Windows, Linux, and Mac.
While we’re talking about the internet connections troubleshooter, you can also fix the ERR_CACHE_MISS error by resetting your network settings.
If you’re using Windows, reset network settings through the Command prompt. Here are the steps to do so:
- Locate the search field next to the Windows icon in your taskbar and type in cmd.

- In the Command Prompt app, click Run as administrator.
- A pop-up message will appear asking to confirm whether you want to allow Windows Command Processor to make changes to your device. Select Yes.
- Copy and paste the following commands into the Command Prompt window, pressing Enter after each line:
ipconfig /releaseipconfig /allipconfig /flushdnsipconfig /renewnetsh int ip set dnsnetsh winsock resetipconfig renewipconfig renew
For Mac, reset network settings via the Terminal app by following these steps:
- Go to Finder -> Applications -> Utilities.
- In the Utilities folder, locate and open the Terminal app.

- In the Terminal window, enter the following commands, then press Enter after you input them.
dscacheutil -flushcachesudo killall -HUP mDNSResponder
Restart your computer – the network is now using its default settings. Open Chrome and start browsing again. Hopefully, you will no longer see the ERR_CACHE_MISS.
6. Disable Cache System
If you still couldn’t solve ERR_CACHE_MISS in Chrome, try disabling the Chrome cache system.
This method requires you to access Chrome DevTools, which is Chrome’s tools option for developers. Here are the steps to do it:
- Open Google Chrome.
- Click on the Customize and control Google Chrome icon. Go to More tools -> Developer tools. If you use Windows or Linux, you can access the DevTools by right-clicking on the web page and selecting Inspect. On Mac OS, press Command+Option+I.
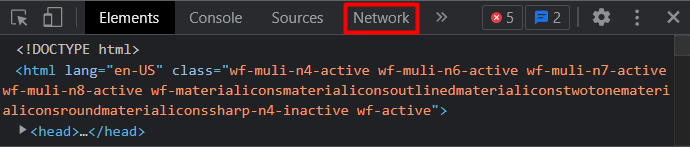
- When the DevTools window appears on the right side of your browser window, select Network tab.
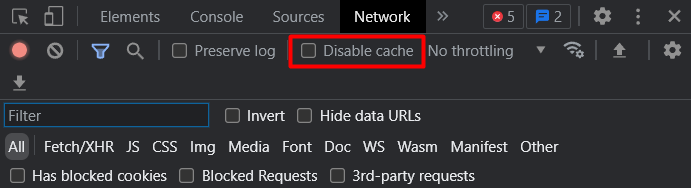
- Check the Disable cache box at the window’s top bar.
You’ll need to keep the DevTools window open to make the cache system remain disabled.
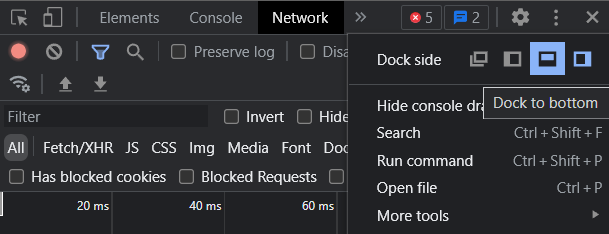
To move the DevTools dock to other positions, click the Customize and control DevTools icon – that’s the three vertical dots at the top-right corner of the dock. There you’ll see the Dock side options, where you can select your preferred setting.
Also, note that disabling the caching system will result in all your Chrome’s browser resources being reloaded.
7. Reset Chrome Settings
If you have already tried all the previous methods but none worked, the next step is to reset Google Chrome settings to their original defaults.
Before changing your browser settings, keep in mind that this troubleshooting method won’t provide a full reset. Some elements like bookmarks, history, and passwords won’t be deleted.
However, some other settings will change to their default state – and this will apply to all the devices you are signed in. The settings that will change include:
- Default search engine
- Homepage and tabs
- The new tab page
- Tabs you have pinned
- Content settings
- Cookies and site data
- Extensions and themes
We recommend taking note of them so you can restore your preferred settings on Chrome later on.
Follow these steps to reset your Chrome web browser settings:
- Open Google Chrome.
- Click the Customize and control Google Chrome icon, then navigate to the Google Chrome Settings. For Windows, choose Advanced -> Reset and cleanup. For Chromebook, Linux, and Mac, choose Advanced -> Reset Settings.
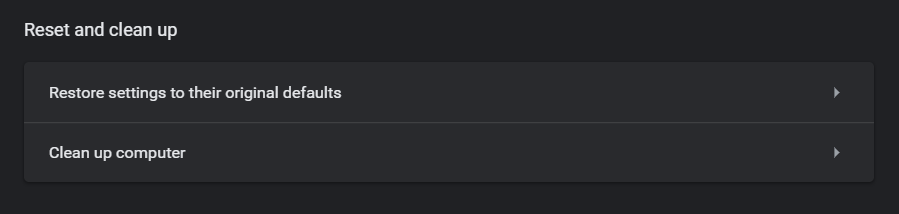
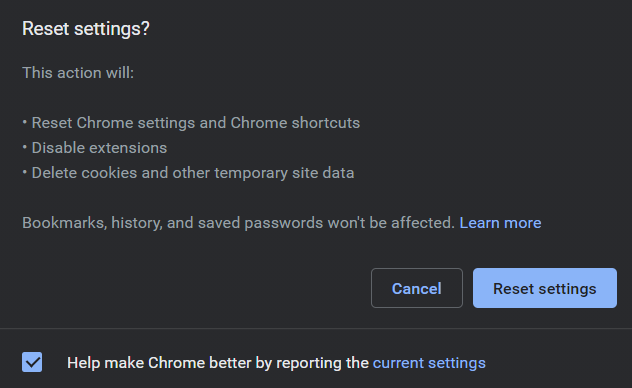
- Click Restore settings to their original defaults.
- A Reset settings? pop-up will appear. Click the Reset settings button to change the browser’s settings.
Alternatively, reset Chrome’s settings by entering chrome://settings/reset on the browser’s address bar.
Conclusion
This is a fairly common error that Google Chrome users may encounter on just about any website.
There are various reasons behind it, such as temporary connection issues, an outdated browser, or problematic network settings.
Luckily, it’s not difficult to solve this problem. Let’s recap the seven methods how to solve ERR_CACHE_MISS error in Google Chrome:
- Hard reload the page and restart Google Chrome
- Disable browser extensions
- Check for Chrome updates
- Clear cache and browsing data
- Flush DNS
- Disable cache system
- Reset settings in Chrome
We hope this article helps you manage ERR_CACHE_MISS in Chrome. Good luck.
Troubleshooting Other Browser Errors
How to Fix Too Many Redirects?
What Are HTTP Status Code
How to Solve PR_END_OF_FILE_ERROR?
How to Fix Localhost Refused to Connect Error?
How to Fix ERR_CONNECTION_REFUSED
How to Fix NET::ERR_CERT_COMMON_NAME_INVALID
How to Fix ERR_CONNECTION_CLOSED
Ways to Fix INET_E_RESOURCE_NOT_FOUND Error
ERR_CACHE_MISS FAQ
What Is ERR_CACHE_MISS?
The err_cache_miss error is caused by your browser’s caching issues. This means that often, due to bugs or corruptions, your browser can’t obtain the cache files from the website you’re trying to visit.
How Do I Fix ERR_CACHE_MISS?
Try refreshing or reloading the page, updating your browser, clearing your browsing history, disabling extensions, changing or refreshing your network settings, changing your browser settings, disabling cache, setting LAN settings to automatic, or changing the DNS settings.

Maya is a Content Specialist and WordPress Contributor. With years of journalistic experience under her belt, her main goals are to help people understand complex processes in a simpler way, and tell the stories of people who thrive thanks to technology. When she’s not writing, you can find her watching sci-fi movies while eating ramen. Follow her on LinkedIn.