How to flush DNS: A step-by-step guide for Windows, macOS, Linux, and web browsers

Flushing DNS caches is a quick and easy solution to internet issues like inaccessible websites or 404 errors. It is risk-free and has various additional benefits, including improving security.
In this article, we will explain how to flush DNS on various operating systems and web browsers. Before getting into the steps, you will learn what DNS cache is so you understand how the process can benefit your system.
What is a DNS cache?
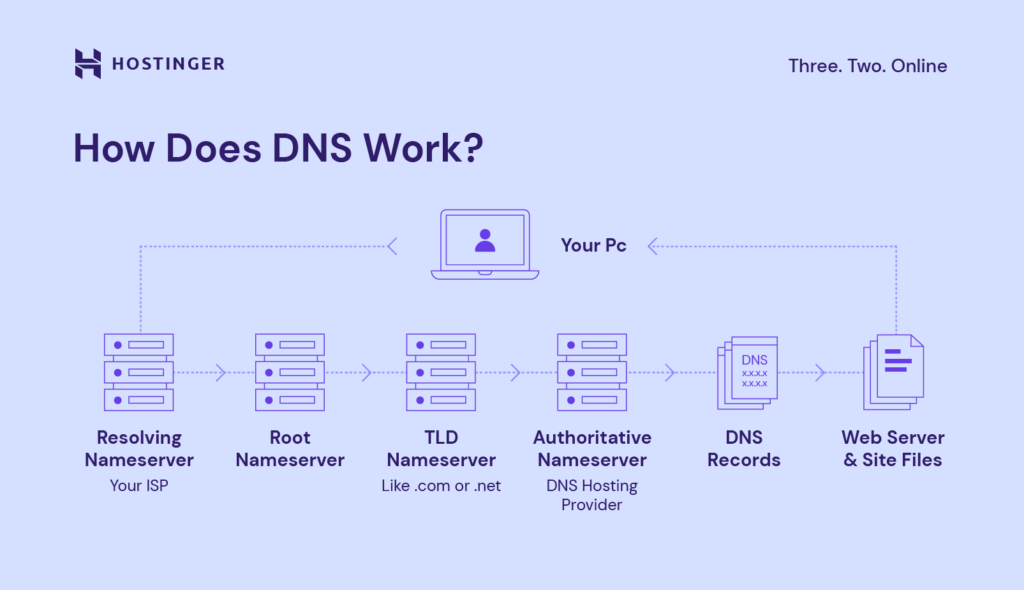
When you access a website using its URL, like https://hostinger.com/, the domain name system (DNS) server will tell your web browser how to find the site. It does so by giving various information, including the site’s IP address and other DNS records.

Once fetched, details about this URL will remain in your system as a cache. This enables your web browser to retrieve the information locally when you revisit the website instead of retrieving it from the DNS server again, making the process quicker.
However, this DNS cache might become invalid or corrupted, preventing your web browser from properly resolving a URL into its IP address. In this situation, you must delete the DNS cache to force the browser to fetch fresh information.
How to flush DNS cache on different operating systems
The steps to flush the DNS cache differ across operating systems. In this section, we will explain how to do so in the three most popular OSes – Windows, macOS, and Linux.
How to flush DNS cache in Windows 10 and Windows 11
With Windows, the steps to flush DNS will be similar for most versions, especially the newer ones. Here’s how to do so:
- Click the Start button and look for Command Prompt by entering cmd into the search bar.
- Right-click Command Prompt and select Run as administrator.
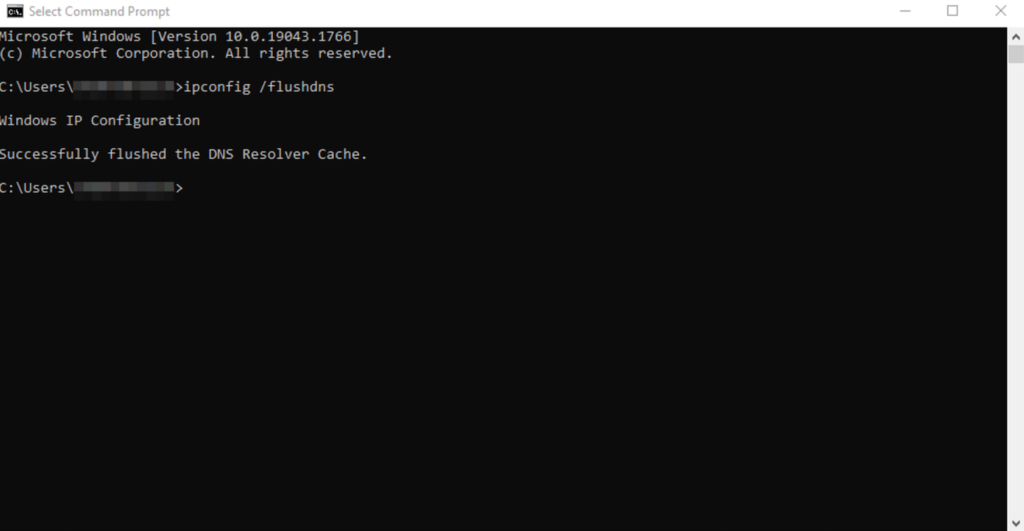
- Enter the following flush DNS command:
Ipconfig /flushdns
That’s it. Your system will automatically delete the stored DNS cache and reset the resolver settings. Once the process is complete, you should see a confirmation message in Command Prompt.

If you encounter an error when running the command, make sure to launch Command Prompt as an administrator. Otherwise, you won’t have the necessary permissions to flush the DNS cache.
How to flush DNS cache in macOS
Flushing the DNS cache in macOS is trickier since it requires different commands depending on the operating system version. However, the general procedure is the same:
- Click the magnifying glass icon on the top menu bar. Alternatively, press Command + spacebar.
- In the Spotlight Search menu, find Terminal. Hit Enter.
- Based on your MacOS version, type the following command to flush the DNS cache:
- macOS Big Sur (11), Monterey (12), Ventura (13), Sonoma (14), and Sequoia (15):
sudo dscacheutil -flushcache; sudo killall -HUP mDNSResponder - macOS El Capitan (10.11), Sierra (10.12), High Sierra (10.13), Mojave (10.14), or Catalina (10.15):
sudo killall -HUP mDNSResponder - macOS Yosemite (10.10):
sudo discoveryutil udnsflushcaches - macOS Lion (10.7), Mountain Lion (10.8), or Mavericks (10.9):
sudo killall -HUP mDNSResponder - macOS Snow Leopard (10.6):
sudo dscacheutil -flushcache - macOS Leopard (10.5):
sudo lookupd -flushcache
- macOS Big Sur (11), Monterey (12), Ventura (13), Sonoma (14), and Sequoia (15):
- If Terminal asks for authorization, enter your user password. This will grant you the required admin privileges to run the command.
How to flush DNS cache in Linux
Commands to flush DNS caches in Linux differ depending on your distributions since they might use different DNS services. For example, Ubuntu uses dnsmasq, while Red Hat Enterprise Linux typically utilizes NCSD.
If you are unsure which DNS service your system uses, check it by running the following command in Terminal. Replace dns_service with dnsmasq, ncsd, or bind:
sudo systemctl status dns_service
Here’s the general procedure to flush DNS caches on a Linux system:
- Pres Ctrl + Alt + T to open Terminal.
- Enter these commands according to the DNS service your distribution uses:
- Dnsmasq:
sudo /etc/init.d/dnsmasq restart - NCSD:
sudo /etc/init.d/nscd restart - BIND:
sudo /etc/init.d/named restart && sudo rndc restart && sudo rndc exec
- Dnsmasq:
- Enter your account password to authorize the command execution. If you log in as root, you can skip this step.
The DNS service will stop briefly and reboot. If systemctl can’t find any of the DNS services, use the following command to flush the cache:
sudo resolvectl flush-caches
How to flush DNS cache on web browsers
Since web browsers typically store their own DNS cache, you might need to flush them separately. Here’s how to do so in some of the most popular browsers:
- Open your web browser.
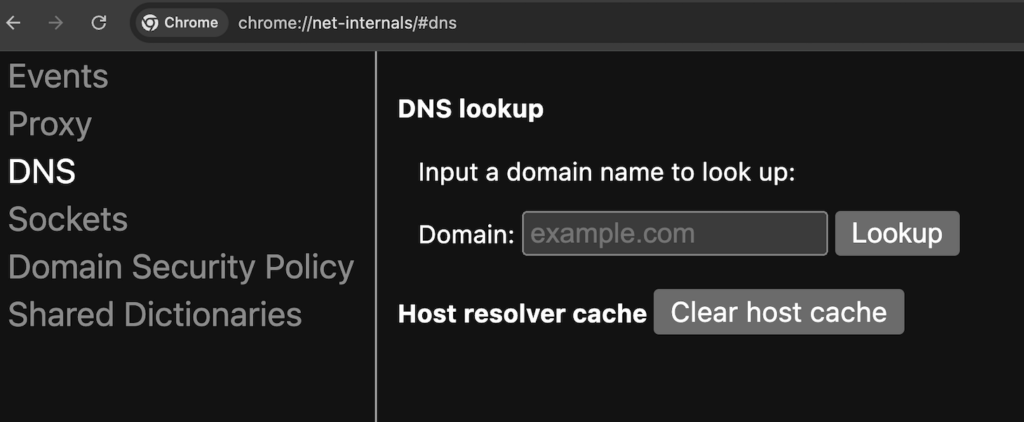
- In the address bar, enter the following address based on your browser:
- Google Chrome:
chrome://net-internals/#dns - Microsoft Edge:
edge://net-internals/#dns - Firefox:
about:networking#dns - Opera:
opera://net-internals/#dns
- Google Chrome:
- Press Enter to open the DNS management page.

- Find and click the button that says Clear host cache or Clear DNS cache. The name varies depending on your web browser.
We’re done. Restart your web browser, and it should redownload all the DNS details when you revisit a website.
Important! Safari doesn’t have a page for flushing the DNS cache and uses the system-level configuration instead. This means resetting your macOS system’s DNS will also flush the web browser’s data.
How to flush DNS: Video tutorial

Why flush DNS?
By default, DNS caches will clear themselves after reaching a certain time-to-live (TTL) period. In some cases, however, you might need to manually flush them before they expire. Here are some of the reasons:
- Website issues – clearing the DNS cache will force your system to fetch new information about the website directly from the DNS server. This process resets potential misconfigurations or corruptions.
- DNS spoofing – cyber criminals might alter information stored in your DNS cache to redirect you to a malicious website. Resetting your DNS ensures your system uses valid records.
- Switching DNS server – when you change your system’s DNS provider, a connectivity issue might occur if the old information remains. Flushing the cache clears outdated data from the previous DNS server to prevent conflicts.
- Speed up DNS propagation – if you host a website, you must wait for its domain name to fully propagate so that it is accessible online. Flushing DNS forces your system to renew its information, allowing your site to be accessible on your device faster.

Conclusion
Upon visiting a website, your system will save information about its domain as a DNS cache. While useful for speeding up the loading process, you might need to delete this cache since it can get corrupted and cause connectivity issues.
In this article, we have explained how to flush DNS on various operating systems and web browsers. The general procedure is similar, but the command and address differ depending on the software.
To flush your computer’s DNS, open your system’s command-line interface and enter the DNS deletion commands as an administrator. For browsers, open the DNS management page by entering the address into the address bar and clicking the cache deletion option.
Flushing DNS clears corrupted or outdated data in your system to help resolve connectivity issues. Moreover, it prevents spoofing attacks, in which hackers alter your DNS records to redirect you to malicious websites.
How to Flush DNS Cache FAQ
Is It safe to flush the DNS cache?
Yes, flushing the DNS cache is risk-free. All it does is remove invalid or outdated data to force your system to download the new one.
How often should I flush my DNS cache?
There is no ideal frequency for flushing your system’s DNS cache. However, since it is beneficial, we recommend doing it regularly, like weekly.
Does clearing the DNS cache speed up my internet?
Flushing DNS cache doesn’t directly affect your internet speed. However, it can make websites load slightly slower when you reaccess them again since your web browser must fetch the new DNS information.
Does restart clear DNS cache?
Yes, rebooting your system will flush the DNS cache. However, other DNS caches might still exist in other areas, like your web browser or router.

Comments
May 13 2018
To check DNS and IP addresses accessed by Chrome, you can go to: chrome://net-internals/#dns
May 23 2018
Hello, Cesar I appreciate your input. I was not aware of the provided tool and it seems really useful!
July 02 2021
Hello : The article was very good and ilustrative , I didn't know that flushing the cache , prevents to several problems from attacks and stole our credentials. Every day we learn something interesting !! Thank you
January 16 2022
DNS_PROBE_FINISHED_NXDOMAIN I request u to do from your team pls fix it
January 18 2022
Hi there, feel free to check our guide on solving DNS_PROBE_FINISHED_NXDOMAIN error. If you're having any trouble with it, don't hesitate to contact your host - in case you're hosting with Hostinger, you can find how to contact the Customer Success team here :)