How to Install Ruby on Rails on Ubuntu
The Ruby on Rails framework provides various toolkits that help improve web application development efficiency. It offers various code templates and libraries, allowing developers to easily add new functionalities without writing them from scratch.
However, installing Ruby on Rails can be challenging for new developers. Users must first prepare the hosting environment properly and install several dependencies using various commands.
In this article, we will explain how to install Ruby on Rails on a virtual private server (VPS). We will also explain the steps to create a Rails application and provide the best practices when using the framework.

What Is Ruby on Rails?
Ruby on Rails is a web application framework based on the Ruby programming language. It provides various toolkits, libraries, code templates, and components that help streamline development. This framework uses the popular Model-View-Controller (MVC) architecture, making it highly flexible and suitable for all web applications, including websites and CMSs.
How to Install Ruby on Rails on Ubuntu
In this section, we will explain how to install Ruby on Rails on an Ubuntu 22.04 virtual private server. Before proceeding, ensure you have purchased a VPS hosting plan running the operating system.
1. Prepare Your Ubuntu Server
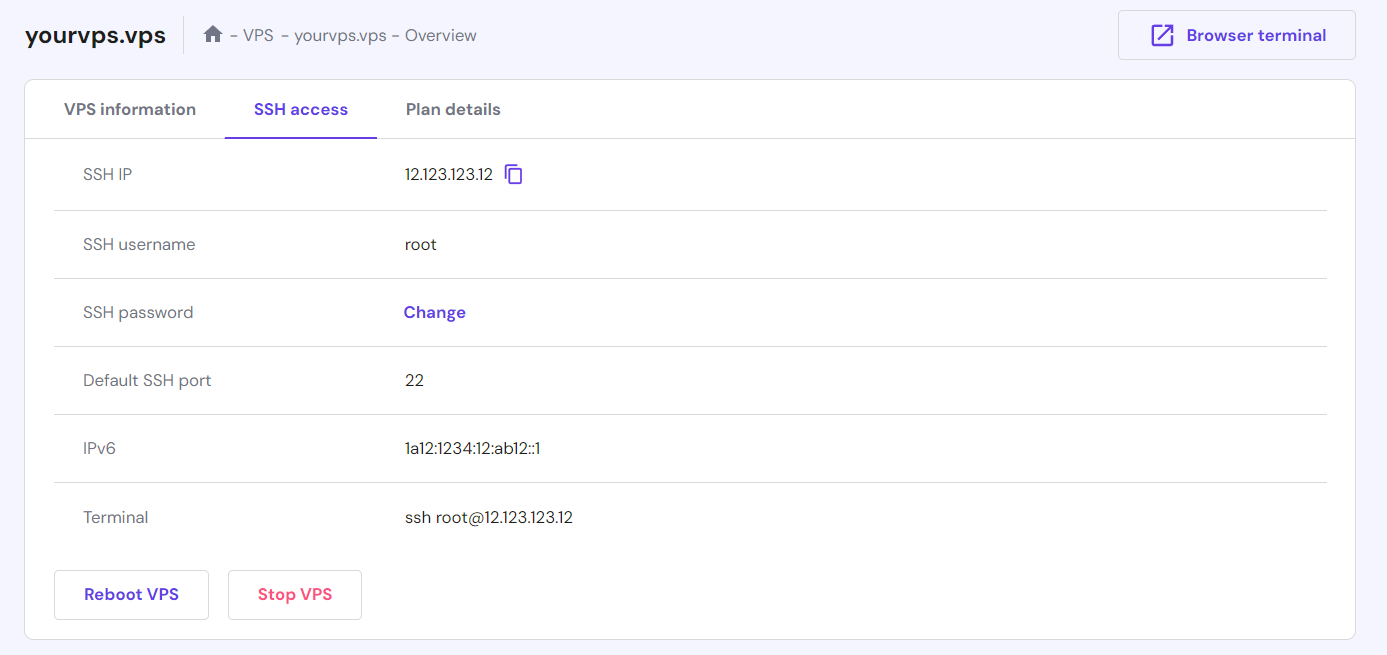
To prepare the Rails environment, connect to your VPS using an SSH client like PuTTY or Terminal. Hostinger users can use the Browser terminal to access their server and run Linux commands remotely via web browsers.
To simplify the preparation process, ensure your system is clean with minimal bloatware and junk files. Unnecessary software on your server can slow down performance and cause conflicts, affecting its functionality.
Hostinger VPS hosting users can choose which software to install. They can also opt for a plain operating system to create a minimal, easy-to-set-up hosting environment.

Hostinger users can find their server IP address and SSH login credentials through the VPS Dashboard → Overview → SSH Access. Instead of root, we recommend switching to other superuser accounts to help avoid accidental modifications that may break your system.
Once connected, update the Ubuntu repository to ensure you install the latest package version using the following command:
sudo apt update && sudo apt upgrade
2. Install Ruby on Ubuntu
Ruby on Rails prerequisites include the Ruby programming language, code compiler, and JavaScript runtime. Depending on your application, it may also need other optional packages like Redis or Readline.
For this tutorial, we will show you how to install all the required software using APT.
To install Ruby, run:
sudo apt install ruby-full -y
Check whether the system has installed Ruby successfully using the following command:
sudo ruby -v

If the command line interface returns the “Command not found” error, it means the package wasn’t installed properly. If Terminal outputs the Ruby version number, you can continue installing other essential packages.
You can install different software based on your preference. For this tutorial, we will install the build-essential compiler package, Git version control, PostgreSQL database, SSL library, and zlib compression:
sudo apt install -y build-essential git-core libssl-dev zlib1g-dev postgresql postgresql-server-dev-all
Suggested Reading
Check out our guide on how to Install PostgreSQL on Ubuntu to learn more about how to set up a default database and Postgres user.
Verify whether these packages are installed correctly by checking their versions. For build-essential, use the grep command:
apt list --installed | grep build-essential

Then, run the following command to install the Node.js JavaScript runtime and Yarn package manager to enable the asset pipeline:
sudo apt install -y nodejs yarn
We recommend using the most recent version to ensure optimal compatibility, security, and functionality. If unsure, check the developer release note pages.
3. Install Rails on Ubuntu
Pro Tip
Hostinger’s Rails VPS hosting plans allow you to set up Ubuntu 22.04 64bit with Rails/OpenLiteSpeed in one click. Each package also offers a browser terminal and AI Assistant.
We will install Ruby on Rails using the RubyGem package manager. It is the framework’s official source, ensuring you get the latest version and frequent updates.
This tool also facilitates Ruby gems installation, removal, and management. It also lets you easily manage dependencies and Ruby libraries to simplify project administration.
RubyGem usually comes pre-installed with the Ruby programming language. Check whether your system has it by querying the version number:
gem -v
You can also install it manually using APT by running the following command:
sudo apt install rubygems -y
Install other essential development packages, like the Bundler dependency management system and rbenv version manager. Use the following command:
sudo gem install bundler && sudo apt install rbenv -y
If you host multiple applications, you might require a different version of Ruby. Instead of setting them up manually, define a default version that applies to your entire system using the ruby-build plugin and rbenv.
For example, here’s a rbenv command that sets the default Ruby version as 2.2.3:
rbenv global 2.2.3
Once the prerequisites are installed, run this gem command to start the Rails installation process:
sudo gem install rails
Query the version to check whether you have installed Rails successfully.
Instead of running commands, installing Rails in Hostinger VPS only takes several steps:
- Log in to the hPanel and click VPS on the top menu.
- Select your VPS plan.
- Go to the sidebar → OS & Panel → Operating System.
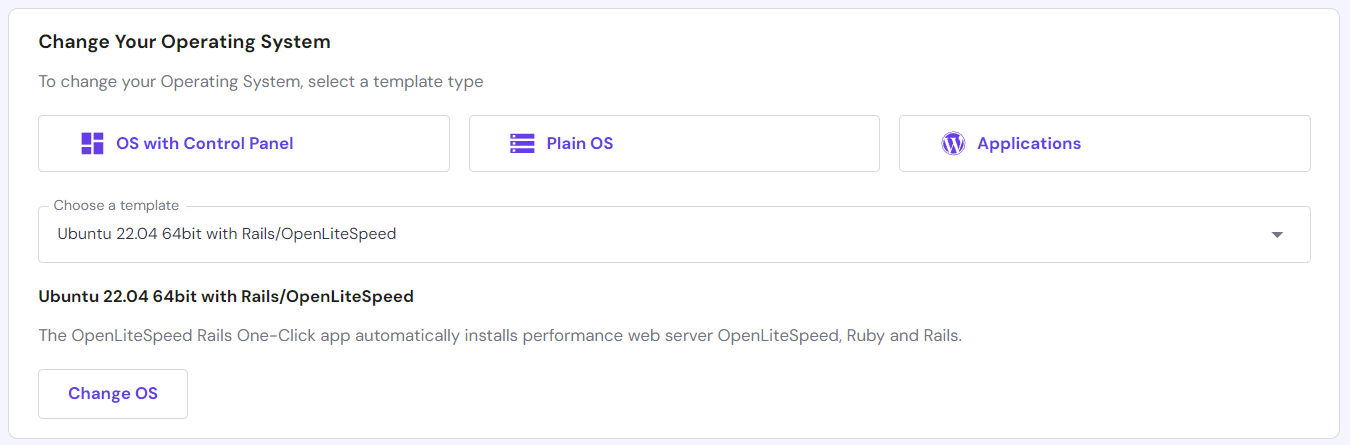
- Under the Change Your Operating System window, click Applications.
- Select Ubuntu 22.04 64bit with Rails/OpenLiteSpeed.
- Click Reinstall.
Warning! Reinstalling your VPS operating system will wipe all its data. Before proceeding, create a backup if you wish to preserve its files.
4. Set up a Development Environment
After preparing the hosting area, set up your Rails development environment. The steps differ depending on your operating system, but we will show you how to do it in Windows.
Pro Tip
The steps to set up an Ubuntu development environment for Ruby on Rails are similar to those for the hosting area.
Installing A Code Editor or IDE
You need a text editor or an integrated development environment (IDE) to write and debug your Rails application’s code. You can choose any software you are familiar with.
If unsure, check our best code editors article. We recommend choosing one with features like syntax highlighter and auto-completion to simplify the development process and help minimize human errors.
In this tutorial, we will use Visual Studio Code (VSCode). This free IDE offers various plugins that help improve development efficiency, like the VSCode rdbg Ruby code debugger.
Installing Ruby on Windows
The development area requires the same dependencies as the hosting server. Instead of using commands like on Linux, Windows users must obtain the installer package manually from the official rubyinstaller website. We recommend the newest version of Ruby with devkit.
Double-click on the executable file and complete the Ruby installation. This process will also configure the RubyGem package manager and the WEBrick web server. WEBrick is a Rails development server that allows you to host an application on your local machine for testing.
Installing Rails on Windows
The steps of Rails installation in Windows are the same as in other operating systems. Open Command Prompt, PowerShell, or VSCode Terminal as an administrator and run this gem command:
gem install rails
This will set up the web framework and its dependencies. To ensure the software is installed correctly, check the Rails version using the following command:
rails -v

Installing Git Version Control
Git lets you easily push code and files from your local machine to the live environment. While Hostinger VPS supports other methods like SFTP, they are less efficient.
Download the latest version from the official Git website and complete the installation. Open the Git Bash application from the start menu and run the following command to check the version:
git version
Then, set up a Git repository to host your project code and documentation. Choose a platform that best suits your needs and workflow. For example, the popular options include GitHub and BitBucket.

5. Create Your First Rails Application
To create a Rails application, open your VSCode terminal by pressing the Ctrl + ` shortcut. Navigate to your project directory using the cd command:
cd D:\Project
Create new Rails project files and folders using the following command and replace rails_app with your application name:
rails new rails_app
The application folder comprises several directories, each for different purposes. For example, the app/ path contains the application’s main components, while config/ houses the configuration files. Check the Rails start guide to learn more about the structure.
Navigate to the application’s main folder using the cd command and run the project using the following:
rails server --binding=0.0.0.0
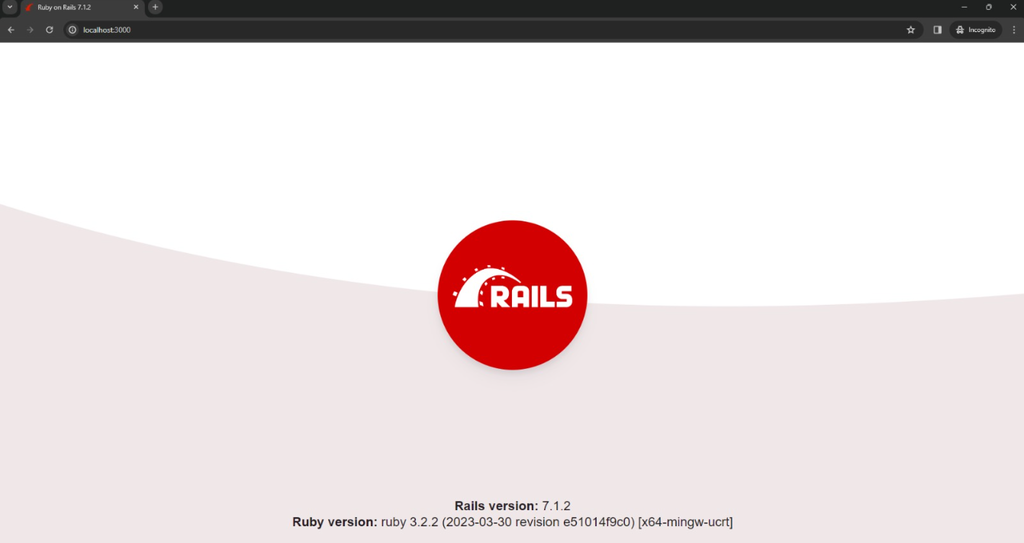
Enter localhost:3000 into your web browser. If the Rails welcome screen appears, you can start writing the application’s code and push the files to your server using Git commands.
After moving the files into your VPS, connect to it via SSH. Navigate to the project folder and enter the same command to start the application:
rails server --binding=0.0.0.0
Visting vpsipaddress:3000 in your web browser should load the application. Press Ctrl + C in the command-line interface to stop the application. Run the same command to restart it.
Ruby on Rails Best Practices
This section will explore best practices for Ruby on Rails installation to help you streamline the process.
Use Version Management with Ruby Version Manager (RVM)
Hosting several applications with different Ruby versions on one server may cause incompatibility issues. RVM addresses this problem by allowing users to manage multiple Ruby installations using a command line interface.
It lets you install, manage, and switch to different versions easily. RVM also allows users to manage isolated environments for gem installations called gemsets.
Hostinger VPS lets users install RVM to set up a solid environment to host their applications. In addition to ensuring functionality, this command-line tool helps simplify development since users don’t need to manage multiple servers.
Enhance Development With Essential Gems and Packages
In Rails, gems are additional packages for extending the framework functionality and simplifying tasks. Users can install them using the Bundler gem dependency manager.
To do so, add your desired gem to your project’s gemfile by inserting the following new line:
gem 'gem_name'
Then, install the package by running the bundle command:
bundle install gem_name
There are various gems with different purposes. For example, install Devise to set up user authentication on your applications. Meanwhile, use Paperclip or CarrierWave to enable file uploads.
Use Version Control with Git
In software development, a version control system allows developers to track project changes. In addition to providing a restore point for troubleshooting, it also enables continuous integration and deployment (CI/CD) to automate the process.
Git is a version control system that lets developers streamline their development tasks and improve collaboration. It enables non-linear workflow, allowing them to individually work on a project concurrently.
Developers can use simple Git commands to push files to a remote server and create an isolated development branch, improving efficiency. Check out our Git tutorial to learn more about this tool.
Join the Ruby on Rails Community
Ruby is one of the most used server-side programming languages, more popular than JavaScript. Due to its popularity, the Rails framework has a large community of users behind it.
This benefits users, especially beginners, as they can quickly find solutions when encountering difficulties related to the framework. They can ask questions or search for answers on various online forums.
For example, Rails has an official forum with many active users. Moreover, developers can join non-official discussion boards from Rails course providers like GoRails or other popular platforms like Reddit.
Stay Updated
Installing the latest Ruby and Rails version ensures your application applies the latest security patches. Moreover, updates commonly come with bug fixes and new software compatibility to improve your hosting environment stability.
Using the new version of Rails and Ruby also ensures you get continuous support to simplify troubleshooting. To stay updated, subscribe to web development newsletters, participate in forums, and check the release notes.
If you run multiple applications, use a tool like RVM to simplify the task. For example, you can use this command to list all the available Ruby versions:
rvm list
Learn More About Web Application Deployment
How to Deploy Web Apps on Linux using Kamal
Kubernetes Tutorial
Conclusion
Ruby on Rails is a popular framework for developing a web application. It provides various libraries, templates, and toolkits that allow developers to add new functionality to their software without coding from scratch.
In this article, we have provided the Ruby on Rails installation guide on Ubuntu:
- Prepare hosting environment. Connect to your remote VPS via SSH using a superuser account. Install the Ubuntu operating system and update the packages via APT.
- Install Ruby. Use APT to install the Ruby, RubyGems, and other dependencies. For example, configure PostgreSQL database, GCC compiler, and NodeJS.
- Install Rails. Download and install Ruby on Rails using RubyGems. In addition, install rbenv or RVM if you run multiple Ruby environments.
- Set up the development environment. Download a text editor or an IDE like VSCode. Then, set up Ruby and Rails via a command line interface like Command Prompt.
- Create and push your application. Run the rails new command in your IDE’s Terminal to start a project. Write your application code and push it using Git or an FTP client.
Install the latest version of Ruby and Rails to ensure optimal application performance and stability. To stay updated, regularly check the release notes and join the Rails community, like forums or subreddits.
To improve development efficiency, use the RVM version manager, additional gems, and the Git version control system. Hostinger VPS hosting environment supports all these tools to ensure an optimal web development experience.
Install Ruby on Rails on Ubuntu FAQ
In this section, we will answer several questions about installing Ruby on Rails on Ubuntu.
How to Download Ruby on Rails on Ubuntu?
To download Rails on Ubuntu, you need RubyGems. It is pre-configured when you install the Ruby programming language. After installing Ruby using Ubuntu’s APT manager, download the Rails framework via RubyGems using the gem install ruby command.
Which IDE Is Best for Ruby on Rails Ubuntu?
If you exclusively use the Ruby on Rails framework, we recommend RubyMine. It has various built-in tools that help developers efficiently write and debug Ruby code. If you want a free IDE for developing various applications with different frameworks, we recommend Microsoft VSCode.
Can I Host Ruby on Rails Applications on Hostinger’s VPS?
Yes. Hostinger VPS supports all software required for developing and hosting Ruby on Rails Applications. We offer a clean hosting environment that users can easily configure to their needs. Moreover, we provide an Ubuntu 22.04 and Rails template, allowing users to prepare their server easily in one click.

Aris is a Content Writer specializing in Linux and WordPress development. He has a passion for networking, front-end web development, and server administration. By combining his IT and writing experience, Aris creates content that helps people easily understand complex technical topics to start their online journey. Follow him on LinkedIn.
