How to Use Atarim to Improve Communication With Clients as a Web Developer or Designer

Whether you’re a web developer, designer, agency, or even a client, keeping track of communication is a big part of the job. However, it can be a challenge.
You may use emails for updates, apps for to-do lists, and text messages for urgent notifications. This scattered approach can make your workflow more complicated than it needs to be.
This is where Atarim comes in. With a robust task center and visual collaboration interface, this platform can take the guesswork out of project management and client communication.
Best of all, you can use Atarim right from Hostinger Pro Panel. In this article, we will walk you through how to use Atarim and access it through the Hostinger Pro Panel.
Download Web Development Proposal Template
What Is Atarim and How to Access It From Your Hostinger Account
Atarim is a one-stop visual collaboration and workflow platform for digital teams. One of its applicable use cases is for building client websites.
In one centralized platform, freelancers and agencies can:
- Visually collaborate with teams and clients. Atarim’s visual collaboration interface lets you invite people to create tasks and comment directly on a website. Features like automated screenshots can help pinpoint exactly what clients and team members are referring to.
- Easily manage projects. The clean project management dashboard organizes all your websites for easy navigation. You can also sort and filter projects to quickly access the website you’re working on.
- Monitor project statuses. Track all client websites so everyone stays in the loop. Clients can also assign the urgency of tasks, ensuring alignment on project timelines.
- Communicate with clients in one place. The built-in inbox gathers all client tasks and comments, so you don’t have to sift through various channels. You can also use the forms feature to gather all essential project details upfront and collect client feedback.
- Connect Atarim with tools you already use. Other Atarim integrations besides Hostinger include monday.com, Trello, Jira, and MainWP – a site management WordPress plugin.
Hostinger users can access Atarim right from the Pro Panel. Its free plan makes it accessible for pros of all levels. At the moment, this integration is only available for WordPress website owners.
To use the platform via Hostinger, you need an Atarim account.
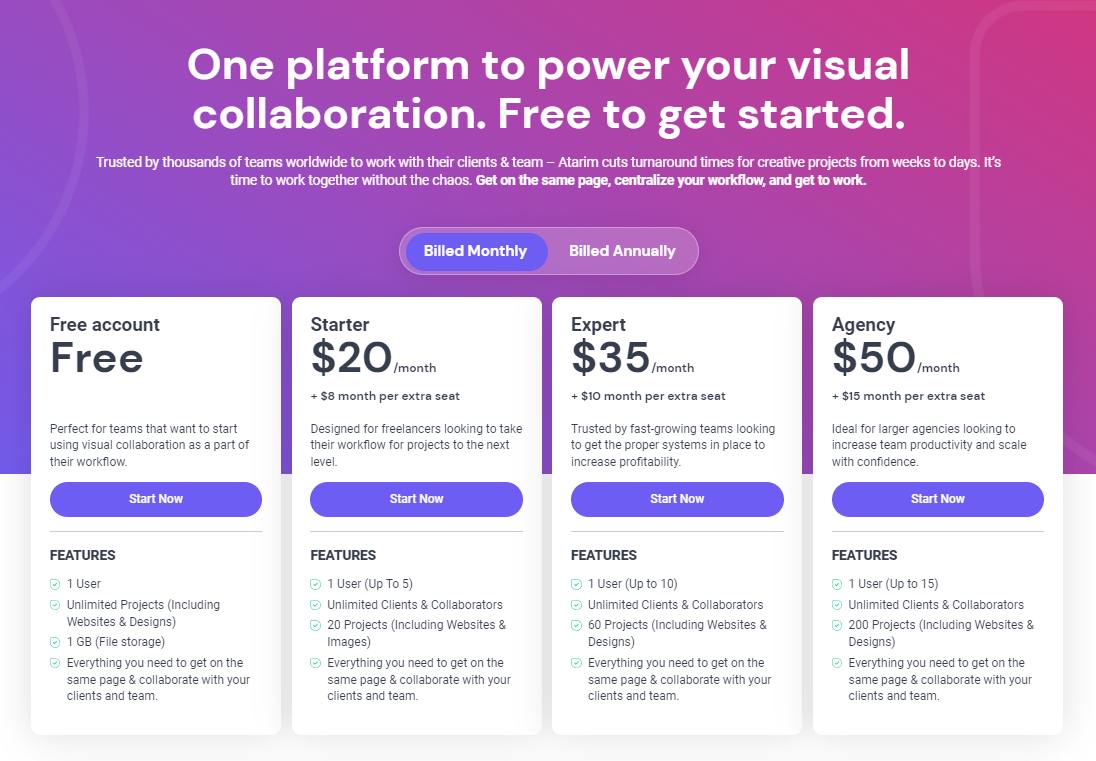
First, go to the Atarim website and choose the best plan for your needs. All subscriptions, including the free plan, come with all the essential workflow features. The main difference is the amount of storage and access for clients and team members.
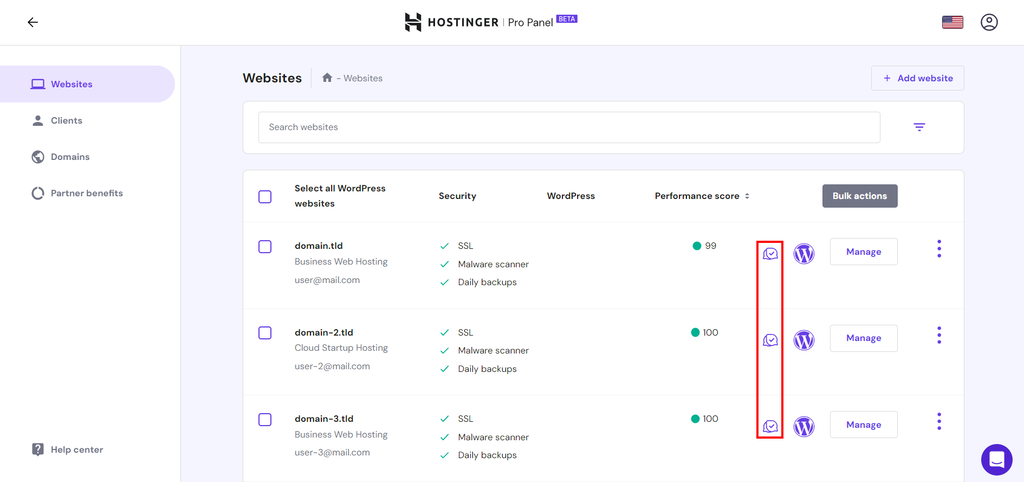
After choosing a plan and signing up, log in to hPanel → Pro Panel. On the Websites page, select a site and click the Atarim collaborate button.
Finally, log in with your credentials to access the Atarim dashboard.
How to Use Atarim to Improve Communication With Clients
This section covers how you can use Atarim to manage client projects, from collecting information to keeping track of each task’s status.
1. Gather All the Information You Need
Before you start collaborating, gather as much information as needed on the client’s needs.
Some web designers and developers like to use a form app to gather information. Instead of using an external tool like Google Forms, you can use Atarim’s new built-in forms feature to save time.
To create a new form, go to the Forms tab of the Atarim dashboard and click Add New in the top right corner.
You will see the drag-and-drop form builder, where you can insert form elements from the left panel to the center of the screen. The basic options include drop-down, checkboxes, single-line text, and text area.
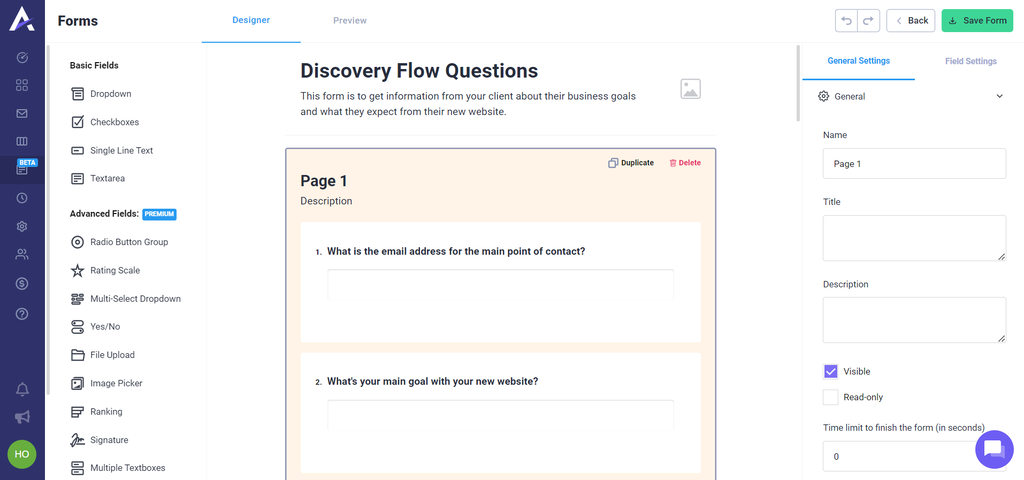
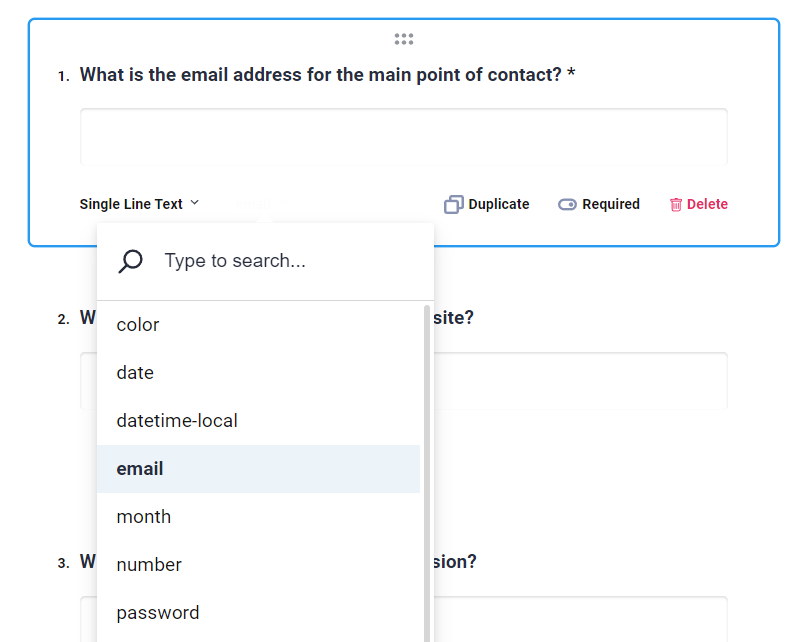
In each form element, you can alter its type, duplicate it, and set it as required. In text areas, you can specify the type of information to be submitted, like text, color, range, or URL.
Use the right panel to configure the form’s general settings, like its title, description, language, and navigation. There is also the field settings tab to change each question’s title, description, input type, autocompletion, and logic.
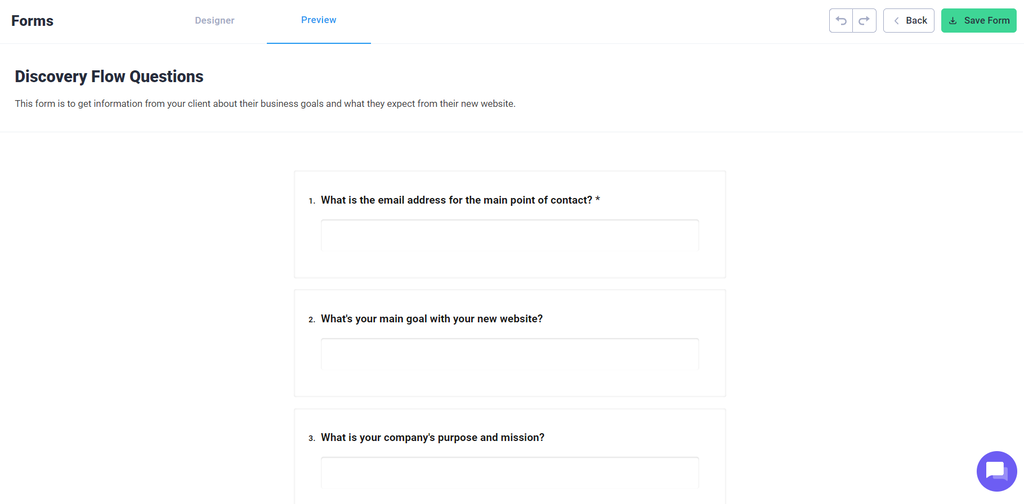
After customizing the form, use the Preview tab on the top menu to check it for errors. Once finalized, hit Save Form.
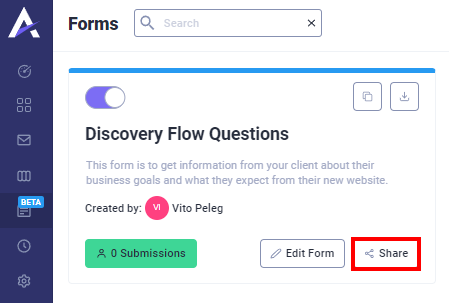
On the forms page, click the Share button to make the form available for clients and team members.
After using the form to collect all the necessary information from clients, it’s time to start building the WordPress website.
2. Set up a Base Site
Setting up a good base website is essential for any web project, as it can save time and optimize your workflow. Keep these in mind when building a base site:
- Website theme. Choose a fast, mobile-responsive theme that you can easily tailor to the client’s brand design.
- Plugins or extensions. Opt for high-rated plugins that meet client needs and project objectives. For example, you may want a contact form plugin for a business website to facilitate customer inquiries.
- Search engine optimization (SEO). Set up crucial SEO elements like permanent link structures and meta tags from the start. This helps in improving the site’s visibility on search engines.
- Best user experience practices. Aim for a simple website structure, intuitive navigation, and a clean layout. This makes it easier for visitors to find what they want, enhancing user satisfaction.
- Mobile responsiveness. The WordPress website should perform well across all device types. Fortunately, Atarim has a preview feature for checking the site’s appearance on desktop, tablet, and mobile devices.
- Loading speed. Focus on fast website performance as it impacts both SEO and user satisfaction. Use tools like Google PageSpeed Insights to analyze and improve site speed.
- Security measures. Implement fundamental security elements such as an SSL certificate and automated backups. This protects both user data and website integrity.
For WordPress website developers, this is a good time to install the Atarim plugin.
This tool lets you manage tasks and view client comments in your WordPress account without navigating to the Atarim dashboard.
3. Send a Link to the Client and Team Members for Collaboration
After creating a base website, invite your client and team to collaborate and give feedback.
Atarim simplifies team and client collaboration in multiple ways. One method is to navigate to the Atarim dashboard, open the Projects page, and select a relevant project. Then, click Collaborate.
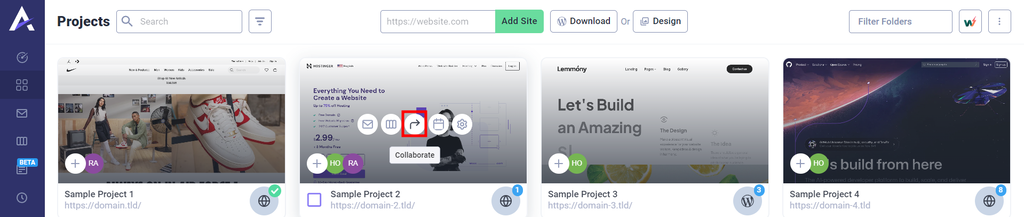
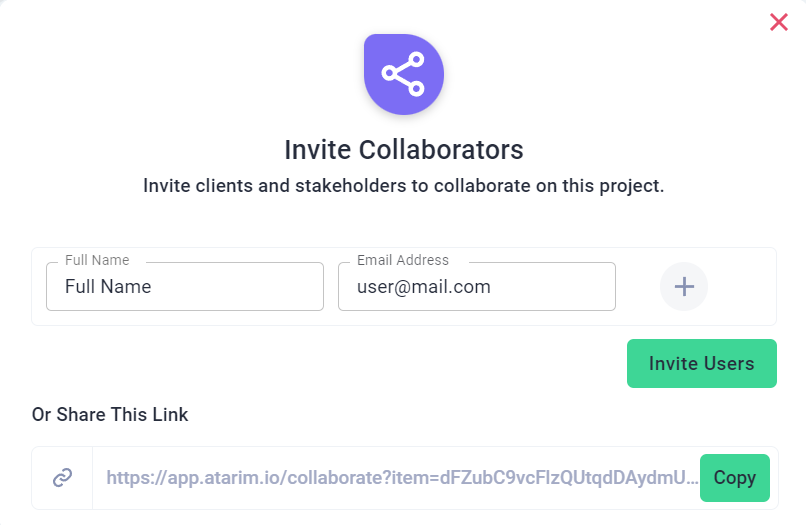
Here, press the Share button located at the bottom right corner.

Input the client’s full name and email address and click Invite Users. Use the + button to enable access for multiple clients. You can also copy the link to the project.
A major advantage of Atarim is that clients don’t have to create new accounts to contribute. They will be logged in immediately so that they can jump right into the project.
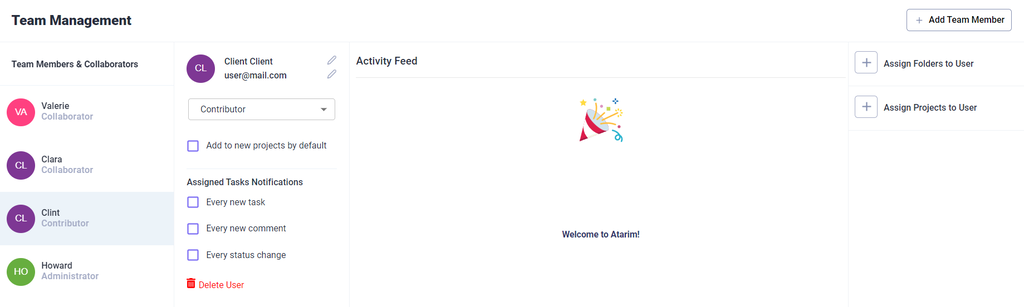
To invite team members, go to the Manage Users menu on the Atarim dashboard. Click the + Add Team Member button in the top-right corner and insert the user’s first and last name and email address. Set their user type as Collaborator, and click Invite Users.
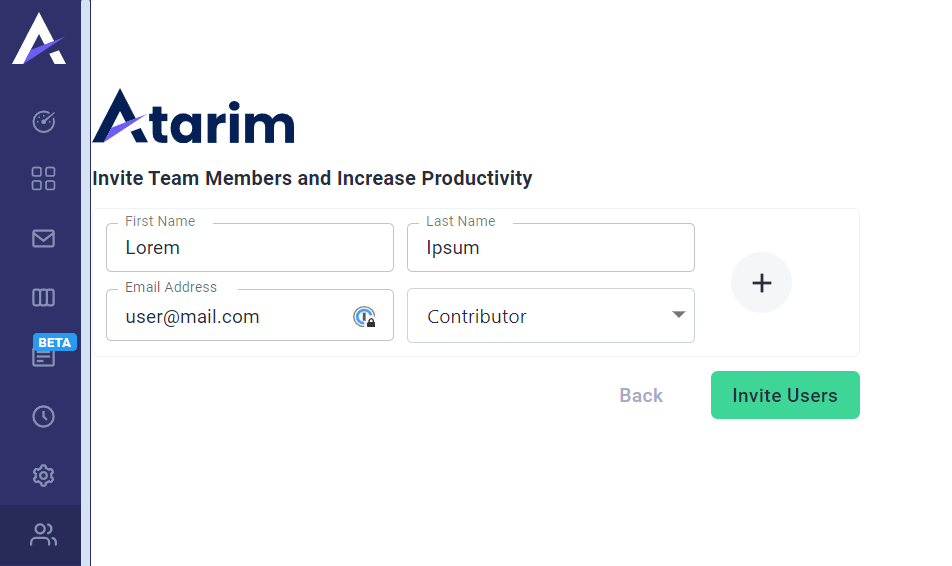
Here, you can fine-tune team members’ email notification settings, such as the alerts for new tasks, comments, or status changes. This streamlines communication and keeps everyone up-to-date, minimizing the need for back-and-forth messages.
You can also track team members’ past activities and assign them new tasks or projects.
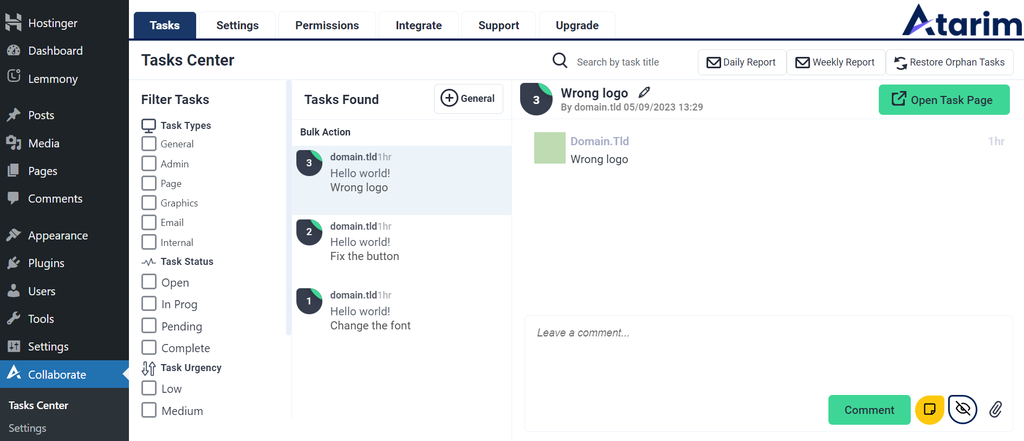
4. Assign Client Tasks to Team Members From the Front End
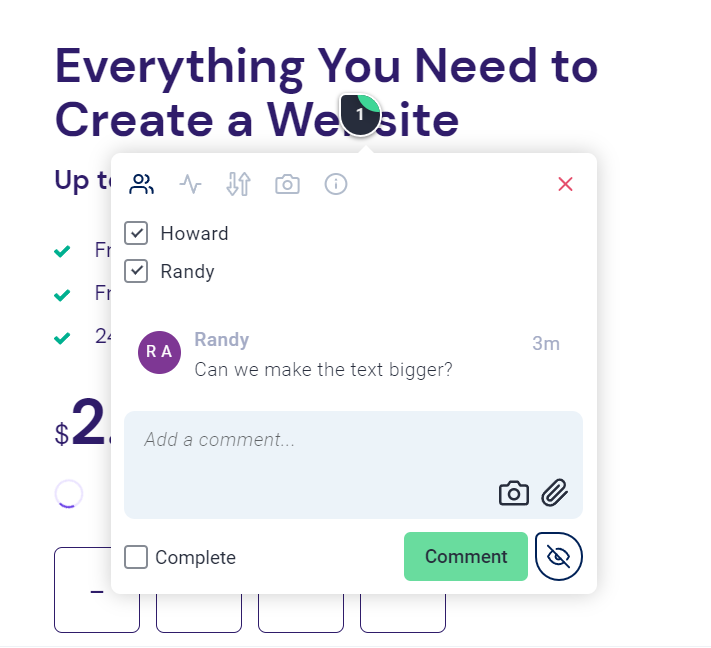
After inviting clients to visually collaborate on the project, they can start giving feedback directly on the website. You can assign team members to address them from the front end. On the comment box, click the user icon in the top-left corner. Then, tick all the users involved.
When team members see this comment, they can navigate to the second tab to mark the task’s status as In Progress.
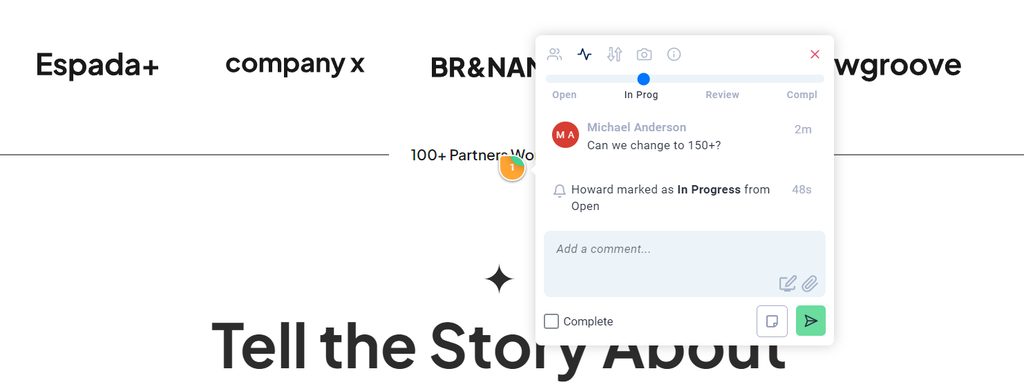
Atarim also lets users set the urgency level for tasks right from the front end. This way, critical and time-sensitive issues don’t get overlooked.
To set task urgency, click on a comment and select the arrows icon. Choose between four levels – Low, Medium, High, or Critical.
- Low can be for minor website tweaks that can wait.
- Medium can be for more important tasks that can wait.
- High can be for crucial tasks that don’t require instant action.
- Critical can be crucial, time-sensitive tasks demanding instant action.

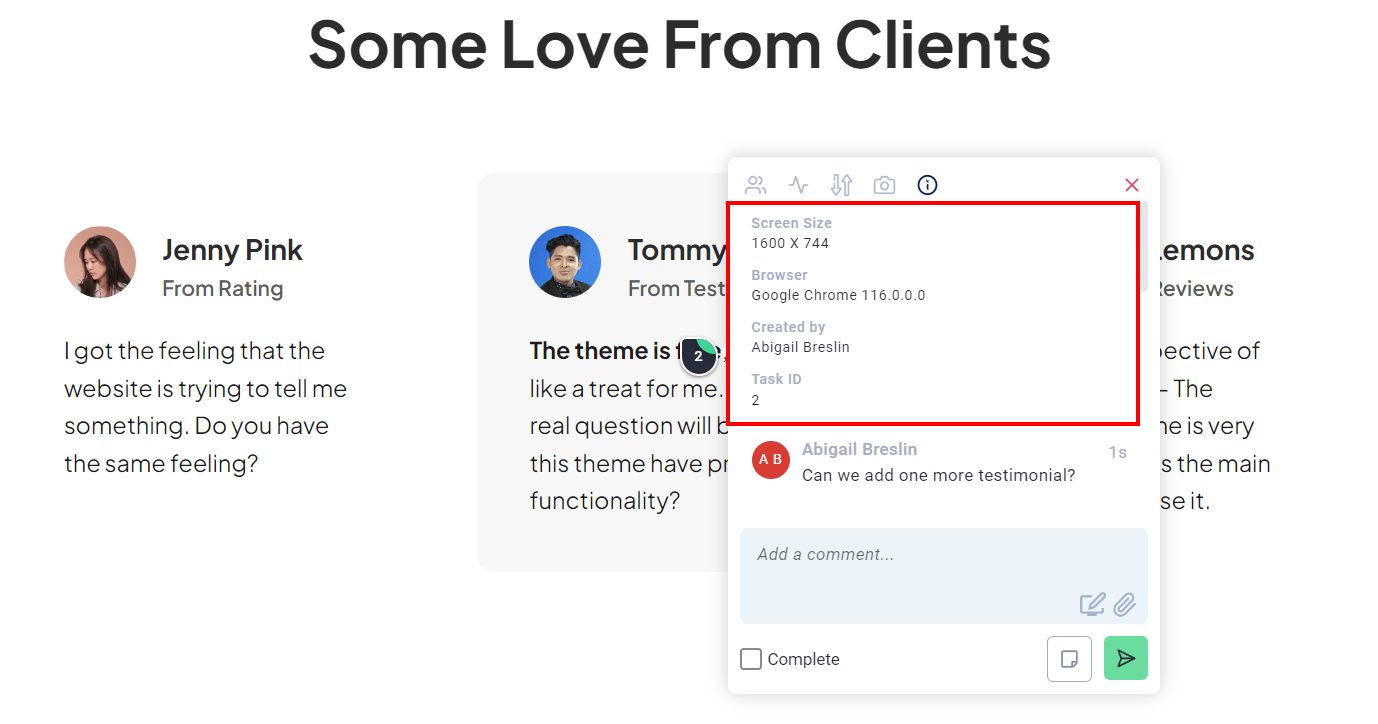
Sometimes, you may need your client’s browser and screen size information to make changes specific to their device’s specifications. Switch to the tech info tab to view these details.
5. Find Client Comments and Tasks in Your Inbox
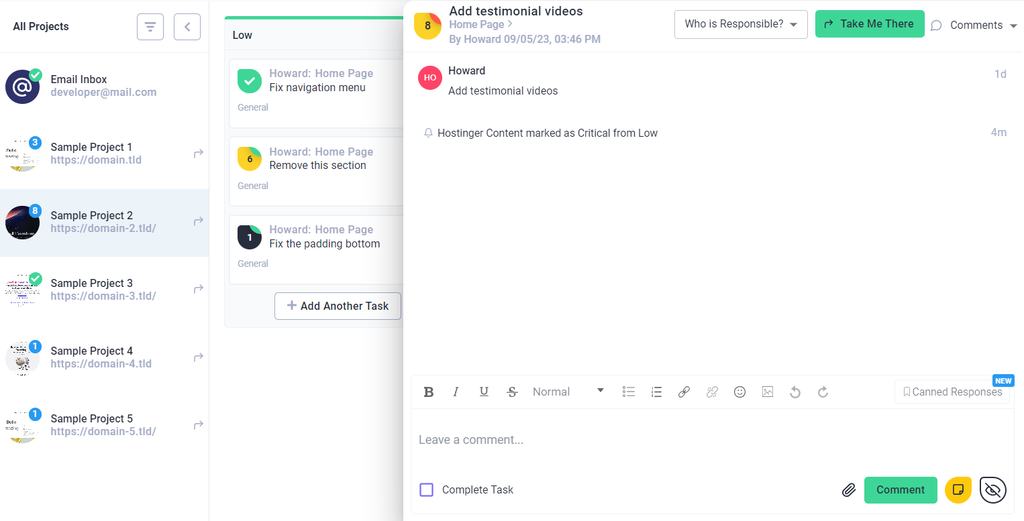
With Atarim, there’s no need to worry about scattered communication. All comments and messages are easily accessible from the Inbox on the Atarim agency dashboard.
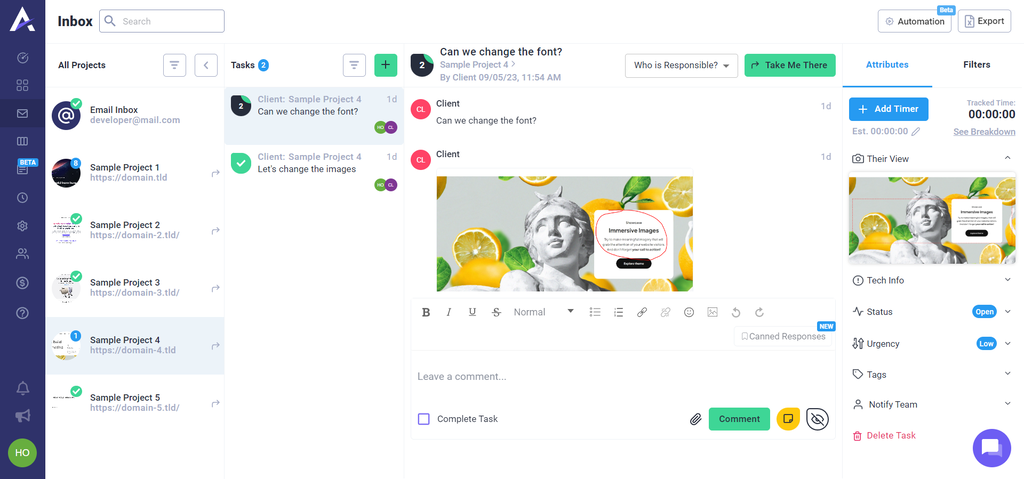
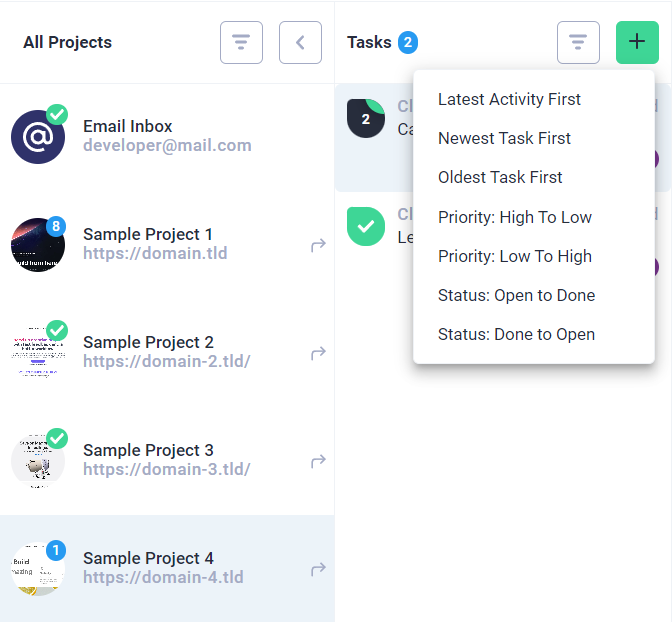
The inbox organizes the tasks by project. You can sort them by priority, status, latest, or oldest.
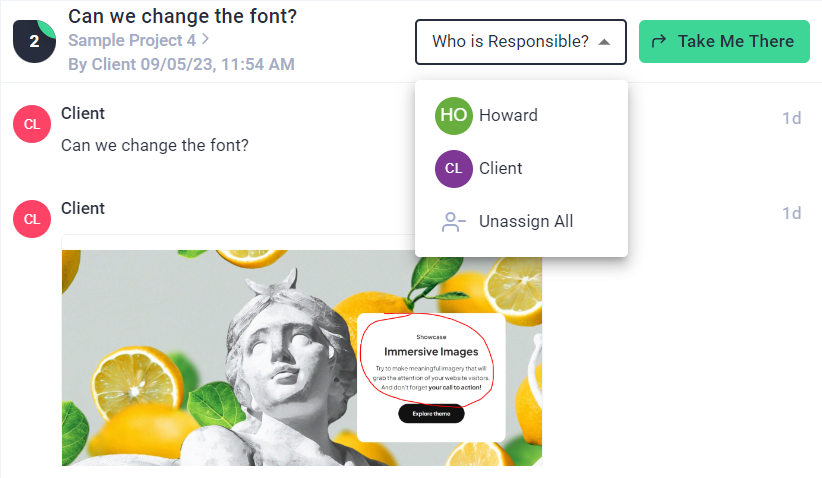
The Take Me There button will direct you to the collaboration interface, providing more context for the client’s comment. Expand Who is Responsible? to quickly delegate the task to team members.
Add attributes like timers, urgency levels, and tags to help categorize and manage the assignment better.
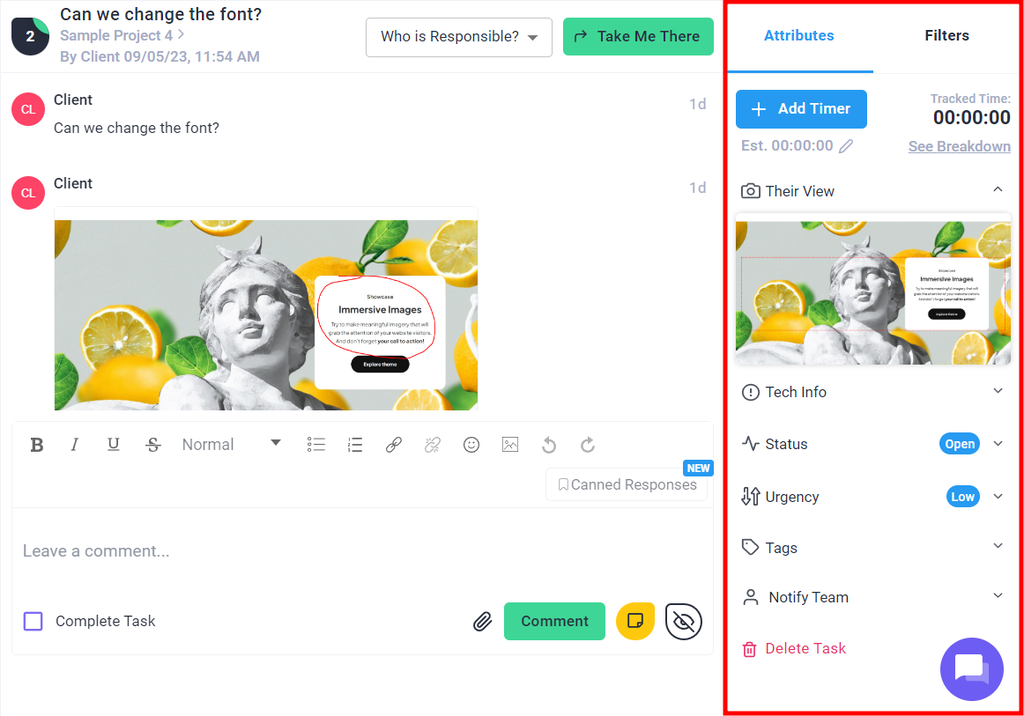
When updating a task, you can add comments and attach files for more clarity. These messages will show up on the visual collaboration interface, too. Tick the Complete Task box to finish it.
Atarim also offers canned responses to create reusable text snippets. They make it easier to reply to frequent client requests or questions.
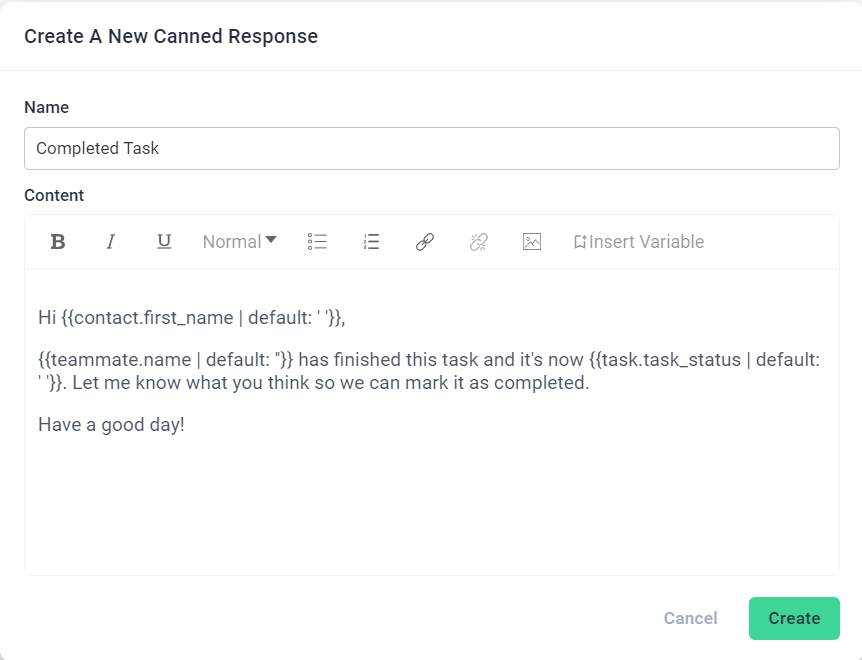
To set them up, navigate to the dashboard’s Settings → Canned Responses. Click Create A Canned Response, and a pop-up will emerge. Then, insert the snippet’s name and message, and add variables like the client’s full name, email, urgency, status, and assignee if necessary.
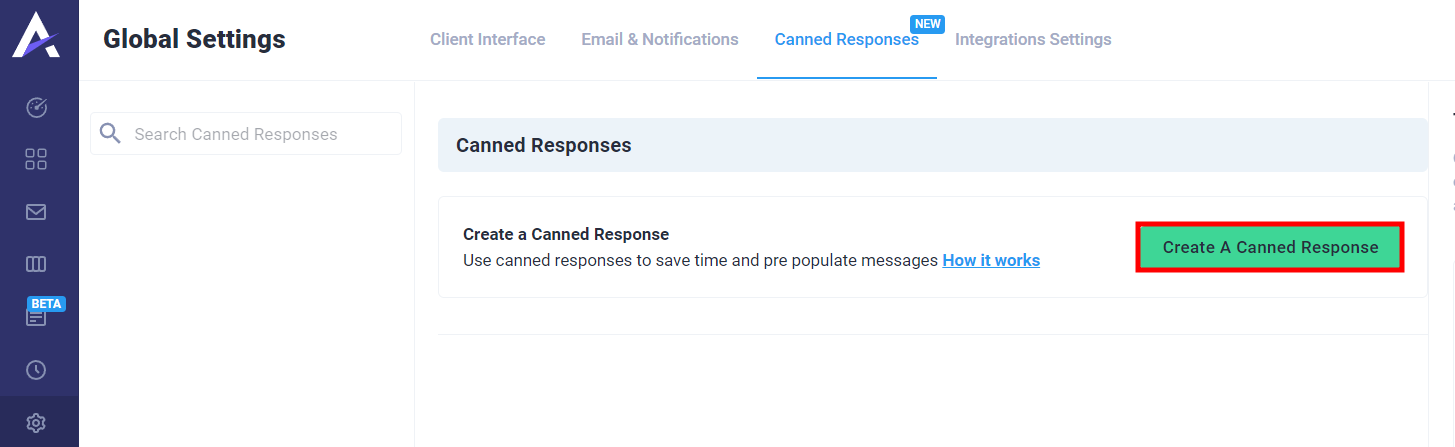
Hit the Create button to save the new canned response.
6. Communicate With Your Team Internally Through Notes
Sometimes, a private channel for your team is necessary to discuss project details without involving the client. This could be useful for internal strategy, issue resolution, or casual brainstorming.
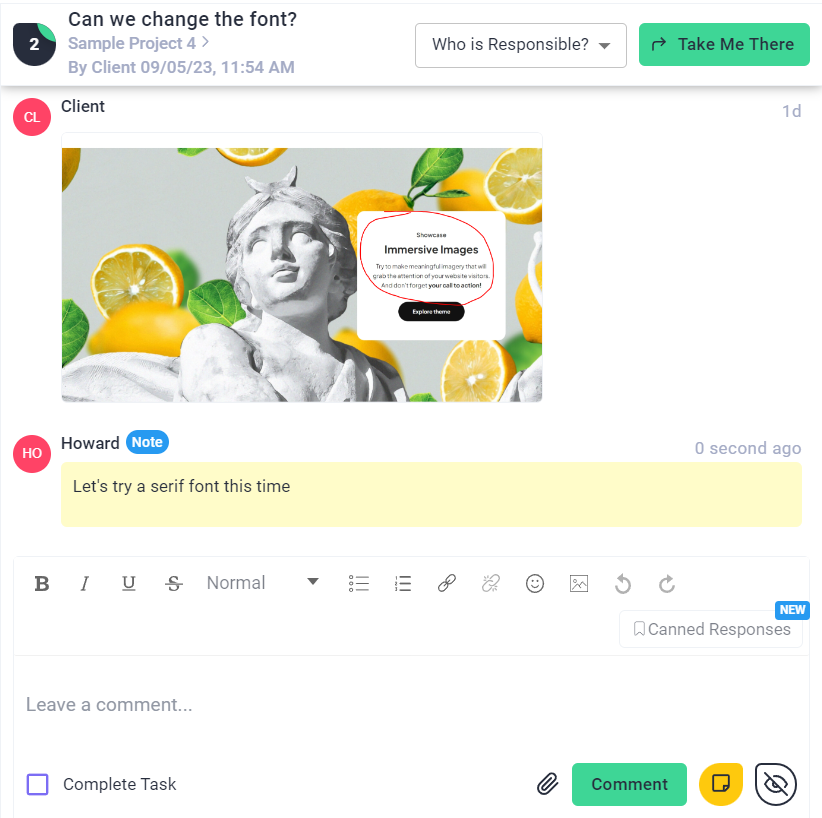
Atarim offers two features for this purpose. The first is notes, which let you leave comments that only other team members can see. It is accessible from right in the inbox.
To use it, simply write down your comment and click the yellow notes icon when finished.
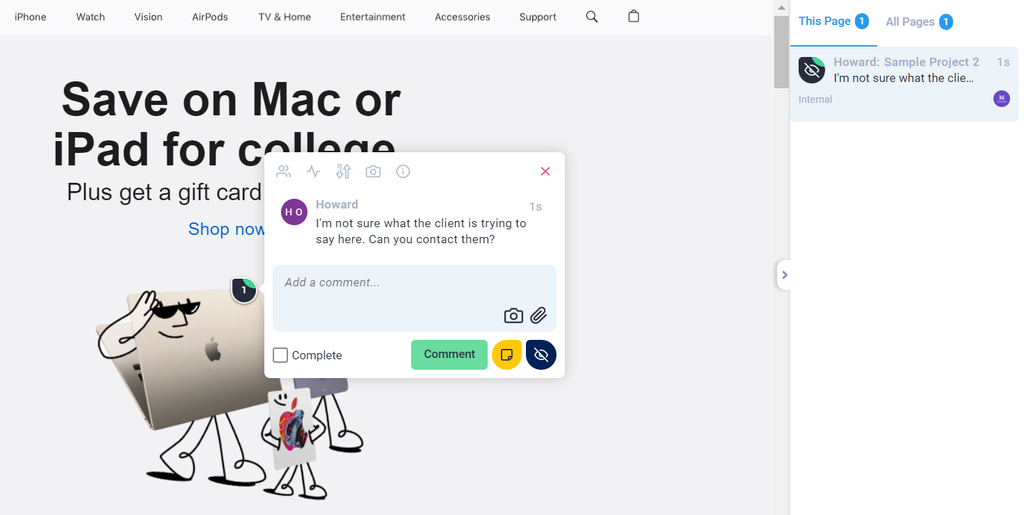
The second feature is the internal task, represented by an eye icon. Available through the inbox, the front end, and the Atarim task center on WordPress, activating this will make the task visible only to team members.
Enter your message and press the eye button to enable the feature. Deactivating the internal task feature will make the task publicly visible, so use this function wisely.
Suggested Reading
Communicating With Clients: 10 Tips to Improve Your Client Relationships
7. Mark the Task Status to Inform the Client
Updating the task status is important when working with a client. It creates transparency, aligns expectations, and facilitates efficient workflow. Both team members and clients will be able to stay up-to-date and make informed decisions.
Atarim makes this easy with its Boards page, where tasks are organized by projects. It offers various sorting and filtering options for easier navigation.
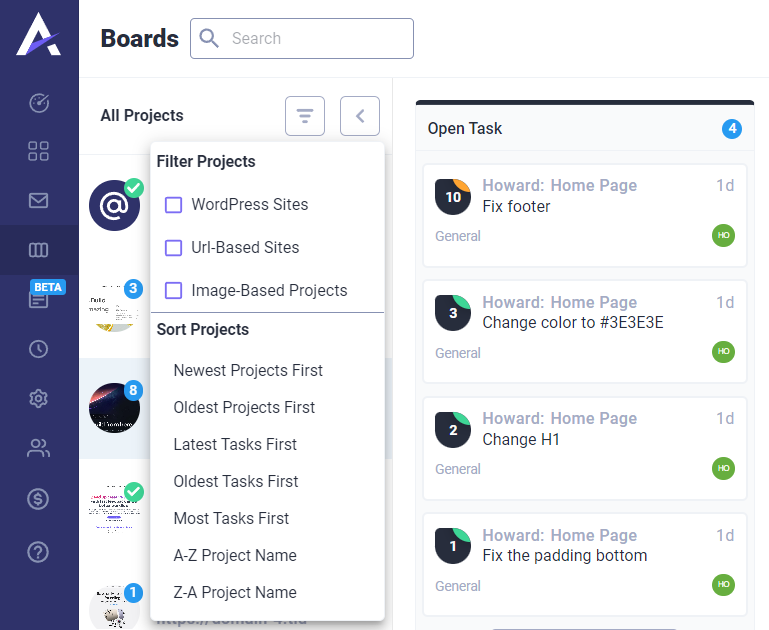
Two view options are available, toggled from the top-right corner. One is Task Status, consisting of four columns – Open Task, In Progress, Pending Review, and Completed.
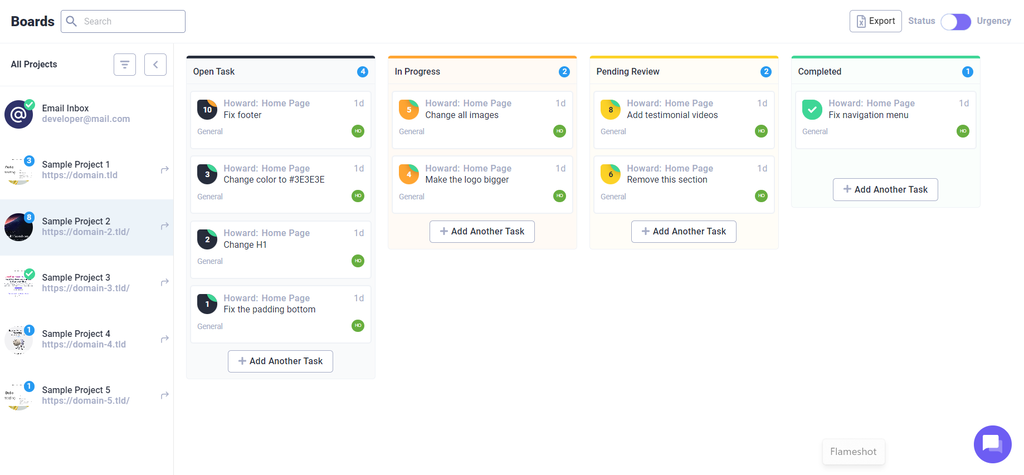
The other is Task Urgency, which has Low, Medium, High, and Critical.

Like a standard Kanban board, you can drag and drop tasks based on their status or urgency. You can also add tasks directly from this board, eliminating the need to switch to the front-end view.
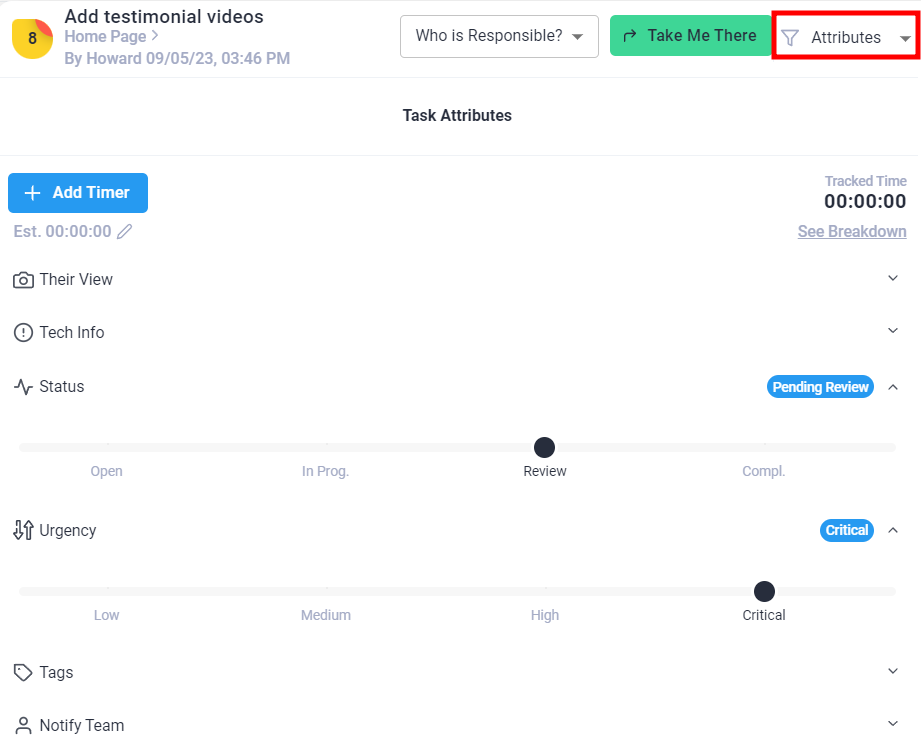
Clicking on a task opens all related client-team communications, similar to the Inbox page. This way, there’s no need to navigate to a different menu to get all the relevant information about the task.
You can also change to the Attributes mode to add a timer, change the task status or urgency level, add tags, and set notification preferences for the assignment’s progress.
How to Use Atarim as a Client
Now, let’s delve into how to use Atarim as a client. This section will be particularly helpful if you own a website and are working with a developer. Or if you’re a developer who wants to guide clients through the Atarim platform.
1. Open the Link and Connect Through Your Email
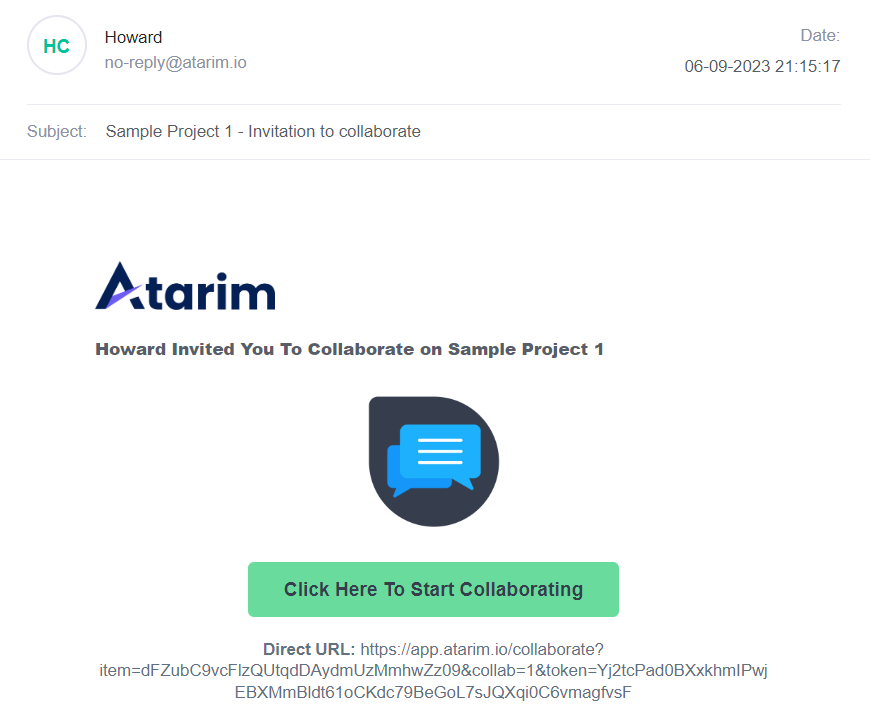
When a web developer invites a client to an Atarim project, the client receives an email invitation. Simply click the link in the inbox to get started.
There’s no need to set up an account from scratch. The client will automatically be logged in and ready to provide feedback on the project.
2. Leave Feedback via Comments
Atarim’s streamlined workflow makes communicating and connecting with stakeholders easy.
After logging in, the client will see the front end of the project. Hover over any website element, and a red box will appear, highlighting it. Select this box to leave a comment, creating a task everyone can see.
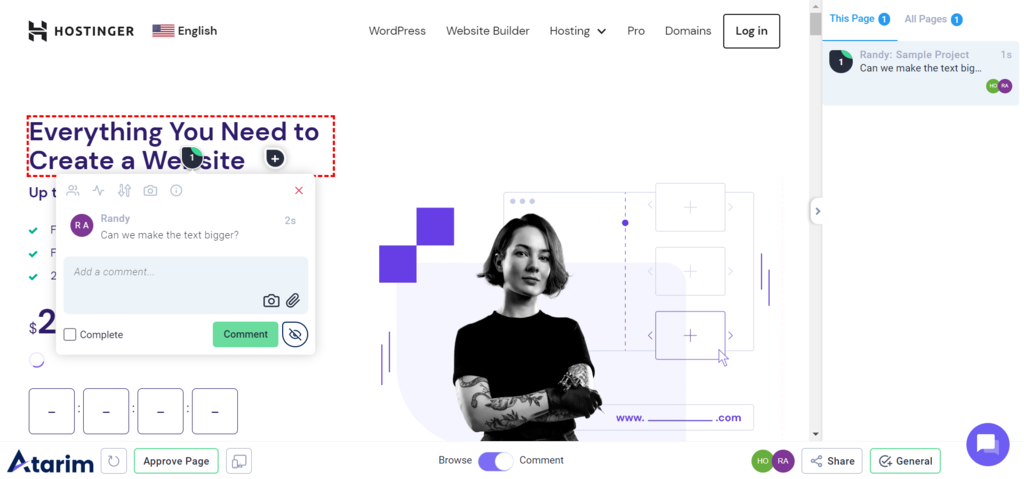
Like team members, clients can set a task status and urgency if needed.
3. Leave Notes on Screenshots for Non-Elements
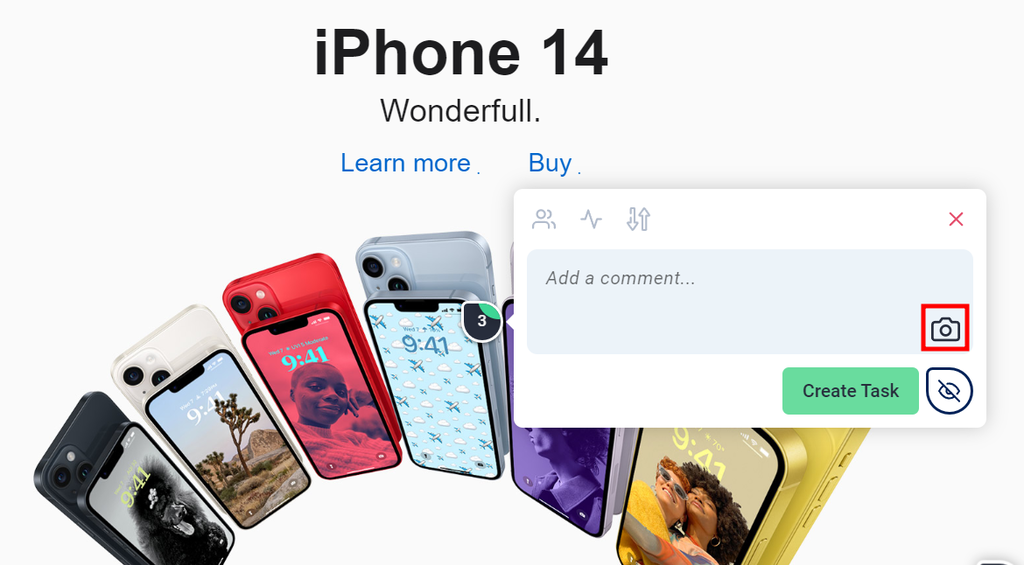
When navigating a project, clients may find that the red box doesn’t always appear around the element they want to comment on. In this situation, automated screenshots are useful.
The client can click near the area they wish to refer to, then hit the Camera button in the comment box. When the browser asks permission to take screenshots, go ahead and allow it.
The system will automatically capture a screenshot and provide an editor for clients to add annotations to the image. Use the rectangular highlighter to pinpoint a specific area.
After annotating, click Create to include the screenshot in the comment box.
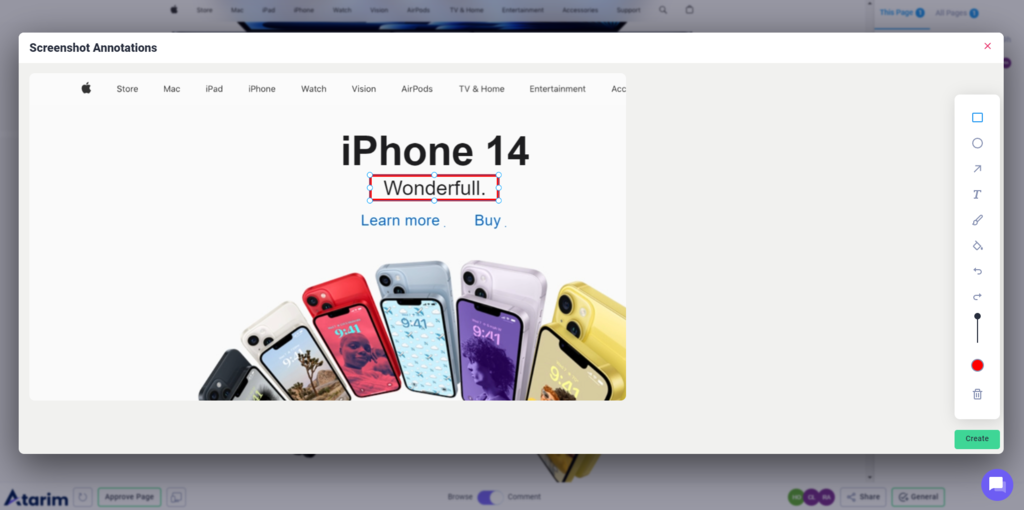
This feature allows clients to leave precise feedback that can be critical for a smooth workflow. They can also add any additional comments for extra context.

4. Follow Progress Through Emails
Clients typically keep track of a project’s progress by pinging their freelancer or agency or checking the website directly. Although well-intentioned, this can sometimes disrupt the team’s workflow. Atarim prevents this issue by sending clients email notifications about the project.
They’ll get updates on task statuses, requests created, and automated screenshots in their email inbox. They will be able to follow the project’s progress without constantly communicating directly with the team.
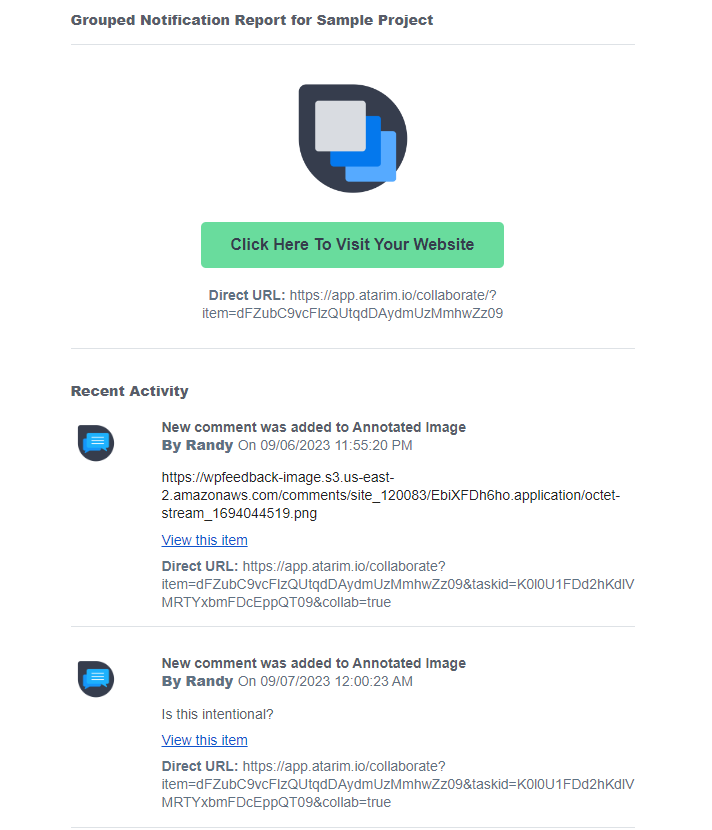
Fortunately, clients don’t need to worry about getting bombarded with emails. Atarim compiles all essential updates into easy-to-read grouped notifications. Each email includes links to specific comments on the Atarim platform for convenient follow-ups.
Tips and Tricks for Using Atarim
Now that you’re familiar with Atarim, let’s discuss tips and tricks to make the most of this tool.
Set a Timer to Calculate Hours Worked
For freelancers and agencies, not tracking time spent on tasks can result in poor project estimations and missed deadlines.
The Atarim dashboard includes a time tracker that monitors hours spent on tasks. This lets you stay on track, generate more accurate pricing estimates, and adjust deadlines as needed.
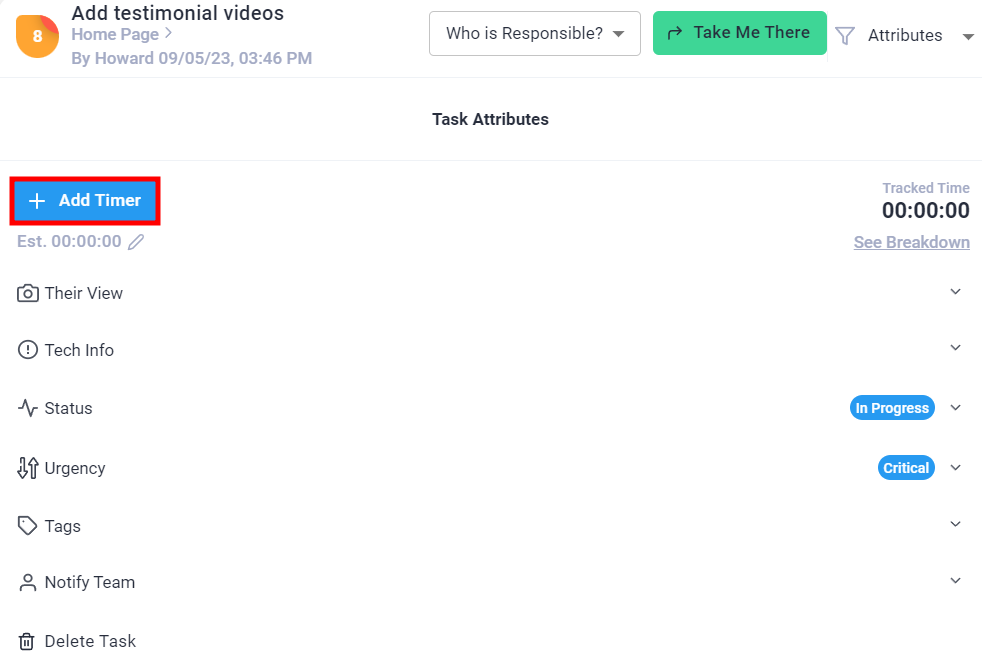
To set a timer, navigate to either Boards or Inbox, select a task, and view its attributes. Then, hit + Add Timer to initiate the tracking.
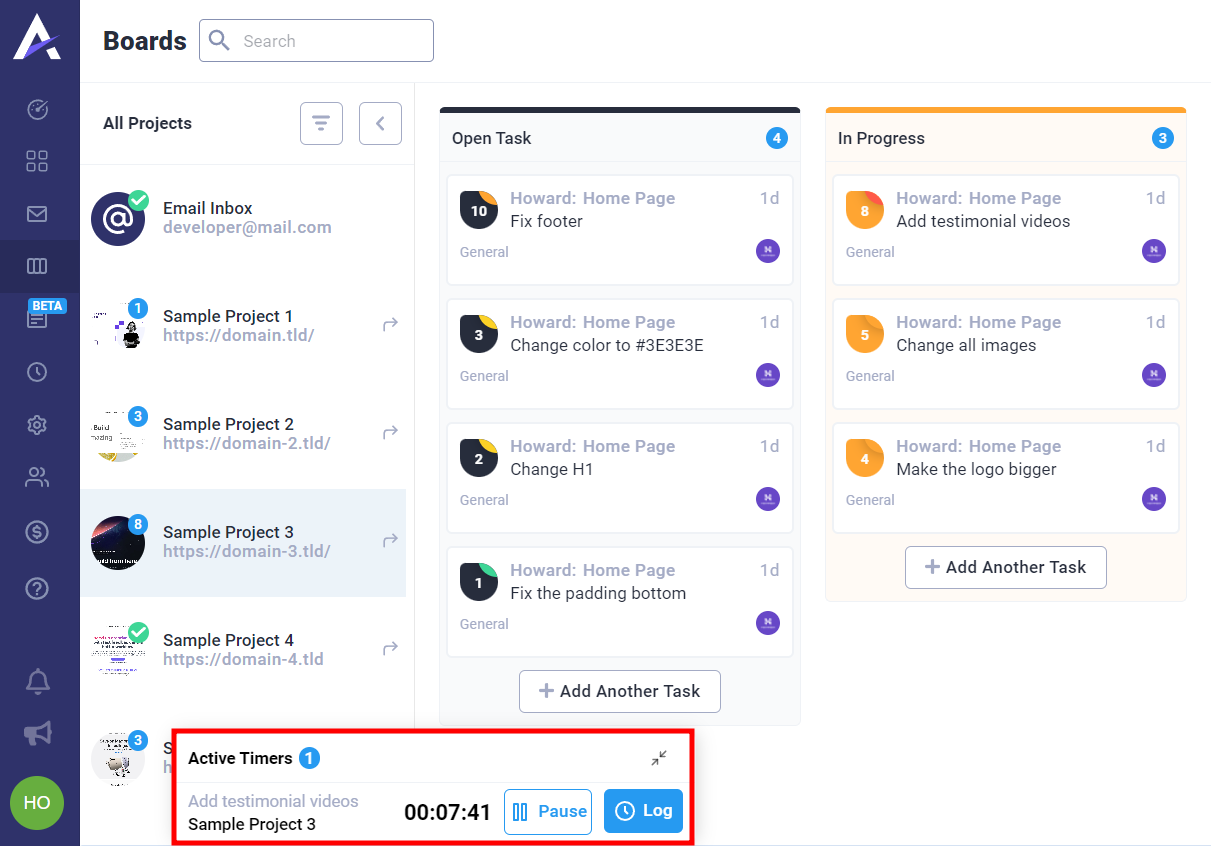
A timer will appear at the bottom left of the screen and start counting automatically. You can also pause the timer whenever necessary. When done, click Log to stop the timer and record your time entry.
Then, a pop-up will appear, prompting you to describe the completed work. Ticking the Complete Task checkbox will notify clients and team members that the task is done.
Checking the Billable box will help calculate billable hours based on your rate, making it easier to manage workflow and support project estimates.
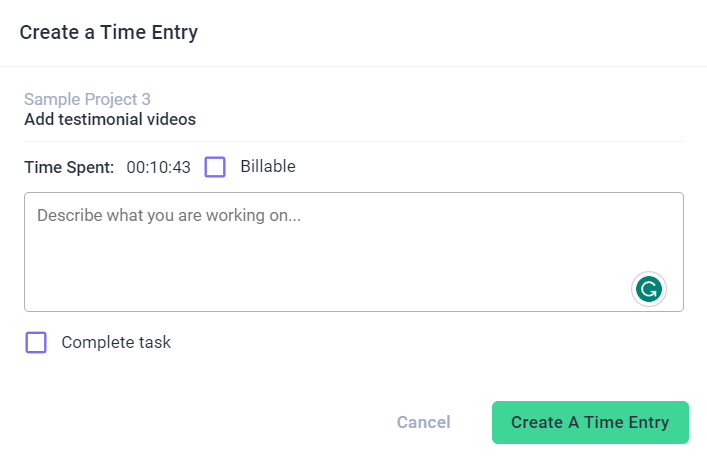
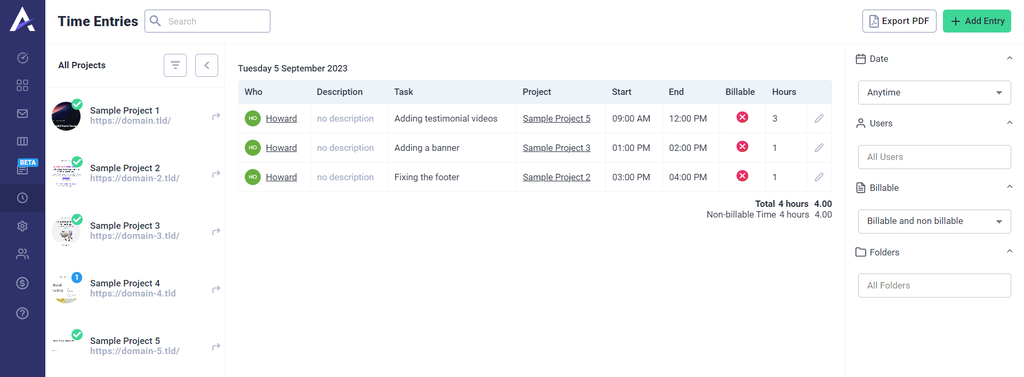
After completing the necessary information, click Create A Time Entry to log your hours into the system. For a historical overview of the tracked time, head to the Time Entries page. You can export all the data to a PDF for client invoicing or internal time audits.
Collect Feedback Through Forms
Asking for feedback is crucial for continuous improvement and client satisfaction. It helps gauge the effectiveness of your workflow and team communication so you can fine-tune your approach for future projects.
Consider these aspects when creating a feedback form:
- Timeliness. Send the form shortly after project completion to get the most relevant insights.
- Clarity. Make sure the questions are easy to understand.
- Specificity. Target specific aspects like design, functionality, or support team responsiveness.
- Multiple formats. Use various question types, such as multiple choice and open text, to gather both qualitative and quantitative data.
Use Atarim’s Inbox as a Support Platform
The client relationship doesn’t end when the project is complete. There may be a need for ongoing website tweaks, bug fixes, feature additions, or hosting support for your clients.
Keep the conversation going through Atarim’s Inbox rather than scattered emails or texts. It centralizes client support communication and keeps the team in the loop. This ensures quicker responses when you’re unavailable.
Nurturing strong client relationships after a project can pave the way for long-term contracts, increased clientele for freelancing through referrals, and positive reviews – all of which are vital for a business’ success.
Suggested Reading
How to Become a Freelance Web Developer
How to Start a Web Design Business: From Freelance to Business + Success Tips
Conclusion
Atarim is an all-inclusive hub for web developers, designers, and clients. Accessible through Hostinger Pro Panel, it simplifies website project management and client communications.
Web developers and designers can use Atarim to gather information for their projects, collaborate with team members and clients, and monitor milestones from a centralized dashboard.
Atarim also offers clients a user-friendly platform to leave comments, set task urgencies, and stay up-to-date on project progress through grouped email notifications. If you’re ready to experience Atarim’s full range of features, get a Hostinger web hosting plan today and configure your Pro Panel. We’d love to hear your thoughts on this new integration and what it does for your workflow and client communications.

Maisha is a proponent of high-quality, actionable content. When she's not writing for Hostinger Tutorials and Blog, she immerses herself in the English thesaurus. Her love for personal development essays drives her to help her fellow writers succeed in the world of content marketing.