WordPress Custom Fields: What They Are and Ways to Add Them to Posts and Pages
As one of the most popular content management systems (CMS), WordPress is widely known for its various functions and customization options.
One such option is expanding metadata, which refers to key information of a page or post, including author names, titles, and descriptions.
Users can include additional metadata by enabling custom fields in WordPress, extending the functionality of specific posts or pages. For instance, collecting the author’s email, putting a disclaimer on a sponsored post, or attaching extra details to a product.
Similar to most WordPress features, you can add custom fields to your posts and pages manually or using a dedicated plugin.
In this article, we’ll explain what custom fields are and how to add them to your WordPress content using both methods.

What Are WordPress Custom Fields
Each page and post you create in WordPress carries its own metadata. The WordPress’ default metadata includes the author’s name, date, and time. For example, on the post below, you can see the metadata displayed above the post title.
In some cases, however, you need to add metadata that WordPress doesn’t support out of the box – this is where custom fields come in handy. WordPress custom fields are a feature that inputs additional information to a post or a page.
Custom fields give you a way to enter that data and extend the information on your content:
- Flexible and customizable. Custom fields are made of code snippets, allowing you to customize and control their placements on your site’s front-end.
- Easier input and update. If you want to update the information displayed on your posts, simply modify the custom fields instead of editing each post individually.
- Consistent. Custom fields ensure all of your posts display the same information in the same formatting.
Finally, it is important to note the difference between custom fields and custom post types.
A custom post type is a specially formatted kind of content, such as review posts or product pages. In many cases, people add custom fields to their custom post templates, but you can also use them separately.
How to Add WordPress Custom Fields to Your Posts and Pages
In the following section, we’ll help you create your own custom fields using two different methods.
The first method involves installing a dedicated plugin to simplify the process. The second one requires that you manually edit your WordPress theme files.
Use the Advanced Custom Fields Plugin
There are a lot of plugins to help you quickly add WordPress custom fields. The most popular one is Advanced Custom Fields (ACF).
It comes with an easy-to-use user interface that allows you to add 30 custom field types with only a few clicks. To get started, you need to install the plugin and activate it.
Go to your dashboard and into the Plugins → Add New tab. Once you’re there, use the search bar to look for Advanced Custom Fields.
Go ahead and click the Install Now button. Wait until the text changes to Activate, then click on it once more.
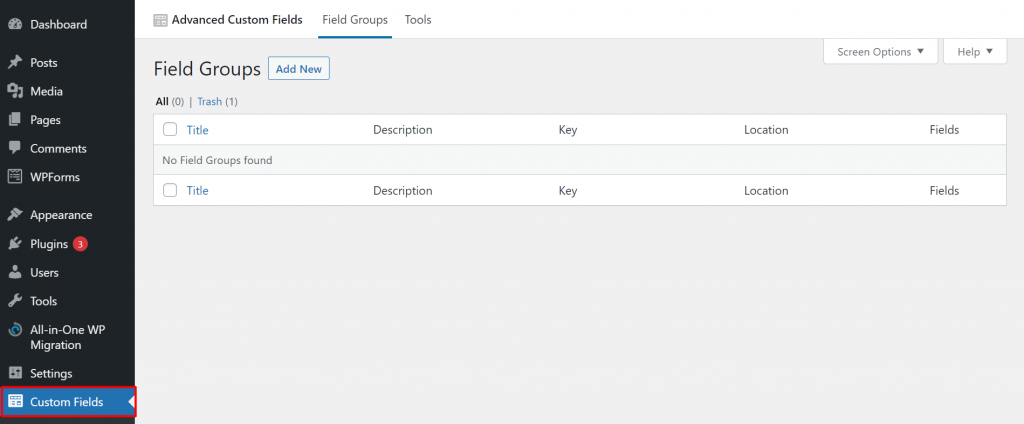
Once Advanced Custom Fields is up and running, you’ll see a new Custom Fields tab appear in your dashboard. Clicking on it will reveal a list of custom field groups, which should be empty.
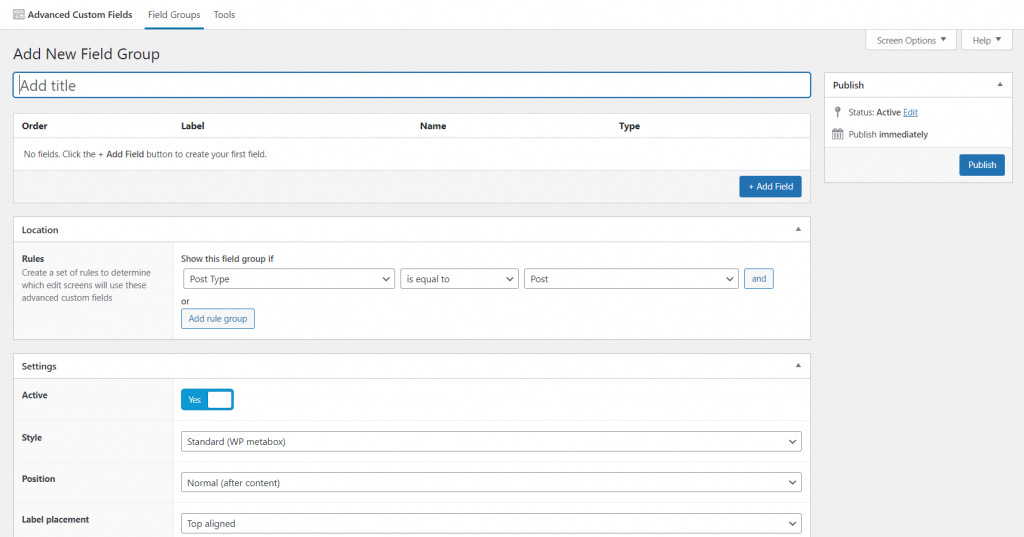
To set up a field group, simply click on the Add New button at the top of the screen.
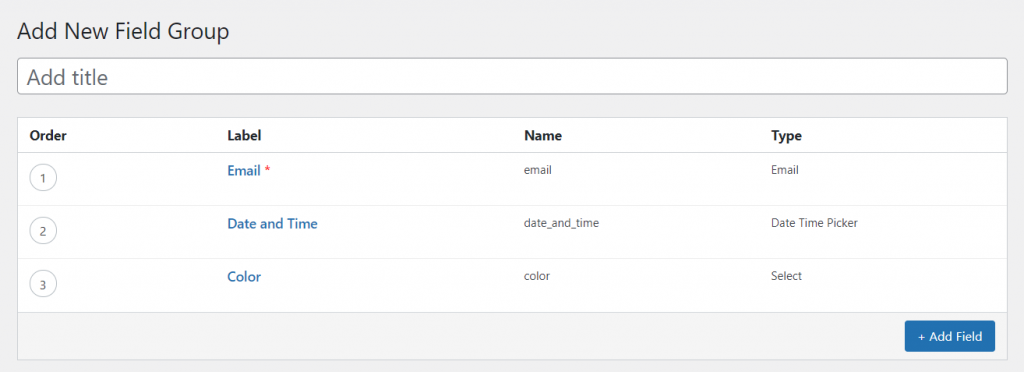
Continue by clicking on the Add Field button. Pick a label for your new field that will also serve as its name. You also need to choose what type of field you want to set up – some of the options include text, checkbox, and email.
For this example, we’re going to create an Email field to collect every author’s email address.
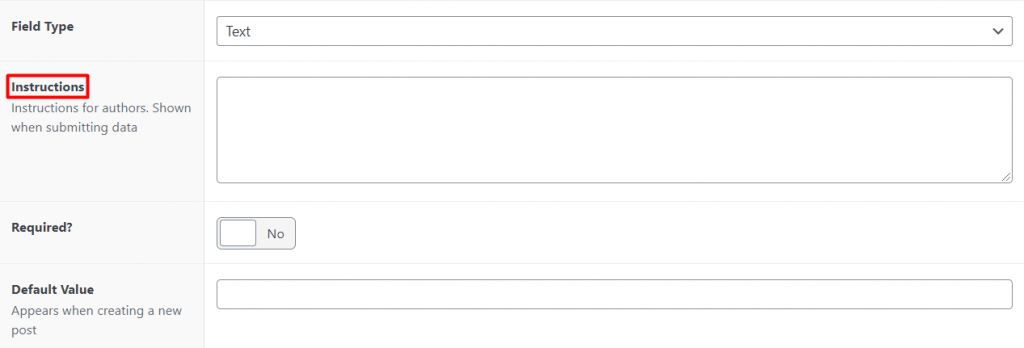
To write a set of instructions, simply fill in the provided field. For example, you can add “Please fill out your email address before publishing your post.”
Although this step isn’t necessary, it helps other administrators on the website know what to do with the custom field.
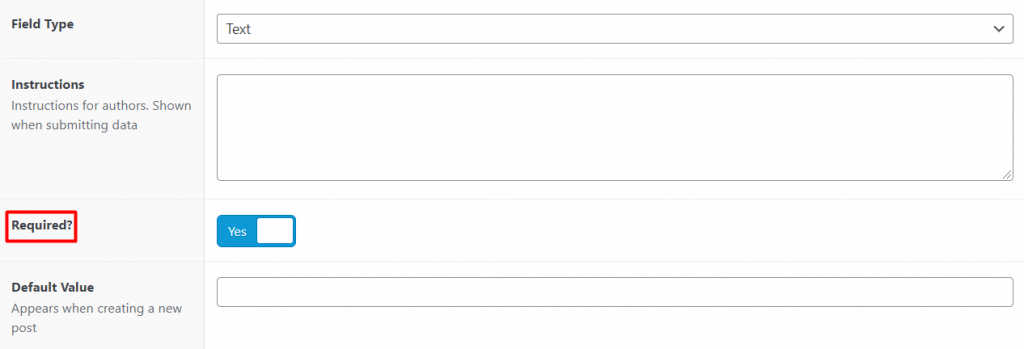
Moving on, you’ll also need to indicate whether this is a required field or not. This way, it will not be possible to save posts or pages without filling it out.
There are a few other advanced settings you can adjust if needed. Once the basic properties are filled out, scroll down to locate the Close Field button.
Clicking on it will automatically add your custom field group to the list. To add more custom fields, simply choose the Add Field button and repeat the process.
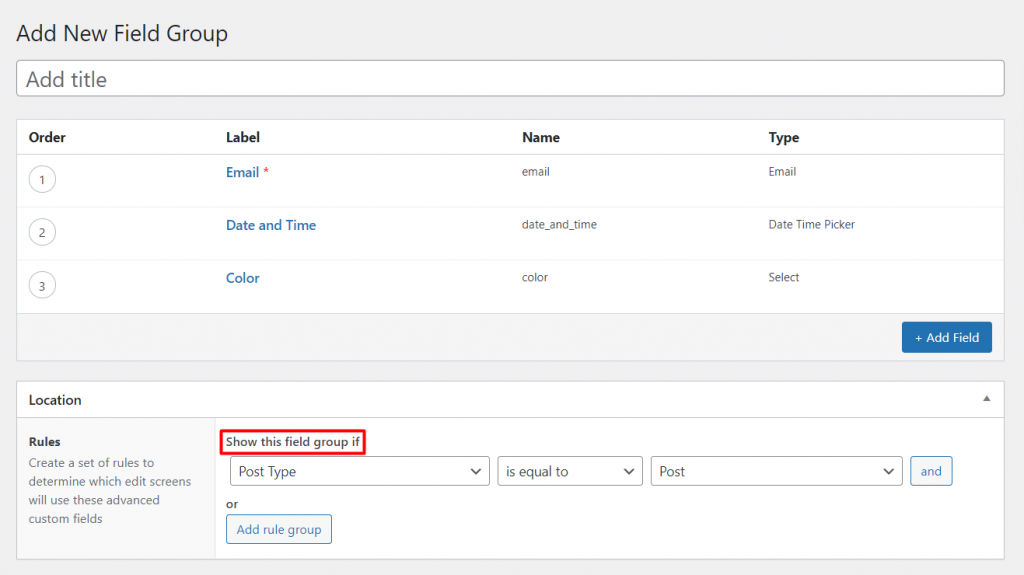
Once you have created your custom field groups, you’ll need to configure where these custom field groups will show up by customizing the Location settings.
There’s an option labeled Show this field group if that you can use to configure the display options.
In this example, we configured the custom field to show up on regular posts. If you want, you can add more than one location to display your custom field using the Add rule group button.
Finally, hit the Publish button to save your new custom field.
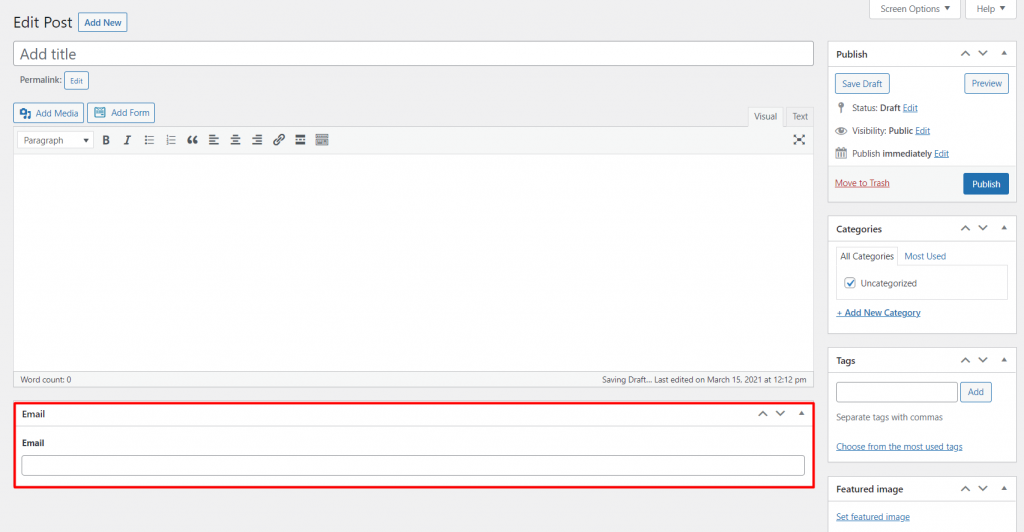
When your field is ready to go, open the WordPress post editor. The custom field will show up right under the text editor.
Keep in mind that you can’t use Advanced Custom Fields to display custom fields for website visitors – the custom field will only show up in your dashboard.
If you want to display the custom fields on the site’s front-end, you’ll need to edit the theme file. We will walk you through this process later in the article.
Other Custom Field Plugins
If you’re looking for a plugin that offers more options than Advanced Custom Fields, we listed three alternatives to help you find a tool that better suits your website needs.
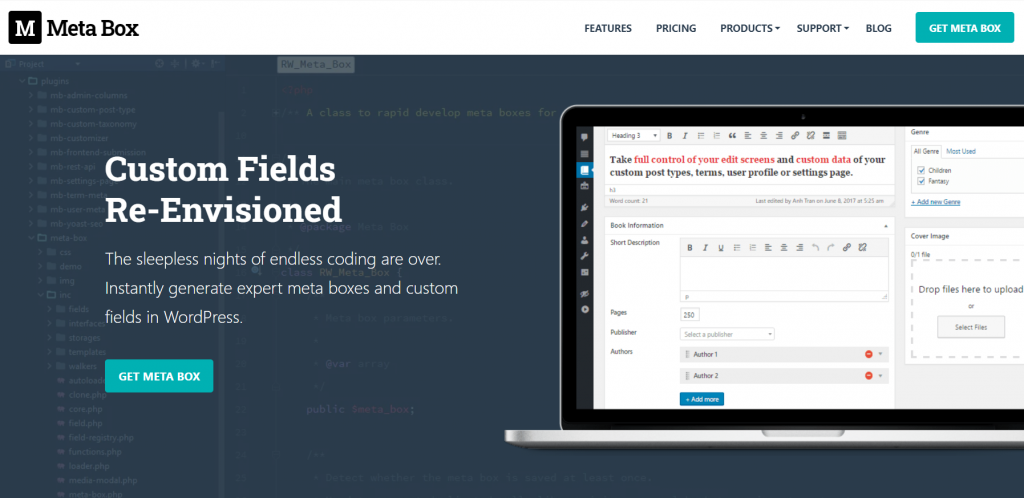
1. Meta Box
With Meta Box, enable custom fields in WordPress posts, pages, and forms. It supports up to 40 custom fields, from text lists and check-boxes to images and user fields.
It provides free extensions, allowing you to add custom fields in the comments and Yoast SEO to improve your content’s SEO scores. The plugin also integrates with WordPress page builders like Beaver Builder.
Additionally, Meta Box offers both free and premium versions.
With its premium version, starting at $99/year, you’ll get access to its meta box builder. This feature lets you add WordPress custom fields using an easy-to-use drag-and-drop interface.

Custom Fields Suite offers a lightweight and straightforward solution to enable custom fields in WordPress websites.
This free plugin supports 14 field types, including loop, tab, WYSIWYG, date, and true/false. You can add custom fields to your WordPress post, page, and custom post types.
Use the plugin to create custom field groups and display them on the post editor. With the placement rules box, you can also decide where the field group will appear. For instance, it’s possible to place it above or below the text editor.
The only downside of Custom Fields Suite is that it doesn’t have a customer support team. However, it provides documentation that you can access for more information about the plugin.
3. Pods
Pods manages all custom content in a simple and clean interface. This makes it easier to add custom fields to your posts, pages, or any custom content types.
Use the plugin’s shortcodes, widgets, or templates to display the fields anywhere on the site. Pods also comes with default custom field types, but it’s possible to create new types according to your needs.
Pods integrates well with other WordPress plugins such as Polylang, Beaver Builder, and Gravity Forms. Moreover, it is equipped with extensive documentation and live chat support to guide users and solve any issues.
[DOWNLOAD]
Add WordPress Custom Post Fields Manually and Edit Your Theme to Display Them
By default, the custom fields option is hidden in WordPress. To enable this feature, access your page or post editor.
Locate the Screen Options button on the right corner of your screen, and check the Custom Fields box.
This will make a new dialog box appear below the content editor.
You can enter the custom field data using key/value pairs. The key refers to the name of your custom field, while the value is the information you want to display.
For example, we want to add a disclaimer to a sponsored post. So, we set Sponsored as the name and fill out Yes or No in the value box to show if the post was sponsored or not.
Hit the Add Custom Field button at the bottom of the box to save it.
However, the process doesn’t end there. WordPress only keeps custom field values on the back-end. To display the information on the front-end of the site, you need to edit the theme files.
There are several options to edit your theme files – through your admin dashboard, connecting to an FTP, or using Hostinger’s File Manager.
Regardless of the method you choose, we recommend using a child theme to experiment freely without damaging the theme during the process.
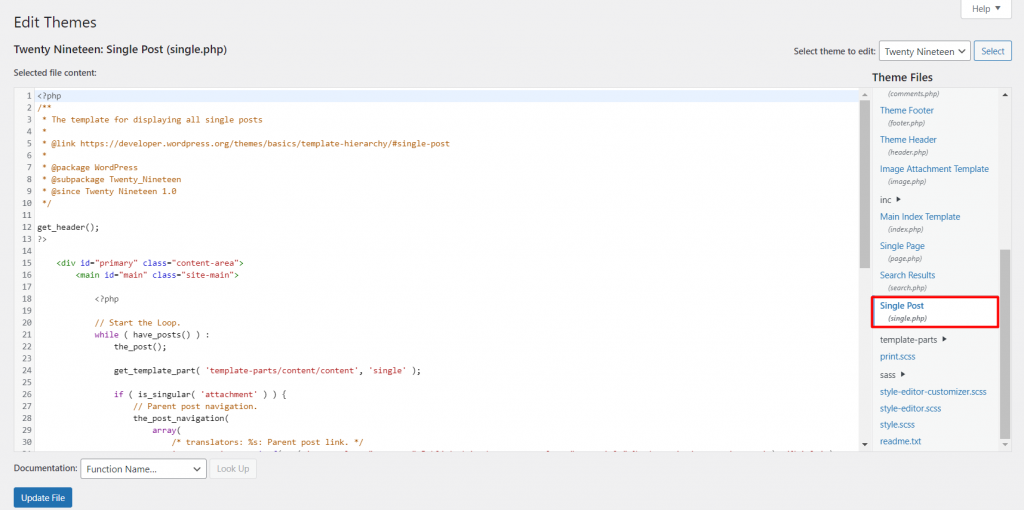
In this tutorial, we will show you how to access the files directly from the WordPress dashboard. Proceed to Appearance → Theme Editor, then locate the single.php file.
Below is an example of a commonly used code to display custom fields:
<?php echo get_post_meta($post->ID, 'key', true); ?>
Note that the exact code you’ll use may vary depending on the action or information you want to display. However, be sure to change the ‘key’ placeholder with your custom field name.
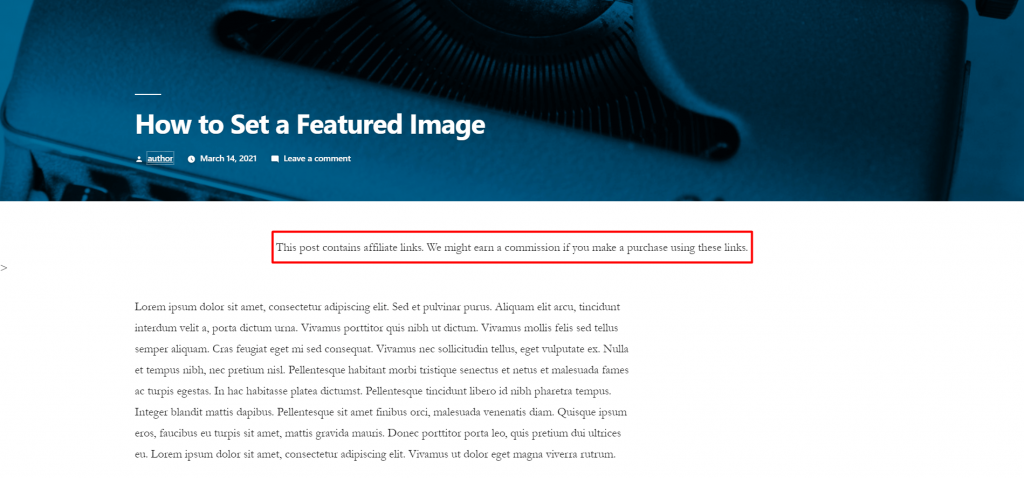
In this example, we want to display a disclaimer message for sponsored posts. Thus, the code should look like this:
<?php
$meta = get_post_meta( get_the_ID(), 'Sponsored Post' );
if( $meta[0] == 'Yes' ) {
?>
<center>This post contains affiliate links. We might earn a commission if you make a purchase using these links.</center>>
<?php } ?>
What you want to do is add your code in the WordPress loop, which is a function that tells WordPress what data it needs to pull up and display when someone views content on your site.
A loop code can vary, depending on which theme you’re using. However, here’s what the default WordPress loop looks like:
<?php if ( have_posts() ) : while ( have_posts() ) : the_post(); ?>
<?php endwhile; else: ?>
<?php endif; ?>
When adding a custom field, you are free to control its placement on the site. For instance, to place it at the top of a post, add the code before the following line:
while ( have_posts() ) : the_post();
When you’ve successfully added the code to the theme editor, click on the Update File button to save the changes.
The code we apply tells WordPress to look for posts with Sponsored Post custom fields and check the value.
WordPress will display the disclaimer message if the value is set as Yes since the post is marked as sponsored. Otherwise, it won’t show any additional information or metadata.
Keep in mind that the example above is one of the WordPress custom fields’ basic functions. To apply more complex actions, you will need to do some extra coding.
Below are several template tags you can use to customize the custom fields function on your website:
- the_meta() – also known as post-meta, this tag displays a list of post custom fields.
- get_post_custom() and get_post_meta() – retrieves a single or multiple metadata of a post.
- get_post_custom_values() – fetches the values of a custom post field.

Conclusion
WordPress is equipped with advanced features like custom fields to enable users to add extra information to a post or a page, from disclaimers to images and checkboxes.
The WordPress built-in custom field functionality is hidden by default, so we’ve included steps on how to enable it.
In addition to that, we have also covered the steps of creating and using custom fields in WordPress:
- By installing the Advanced Custom Fields Plugin or any of the other three plugins suggested on the website.
- Manually editing your theme’s single.php file.
The native WordPress custom field feature might not be the most user-friendly technique. For this reason, we’ve included the option of using custom fields plugins to simplify the process.
We hope this guide has helped you understand how to apply and display your custom fields on WordPress websites. Feel free to leave questions in the comments section below.








Comments
May 04 2020
Hi, And thanks. I've been working at my WP website for weeks because I used to write my own site but decided to migrate all to WP to join the rest of the world. I'm' disappointed a bit though, precisely because there is little option to create custom posts and fields that does not require a major effort to stitch together different different plugins and php to make it happen. I don't want to use a template of someone else's idea of attractive. I want to make something uniquely mine--with my signature, so thanks for this helpful post. It is the first I've seen that steps through each part of the custom field process. Helpful. My one question to you is what plugin do you recommend to produce shortcodes of custom fields? I just want a shortcode for each of my custom fields and then place that anywhere using my editor of choice. Thx, rickymay
May 04 2020
Hey Ricky, glad that the tutorial helped! If you want to build shortcodes for your custom fields you can use the "Get Custom Field Values" plugin.