What Is Grunt? Learning How to Use It + Advantages and Disadvantages
Grunt is a command-line JavaScript task runner based on Node.js. It lets you perform minification, unit testing, and other repetitive tasks automatically to improve your web development workflow.
Grunt has plenty of extensions to expand its functionality, allowing you to automate various tasks easily. Alternatively, users can create custom plugins or scripts for specific tasks.
To help you understand more about Grunt, this article will explain its pros and cons and list some use cases.
Download Glossary For Web Beginners
What Is Grunt?
Grunt is a command-line JavaScript task runner written in Node.js. This tool helps improve development efficiency by automatically executing repetitive tasks like minification or linting.
It lets you automate various tasks by installing plugins via the node package manager (NPM). Grunt is compatible with Windows, macOS, and Linux distros.
Why Use Grunt
Grunt has a continuously-updated plugin library, allowing users to configure it according to their needs. This vast plugin selection makes Grunt more versatile than other task runners.
You can also create custom tasks and scripts for multiple jobs. Some popular Grunt tasks include prefixing CSS rules, compiling a SASS file, minifying JavaScript, and optimizing images.
Grunt Advantages and Disadvantages
In this section, we will explore Grunt’s benefits and drawbacks to help you determine if the tool suits you.
Advantages of Using Grunt
Fast Development Workflow
Grunt automatically executes different tasks in the background with a simple command. You don’t have to manually prepare the required files and tools every time.
It also lets you create scripts for simultaneous task execution. If your build process involves a lot of repetitive tasks, this tool will save you significant time.
Work Effectively With Codebases
As your project grows, it will have more codebases, making the development process more complicated. Grunt uses minimal infrastructure, allowing you to work with multiple codebases easily.
Unifies Workflow
There may be code and workflow inconsistencies if you work in a team environment with multiple web developers. To help solve this issue, Grunt provides a set of unified commands.
It enables the development team to write consistent code for different JavaScript tasks and share the same workflow. This helps minimize code discrepancies, resulting in fewer errors.
Disadvantages of Using Grunt
Plugin Updates Depend on the Author
When NPM packages are updated, your plugins may be incompatible with them, so you will have to wait until the developer releases patches. This is a drawback compared to NPM scripts, which automatically use the latest package version.
Tasks Are Hard to Customize
Grunt’s built-in tasks only let you perform particular actions. To add more tasks, you must write additional scripts to your configuration file, which can be difficult if there are plenty of them.
In addition, you must write longer scripts if there is no plugin for the tasks. This complicates the configuration file’s code and makes customization more difficult.
Grunt Use Cases With Examples
To help you get started with Grunt, we will explain some of its use cases using examples. Before proceeding, ensure your system has Node.js and NPM installed since Grunt requires them.
Suggested Reading
If you are unsure about how to Install Node.js and NPM on Ubuntu, make sure to check our tutorial.
Command Line Interface
The Grunt command-line interface (CLI) package is essential for the tool’s functionality. It enables you to run the grunt command during plugin installation, update, and task execution.
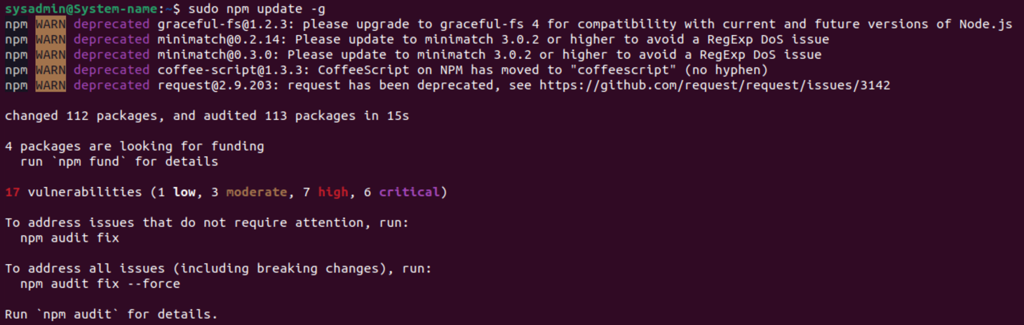
Before installing the package, make sure you are using NPM’s latest version. If you are not, download or update it via Terminal using this command:
sudo npm update -g
Then, run the following command in Terminal or Windows’ PowerShell to install the CLI globally:
npm install -g grunt-cli
You may need sudo or administrator permission to run it. In addition, you must connect via SSH and have root access to install it in a virtual private server (VPS).

The CLI will add the grunt command to your system path, allowing you to run it from any directory. To verify the installation and check the version, use this command:
npm grunt-cli -v

Version Control System
Grunt integrates with the Git version control system, enabling users to deploy changes automatically to their project repository. It is especially useful for a complex project with frequent updates.
To enable this integration, install the grunt-git plugin and add the scripts to your configuration file. This plugin lets you perform various Git tasks such as commit, clone, push, and pull.
package.json File
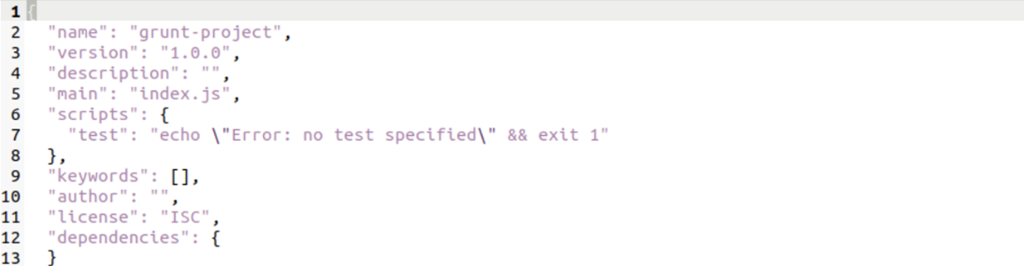
The package.json file is where NPM stores all your Grunt project’s metadata. It contains settings and information about your project, including its name, version, and author.
This JSON file will list dependencies, which are items required for your project. These items include the Grunt task runner and its plugins, which will be listed under the devDependencies property.
To create the file, execute the following command in your command-line tool:
npm init
Enter the required information, including the project name, author, and license. After confirming, the file will appear in your project’s root directory and contain data as follows:
Important! Package.json, Grunt, and its plugins are installed locally into the project folder. Thus, specify the directory when executing the command.
Installing Grunt
There are two ways to install Grunt – using its GitHub repository and your CLI application. You may also choose to install a specific Grunt version.
The easiest option is to install Grunt’s latest version using this command:
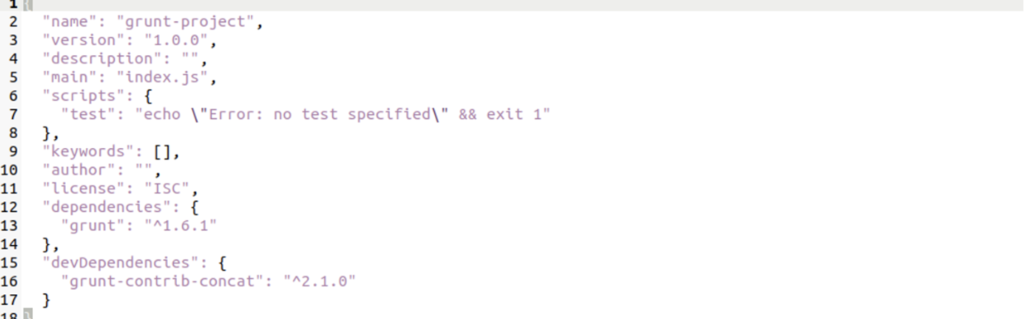
npm install grunt --save -dev
With a similar command, you can also install NPM modules and plugins. For instance, execute the following to install Concat:
npm install grunt-contrib-concat --save-dev
If successful, the commands will list Grunt and the plugin in the dependencies and devDependencies of your package.json file, respectively.
Gruntfile
A Gruntfile is your project’s configuration file, where you configure tasks to automate. It is located in the project’s root directory and can be a valid JavaScript or CoffeeScript file.
A Gruntfile consists of the following parts:
- Wrapper function – the code that calls the Grunt function specified in its brackets.
- Project and task configuration – the function containing the task configuration and target, options, and required files.
- Loading Grunt plugins and tasks – loads a Grunt plugin required for the specified task.
- Custom tasks – specify custom and default task scripts that are run with the Grunt command.
Here is an example of a Gruntfile’s source code to automate an uglify task:
// Wrapper function
module.exports = function(grunt) {
   // Project configuration
   grunt.initConfig({
      pkg: grunt.file.readJSON('package.json'),
      uglify: {
         options: {
            banner: '/*! <%= pkg.name %> <%= grunt.template.today("yyyy-mm-dd") %> */\n'
         },
         build: {
            src: 'src/<%= pkg.name %>.js',
            dest: 'build/<%= pkg.name %>.min.js'
         }
      }
   });

   // Load the plugin that provides the "uglify" task.
   grunt.loadNpmTasks('grunt-contrib-uglify');

   // Custom and default task(s).
   grunt.registerTask('default', ['uglify']);

};
Important! Users must manually create Gruntfiles in the project’s directory.
Using Grunt Plugins
Grunt plugins are NPM modules that let users automate tasks without custom scripts. There are plenty of options created by both users and the Grunt team installable via NPM.
To use Grunt plugins, simply run the installation command. Then, add the plugin to the loadNpmTasks and registerTask functions of your project’s Gruntfile.
Here is an example of the functions that load the JSHint plugin:
grunt.loadNpmTasks('grunt-contrib-jshint');

grunt.registerTask('default', ['jshint']);
Conclusion
Grunt is a command-line tool that automates tasks for JavaScript projects, such as minification, unit testing, and compilation. It helps speed up the development process, unify workflow, and simplify codebase utilization.
This tool lets you automate various tasks using plugins or your own custom script. However, the plugin updates are slow since they depend on the authors, and customizing tasks may be tricky for new users.
This JavaScript task runner requires the latest versions of Node.js and NPM to run. To install Grunt and its plugins, use Terminal or Windows’ Microsoft PowerShell.
If you have more questions about what is grunt and its use cases, leave a comment below.

Aris is a Content Writer specializing in Linux and WordPress development. He has a passion for networking, front-end web development, and server administration. By combining his IT and writing experience, Aris creates content that helps people easily understand complex technical topics to start their online journey. Follow him on LinkedIn.


Comments
April 09 2024
Very help fuel for thank you so much.